GE JGB281SERSS Use and Care Manual - Page 45
Operating, Instructions, Care and Cleaning, Installation, Safety Instructions, Consumer Support - review
 |
UPC - 084691224846
View all GE JGB281SERSS manuals
Add to My Manuals
Save this manual to your list of manuals |
Page 45 highlights
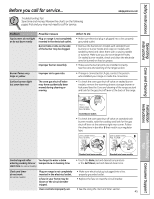
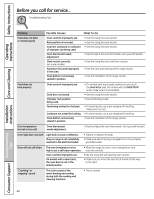
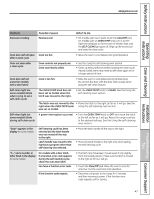
Safety Instructions Operating Instructions Care and Cleaning Before you call for service... Troubleshooting Tips Save time and money! Review the charts on the following pages first and you may not need to call for service. GEAppliances.com Problem Top burners do not light or do not burn evenly Burner flames very large or yellow Surface burners light but oven does not Possible Causes Plug on range is not completely inserted in the electrical outlet. Burner hole or slits on the side of the burner may be clogged. Improper burner assembly. Improper air to gas ratio. The oven gas shut-off valve may have accidentally been moved during cleaning or moving. What To Do • Make sure electrical plug is plugged into a live, properly grounded outlet. • Remove the burners (on models with standard twin burners) or burner heads and caps (on models with sealed burners) and clean them with a sewing needle or twist-tie. Make sure you do not enlarge the holes. On sealed burner models, check and clean the electrode area for burned-on food or grease. • Make sure the burner parts are installed correctly. See the Care and cleaning of the range section. • If range is connected to LP gas, contact the person who installed your range or made the conversion. • To check the oven gas shut-off valve on sealed burner models, remove the warming drawer, storage drawer or kick panel (see the Care and cleaning of the range section) and look for the gas shut-off lever at the back of the range. Lever is shown closed. PULL TO OPEN. Sealed burner models • To check the oven gas shut-off valve on standard twin burner models, raise the cooktop and look for the gas shut-off lever at the extreme right rear corner. Follow the directions in box A or B that match your regulator type. Lever is shown closed. PULL TO OPEN. A Lever is shown closed. PULL TO OPEN. B Installation Instructions Troubleshooting Tips Consumer Support Standard twin burner models Standard twin burner models Control signals after you forgot to enter a bake entering cooking time or temperature or cleaning time. start time (on some models) • Touch the Bake pad and desired temperature or the Self Clean pad and desired clean time. Clock and timer do not work (on some models) Plug on range is not completely • Make sure electrical plug is plugged into a live, inserted in the electrical outlet. properly grounded outlet. A fuse in your home may be blown or the circuit breaker tripped. • Replace the fuse or reset the circuit breaker. oven controls improperly set. • See the Using the clock and timer section. 45
-
 1
1 -
2
-
3
-
4
-
5
-
6
-
7
-
8
-
9
-
10
-
11
-
12
-
13
-
14
-
15
-
16
-
17
-
18
-
19
-
20
-
21
-
22
-
23
-
24
-
25
-
26
-
27
-
28
-
29
-
30
-
31
-
32
-
33
-
34
-
35
-
36
-
37
-
38
-
39
-
 40
40 -
 41
41 -
 42
42 -
 43
43 -
 44
44 -
 45
45 -
 46
46 -
 47
47 -
 48
48 -
 49
49 -
 50
50 -
51
-
52
 |
 |
