GE JGB400DEPWW Use and Care Manual - Page 43
Check Operation Of Oven Burners, Cont., Leveling The Range, Adjust The Bake And Broil, Burner Air
 |
UPC - 084691207924
View all GE JGB400DEPWW manuals
Add to My Manuals
Save this manual to your list of manuals |
Page 43 highlights
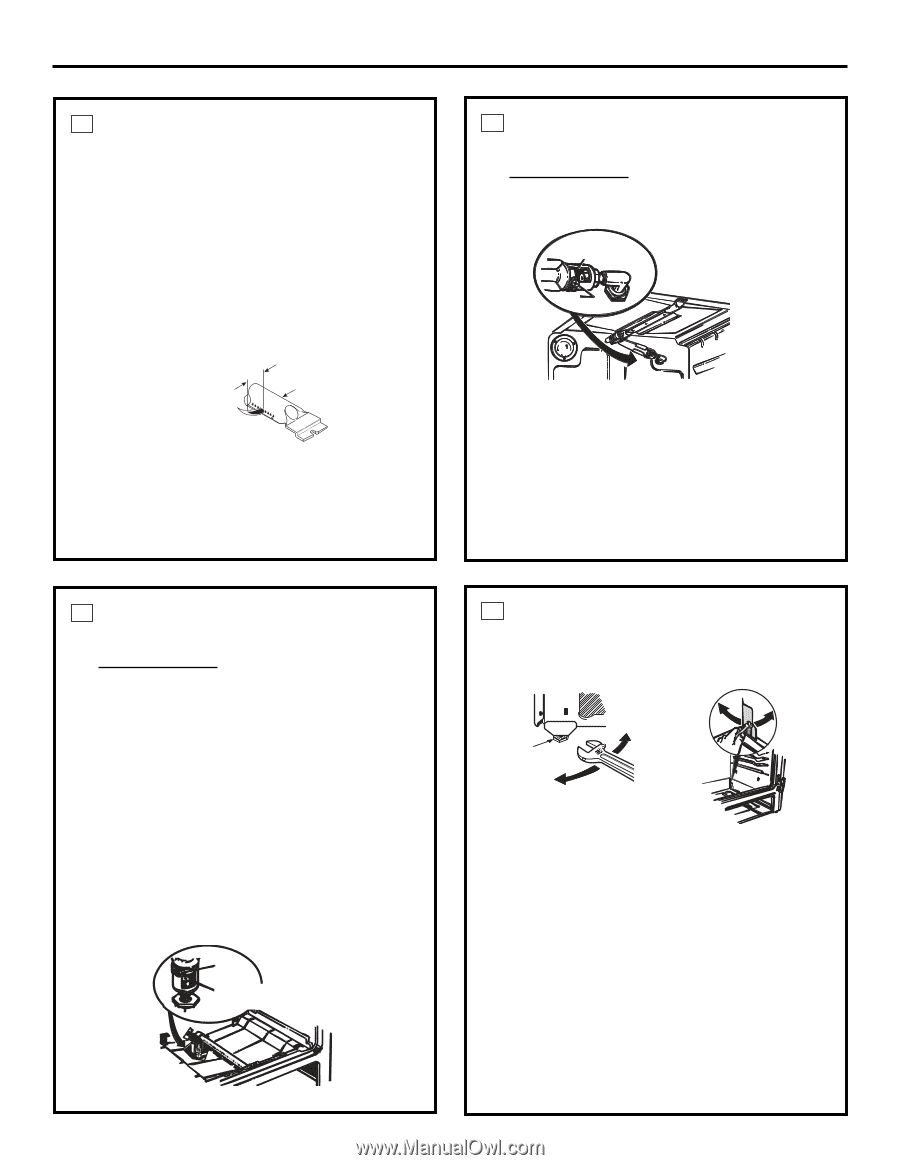
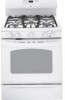
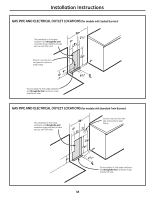
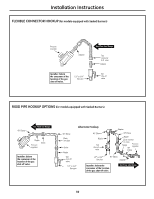
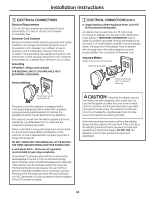
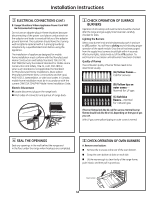
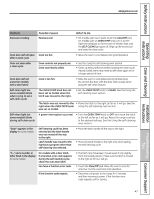
Installation Instructions 6 CHECK oPERATIoN oF oVEN BURNERS (CoNT.) B. To operate the Bake burner, press the Bake pad and then press the number pads until 350 appears in the display. Press the Start/on pad. After 30 to 90 seconds, the burner will ignite. Flames should be steady, approximately 1" blue cones and, if range is supplied with natural gas, should burn with no yellow tips. With most LP gas, small yellow tips at the end of outer gas cones are normal. The inner cone of the flame should be ½" to ¾" long for either gas. Inner cone oCfONflOaImNTeERIOR DE LLAMA 1/2" to 3/4" (12.7 mm to 19.11/2m" TmO 3)/4" oQHOUvEReMNnEAADbROr/RAoSPilAAeRRrAburner C. Perform the same check on the broil burner by touching the Broil Hi/Lo pad and then the Start/on pad. 7 ADJUST THE BAKE AND BRoIL BURNER AIR SHUTTERS IF NECESSARy (CoNT.) The air shutter for the broil burner is accessible in the top rear of the oven. Air adjustment shutter Loosen B. Using a screwdriver, loosen the air shutter adjustment screw. C. Make the air shutter adjustment. D. Retighten the air shutter screw. E. Check that the inner cone of the flame is between ½" and ¾" (12.7 mm and 19.1 mm) long. After confirming correct burner operation, replace all parts 7 ADJUST THE BAKE AND BRoIL BURNER AIR SHUTTERS IF NECESSARy what adjustment to make: A. If the flames are yellow, open the air shutter more than the original setting. B. If the flames blow away or flutter from the burner, close the air shutter more than the original setting. Making the adjustment A. Locate the Air Shutter The air shutter for the bake burner is near the back wall behind the storage drawer, warming drawer or kick panel. Remove the drawer or panel. See the Care and cleaning of the range section. Loosen Air adjustment shutter 8 LEVELING THE RANGE A. Install the oven racks in the oven and position the range where it will be installed. Leg leveler Lower range Raise range Lower range Raise range (on some models) (on some models) B. Check for levelness by placing a spirit level or a cup, partially filled with water, on one of the oven racks. If using a spirit level, take two readings-with the level placed diagonally first in one direction and then the other. C. Remove the storage drawer or kick panel. See the Care and cleaning of the range section. The front leveling legs can be adjusted from the bottom and the rear legs can be adjusted from the top or the bottom. D. Use an open-end or adjustable wrench to adjust the leveling legs until the range is level. E. After the range is level, slide the range away from the wall so that the Anti-Tip device can be installed. 43
-
 1
1 -
2
-
3
-
4
-
5
-
6
-
7
-
8
-
9
-
10
-
11
-
12
-
13
-
14
-
15
-
16
-
17
-
18
-
19
-
20
-
21
-
22
-
23
-
24
-
25
-
26
-
27
-
28
-
29
-
30
-
31
-
32
-
33
-
34
-
35
-
36
-
37
-
 38
38 -
 39
39 -
 40
40 -
 41
41 -
 42
42 -
 43
43 -
 44
44 -
 45
45 -
 46
46 -
 47
47 -
 48
48 -
49
-
50
-
51
-
52
 |
 |