GE JVM2070SK Owners Manual - Page 39
Reusable, Grease, Filters, Removing, and Cleaning, the Filter, Charcoal, Filter on, some models,
 |
View all GE JVM2070SK manuals
Add to My Manuals
Save this manual to your list of manuals |
Page 39 highlights
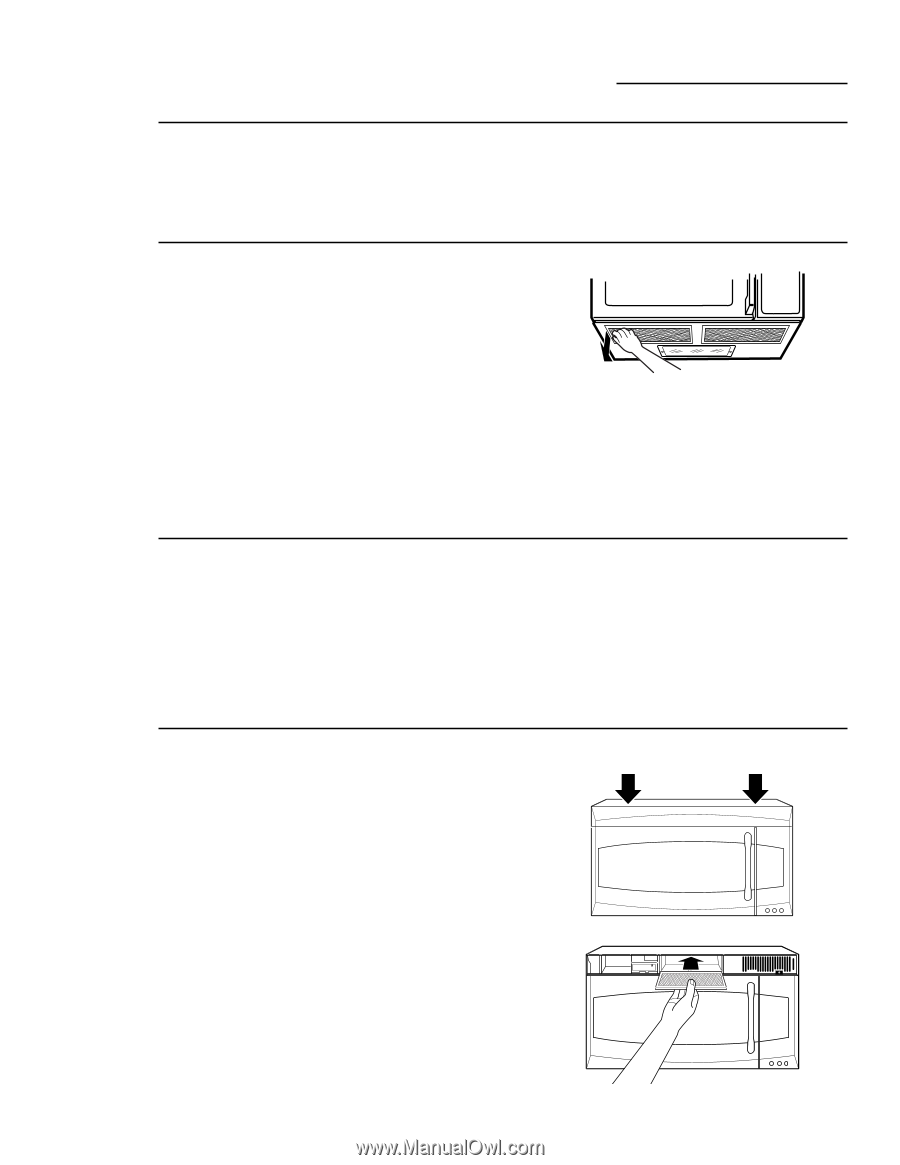
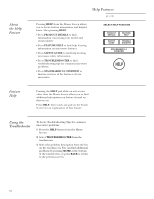
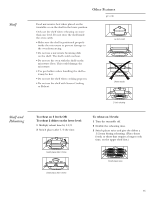
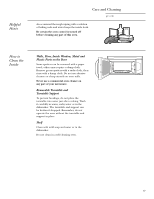
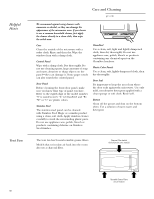
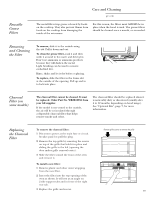
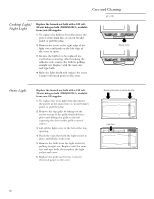
Reusable Grease Filters Care and Cleaning ge.com The metal filters trap grease released by foods on the cooktop. They also prevent flames from foods on the cooktop from damaging the inside of the microwave. For this reason, the filters must ALWAYS be in place when the hood is used. The grease filters should be cleaned once a month, or as needed. Removing and Cleaning the Filter To remove, slide it to the outside using the tab. Pull it down and out. To clean the grease filter, soak it and then swish it around in hot water and detergent. Don't use ammonia or ammonia products because they will darken the metal. Light brushing can be used to remove embedded dirt. Rinse, shake and let it dry before replacing. To replace, slide the filter in the frame slot at the outside of the opening. Pull up and in to lock into place. Charcoal Filter (on some models) The charcoal filter cannot be cleaned. It must be replaced. Order Part No. WB2X10956 from your GE supplier. If the model is not vented to the outside, the air will be recirculated through a disposable charcoal filter that helps remove smoke and odors. The charcoal filter should be replaced when it is noticeably dirty or discolored (usually after 6 to 12 months, depending on hood usage). See "Optional Kits", page 7, for more information. Replacing the Charcoal Filter To remove the charcoal filter: 1 Disconnect power at the main fuse or circuit breaker panel or pull the plug. 2 Remove the top grille by removing the screws on top of the grille that hold it in place and sliding the grille to the left (opening the door makes grille removal easier). 3 Slide the filter toward the front of the oven and remove it. To install a new filter: 1 Remove plastic and other outer wrapping from the new filter. 2 Insert the filter into the top opening of the oven as shown. It will rest at an angle on 2 side support tabs and in front of the right rear tab. 3 Replace the grille and screws. Remove grille screws to remove the grille 39
-
 1
1 -
2
-
3
-
4
-
5
-
6
-
7
-
8
-
9
-
10
-
11
-
12
-
13
-
14
-
15
-
16
-
17
-
18
-
19
-
20
-
21
-
22
-
23
-
24
-
25
-
26
-
27
-
28
-
29
-
30
-
31
-
32
-
33
-
 34
34 -
 35
35 -
 36
36 -
 37
37 -
 38
38 -
 39
39 -
 40
40 -
 41
41 -
 42
42 -
 43
43 -
 44
44
 |
 |