GE PFCS1NFZSS Use and Care Manual - Page 9
About the crispers and pans.
 |
UPC - 084691085362
View all GE PFCS1NFZSS manuals
Add to My Manuals
Save this manual to your list of manuals |
Page 9 highlights
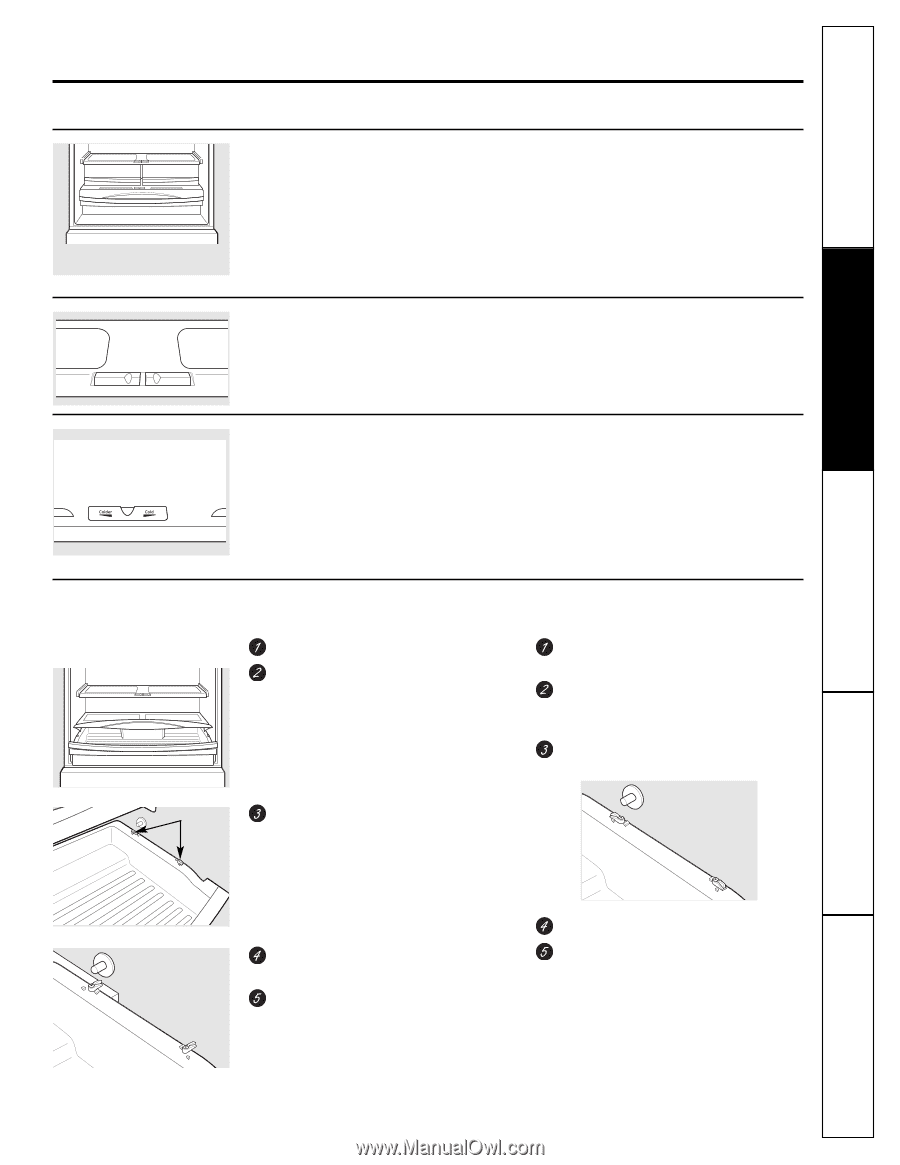
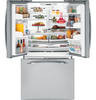
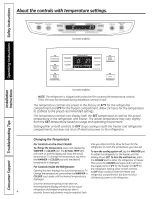
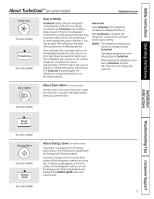
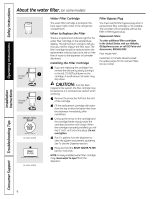
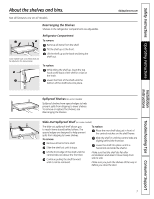
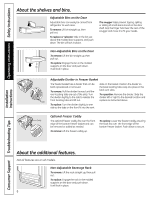
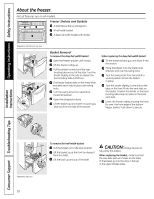
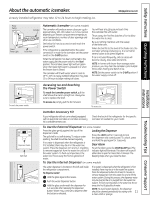
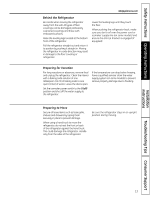
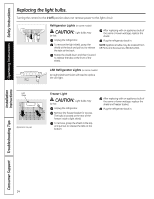
Safety Instructions Operating Instructions Installation Instructions About the crispers and pans. Not all features are on all models. Fruit and Vegetable Crisper Excess water that may accumulate in the bottom of the drawers or under the drawers should be wiped dry. GEAppliances.com Adjustable Humidity Crisper (on some models) Slide the control all the way to the HIGH setting to provide high humidity recommended for most vegetables. Slide the control all the way to the LOW setting to provide lower humidity levels recommended for most fruits. Adjustable Temperature Deli Pan (on some models) Slide the control all the way to the left for the coldest temperature. How to Remove and Replace the Deli Pan To remove: Remove the fruit and vegetable drawers. Pull the drawer out to the stop position. To replace: Make sure all four swing locks are in the unlock position. Place the sides of the drawer into the drawer supports, making sure the swing locks fit on the drawer slots. Lock all four swing locks by rotating them to the lock position. Swing Locks Lift the lid to access the 4 swing locks. Rotate all four swing locks to the unlock position. Lift the front of the drawer up and out. Lower the lid and slide in the drawer. Replace the fruit and vegetable drawers. Troubleshooting Tips Consumer Support 9
-
 1
1 -
2
-
3
-
 4
4 -
 5
5 -
 6
6 -
 7
7 -
 8
8 -
 9
9 -
 10
10 -
 11
11 -
 12
12 -
 13
13 -
 14
14 -
15
-
16
-
17
-
18
-
19
-
20
-
21
-
22
-
23
-
24
-
25
-
26
-
27
-
28
-
29
-
30
-
31
-
32
-
33
-
34
-
35
-
36
-
37
-
38
-
39
-
40
-
41
-
42
-
43
-
44
-
45
-
46
-
47
-
48
-
49
-
50
-
51
-
52
-
53
-
54
-
55
-
56
-
57
-
58
-
59
-
60
-
61
-
62
-
63
-
64
-
65
-
66
-
67
-
68
-
69
-
70
-
71
-
72
-
73
-
74
-
75
-
76
-
77
-
78
-
79
-
80
-
81
-
82
-
83
-
84
-
85
-
86
-
87
-
88
-
89
-
90
-
91
-
92
-
93
-
94
-
95
-
96
-
97
-
98
-
99
-
100
-
101
-
102
-
103
-
104
-
105
-
106
-
107
-
108
-
109
-
110
-
111
-
112
-
113
-
114
-
115
-
116
-
117
-
118
-
119
-
120
-
121
-
122
-
123
-
124
-
125
-
126
-
127
-
128
-
129
-
130
-
131
-
132
-
133
-
134
-
135
-
136
 |
 |