GE PGCS1PJZSS Use and Care Manual - Page 11
About the automatic icemaker.
 |
UPC - 084691211983
View all GE PGCS1PJZSS manuals
Add to My Manuals
Save this manual to your list of manuals |
Page 11 highlights
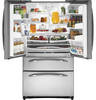
Safety Instructions Operating Instructions About the automatic icemaker. A newly installed refrigerator may take 12 to 24 hours to begin making ice. GEAppliances.com Power Switch Green Power Light Icemaker Feeler Arm Automatic Icemaker (on some models) The icemaker will produce seven cubes per cycle-approximately 100-130 cubes in a 24-hour period, depending on freezer compartment temperature, room temperature, number of door openings and other use conditions. See below for how to access ice and reach the power switch. If the refrigerator is operated before the water connection is made to the icemaker, set the power switch in the O (off) position. When the refrigerator has been connected to the water supply, set the power switch to the l (on) position. The icemaker power light will turn green when the freezer light switch is pressed in or when the freezer door is closed. The icemaker will fill with water when it cools to 15°F (-10°C). A newly installed refrigerator may take 12 to 24 hours to begin making ice cubes. You will hear a buzzing sound each time the icemaker fills with water. Throw away the first few batches of ice to allow the water line to clear. Be sure nothing interferes with the sweep of the feeler arm. When the bin fills to the level of the feeler arm, the icemaker will stop producing ice. It is normal for several cubes to be joined together. If ice is not used frequently, old ice cubes will become cloudy, taste stale and shrink. NOTE: In homes with lower-than-average water pressure, you may hear the icemaker cycle multiple times when making one batch of ice. NOTE: Set the power switch to the O (off) position if the water supply is shut off. Installation Instructions Troubleshooting Tips Consumer Support To reach the power switch. HOME HELP LOCK Hold for 3 Seconds to activate Lock ENERGY SAVER ON FREEZER -3 F REFRIGERATOR 34 F PRECISE FILL OPTIONS TURBO COOL ENERGY SAVER DOOR ALARM Dispenser Cradle Spill Shelf Accessing Ice and Reaching the Power Switch To reach the icemaker power switch, open the top freezer drawer and remove the full-width basket. Always be sure to replace the basket. To access ice, open the bottom freezer drawer. The ice bucket is located below the mullion. Pull it forward to access ice. Ice Bucket To access ice. Mullion Icemaker Accessory Kit If your refrigerator did not come already equipped with an automatic icemaker, an icemaker accessory kit is available at extra cost. Check the back of the refrigerator for the specific icemaker kit needed for your model. To Use the Dispenser (on some models) Press the glass gently against the top of the dispenser cradle. The spill shelf is not self-draining. To reduce water spotting, the shelf should be cleaned regularly. If no water is dispensed when the refrigerator is first installed, there may be air in the water line system. Press the dispenser arm and run 11⁄2 gallons to remove trapped air from the water line and to fill the water system. To flush out impurities in the water line, throw away the first six glassfuls of water. Locking the Dispenser Press the LOCK pad for 3 seconds to lock the dispenser and control panel. To unlock, press and hold the pad again for 3 seconds. 11
-
 1
1 -
2
-
3
-
4
-
5
-
 6
6 -
 7
7 -
 8
8 -
 9
9 -
 10
10 -
 11
11 -
 12
12 -
 13
13 -
 14
14 -
 15
15 -
 16
16 -
17
-
18
-
19
-
20
-
21
-
22
-
23
-
24
-
25
-
26
-
27
-
28
-
29
-
30
-
31
-
32
-
33
-
34
-
35
-
36
-
37
-
38
-
39
-
40
-
41
-
42
-
43
-
44
-
45
-
46
-
47
-
48
-
49
-
50
-
51
-
52
-
53
-
54
-
55
-
56
-
57
-
58
-
59
-
60
-
61
-
62
-
63
-
64
-
65
-
66
-
67
-
68
-
69
-
70
-
71
-
72
-
73
-
74
-
75
-
76
-
77
-
78
-
79
-
80
-
81
-
82
-
83
-
84
-
85
-
86
-
87
-
88
-
89
-
90
-
91
-
92
-
93
-
94
-
95
-
96
-
97
-
98
-
99
-
100
-
101
-
102
-
103
-
104
-
105
-
106
-
107
-
108
-
109
-
110
-
111
-
112
-
113
-
114
-
115
-
116
-
117
-
118
-
119
-
120
-
121
-
122
-
123
-
124
-
125
-
126
-
127
-
128
 |
 |
