GE PGP989TNWW Use and Care Manual
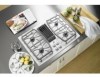
GE PGP989TNWW - True 30" Gas Downdraft Cooktop Manual
 |
UPC - 084691172543
View all GE PGP989TNWW manuals
Add to My Manuals
Save this manual to your list of manuals |
GE PGP989TNWW manual content summary:
- GE PGP989TNWW | Use and Care Manual - Page 1
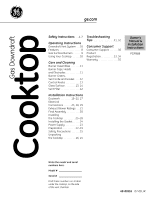
Filter 12 Troubleshooting Tips 31, 32 Consumer Support Consumer Support 36 Product Registration 33, 34 Warranty 35 Installation Instructions Ductwork 19-22, 27 Electrical Connections 23, 28, 29 Exhaust Blower Ratings . . .21 Final Assembly 30 Installing the Cooktop 25-28 Installing the - GE PGP989TNWW | Use and Care Manual - Page 2
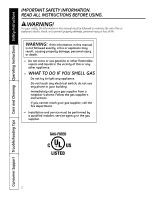
Consumer Support Troubleshooting Tips Care and Cleaning Operating Instructions Safety Instructions IMPORTANT SAFETY INFORMATION. READ ALL INSTRUCTIONS BEFORE USING. WARNING! For your safety, the information in this manual must be followed to minimize the risk of fire or explosion, electric shock, - GE PGP989TNWW | Use and Care Manual - Page 3
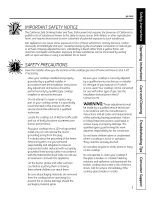
with the Installation Instructions. Any adjustment and service should be performed only by qualified gas cooktop installers or service technicians. s Do not attempt to repair or replace any part of your cooktop unless it is specifically recommended in this manual. All other service should be - GE PGP989TNWW | Use and Care Manual - Page 4
Support Troubleshooting Tips Care and Cleaning Operating Instructions Safety Instructions IMPORTANT SAFETY INFORMATION. READ ALL INSTRUCTIONS BEFORE USING. SAFETY PRECAUTIONS s CAUTION: Items of interest to children should not be stored in cabinets above a cooktop-children climbing on the cooktop - GE PGP989TNWW | Use and Care Manual - Page 5
Safety Instructions Operating Instructions Care and Cleaning Troubleshooting Tips Consumer Support ge.com GLASS COOKTOP SURFACE (on some models) Use care when touching the glass cooktop surface. The glass surface of the cooktop will retain heat after the controls have been turned off. s Avoid - GE PGP989TNWW | Use and Care Manual - Page 6
Support Troubleshooting Tips Care and Cleaning Operating Instructions Safety Instructions IMPORTANT SAFETY INFORMATION. READ ALL INSTRUCTIONS fat slowly and watch as it heats. s Do not leave any items on the cooktop. The hot air from the vent may ignite flammable items and will increase pressure in - GE PGP989TNWW | Use and Care Manual - Page 7
Safety Instructions Operating Instructions Care and Cleaning Troubleshooting Tips Consumer Support ge.com SURFACE BURNERS Adjust the burner flame size so it does not extend beyond the edge of the cookware. Excessive flame is hazardous. s Do not leave plastic items on the cooktop- they may melt - GE PGP989TNWW | Use and Care Manual - Page 8
Consumer Support Troubleshooting Tips Care and Cleaning Operating Instructions Safety Instructions Features of your cooktop. Throughout this manual, features and appearance may vary from your model. 10 1 2 4 3 4 5 8 7 6 8 9 Feature Index 1 Vent Grille 2 Vent Filter (located under the - GE PGP989TNWW | Use and Care Manual - Page 9
Safety Instructions Operating Instructions Care and Cleaning Troubleshooting Tips Consumer Support Using the gas surface burners. ge.com Throughout this manual, features and appearance may vary from your model. Push the control knob down and turn it to the LITE position. How to Light a Gas - GE PGP989TNWW | Use and Care Manual - Page 10
Consumer Support Troubleshooting Tips Care and Cleaning Operating Instructions Safety Instructions Using your cooktop. Use a flat-bottomed wok. Wok This Way We recommend that you use a flatbottomed wok, available at your local retail store. Only a flat-bottomed wok should - GE PGP989TNWW | Use and Care Manual - Page 11
Instructions Operating Instructions Care and Cleaning Troubleshooting Tips Consumer Support Care and cleaning of the cooktop. ge.com Be sure electrical power is off and all surfaces are cool before cleaning any part of the cooktop detergent and hot water for 20-30 minutes. For more stubborn stains - GE PGP989TNWW | Use and Care Manual - Page 12
Consumer Support Troubleshooting Tips Care and Cleaning Operating Instructions Safety Instructions Care and cleaning of the cooktop. Appearance may vary. The grate legs have four rubber feet. To order replacement rubber grate feet, please call our toll-free number: National Parts Center 800.626. - GE PGP989TNWW | Use and Care Manual - Page 13
Instructions Operating Instructions Care and Cleaning Troubleshooting Tips Consumer Support ge . Stainless Steel Surfaces (on some models) Do not use a steel wool Parts Center 1.800.626.2002 ge.com Cleaning the glass cooktop. Clean your cooktop after each spill. Use CERAMA BRYTE® Ceramic Cooktop - GE PGP989TNWW | Use and Care Manual - Page 14
Consumer Support Troubleshooting Tips Care and Cleaning Operating Instructions Safety Instructions Cleaning the glass cooktop. The CERAMA BRYTE® Ceramic Cooktop Scraper and all recommended supplies are available through our Parts Center. See instructions under "To Order Parts" section below. NOTE: - GE PGP989TNWW | Use and Care Manual - Page 15
Installation Instructions Gas Downdraft Cooktop If you have questions, call 800.GE.CARES (800.432.2737) or visit our Website at: ge.com IN THE COMMONWEALTH OF MASSACHUSETTS: • This product must be installed by a licensed plumber or gas fitter. • When using ball-type gas shut-off valves, they - GE PGP989TNWW | Use and Care Manual - Page 16
Installation Instructions UNPACKING YOUR COOKTOP PARTS INCLUDED (PACKED BELOW THE COOKTOP) • Blower assembly • Blower models) • Burner grates • Burner heads (1 small (A), 2 medium (B), 1 large (C)) • Burner caps (1 small, 2 medium, 1 large) • Gas pressure regulator & LP Conversion Instructions - GE PGP989TNWW | Use and Care Manual - Page 17
Installation Instructions PREPARATION TOOLS AND MATERIALS YOU WILL NEED • Saw • Duct tape • Measuring tape or scale • Carpenter's square • Adjustable wrench or socket set (7/16″ socket and ratchet) • Drill and drill bit • 1/4″ nut driver • Sheet metal screws • Pipe wrench • Manual gas line shut- - GE PGP989TNWW | Use and Care Manual - Page 18
Installation Instructions CABINET PREPARATION 1 PREPARING FOR INSTALLATION Positioning the cooktop The cooktop is designed to look best when centered in a cabinet at least 30″ wide. The exhaust vent beneath the cooktop must be located between wall studs or floor joists so that the ductwork may be - GE PGP989TNWW | Use and Care Manual - Page 19
Installation Instructions CABINET PREPARATION CUTOUTS 3 PREPARING THE COUNTERTOP The countertop must have a deep flat surface to accommodate the cooktop and the vent. Countertops with a rolled front edge and backsplash may not provide the flat surface area required. 25" min. flat surface area - GE PGP989TNWW | Use and Care Manual - Page 20
Installation Instructions DUCTWORK CALCULATIONS Calculate Total Equivalent Ductwork Length installation should not exceed 100 feet ft . equivalent length. *Equivalent lengths of duct pieces are based on actual tests and reflect requirements for good venting performance with any downdraft cooktop - GE PGP989TNWW | Use and Care Manual - Page 21
" using the "DUCTWORK CALCULATIONS" table in these instructions for your installation. Step 2: Find the approximate intersection point of installation. Examples: 50 equivalent feet of ductwork has approximately 320 CFM. 100 equivalent feet of ductwork has approximately 265 CFM. Downdraft Cooktop - GE PGP989TNWW | Use and Care Manual - Page 22
Installation Instructions DUCTWORK INSTALLATION (Note: For planning purposes only.) 6 INSTALLING THE DUCTWORK Use galvanized or aluminum duct in 6″ round or 31⁄4″ x 10″ size, or a combination of both. PVC duct should be used if installing under a poured concrete slab. NOTE: Local building code must - GE PGP989TNWW | Use and Care Manual - Page 23
cabinet floor (mount on side or back cabinet wall 2″ min. from centerline) 4″ (to clear toe kick area) The built-in gas downdraft cooktop features pilotless electric ignition for energy savings and reliability. It operates on a 120-volt, 60-Hz power supply. A separate circuit, protected by a 15 - GE PGP989TNWW | Use and Care Manual - Page 24
Installation Instructions UNPACKING THE COOKTOP/INSTALLING THE GASKET 7 INSTALLING THE FOAM GASKET AND REFLECTIVE TAPE CAUTION: Potential risk of fire - reflective tape must be secured around countertop opening as shown. Do not install the cooktop into the countertop without installing the foam - GE PGP989TNWW | Use and Care Manual - Page 25
Center at 800.626.2002. Order two of each part: WB02X11331 Bracket WB01X10353 Screw To install optional installation brackets: Remove 2 screws on both sides under cooktop. Align optional installation bracket under cooktop and reinstall screws through the slot in the bracket. Do this on both sides - GE PGP989TNWW | Use and Care Manual - Page 26
Installation Instructions INSTALLING THE COOKTOP 11 INSTALLING THE BLOWER PLENUM TO THE COOKTOP Slide the plenum, with the blower opening on the left, into the opening in the bottom of the cooktop. Push up on the plenum until the stops on the plenum contact the bottom of the cooktop, and snap the - GE PGP989TNWW | Use and Care Manual - Page 27
ducting. • Make sure the arrow on the body of the regulator is pointing straight up and toward the cooktop. Any other position will affect the output pressure of the regulator. This arrow indicates correct flow of gas. • Install a manual gas line shut-off valve in an easily accessible location. 15 - GE PGP989TNWW | Use and Care Manual - Page 28
Installation Instructions INSTALLING THE COOKTOP 16 BLOWER ELECTRICAL CONNECTIONS • Loosen the two screws and remove and discard the sheet metal strap covering the 5-pin connector on the cooktop bottom. Save the screws for reinstallation later. 16 BLOWER ELECTRICAL CONNECTIONS (cont.) • Fold all - GE PGP989TNWW | Use and Care Manual - Page 29
Installation Instructions ELECTRICAL CONNECTIONS 17 ELECTRICAL REQUIREMENTS 120-volt, 60-Hertz, properly grounded mates with a standard three-prong grounding wall receptacle to minimize the possibility of electric shock hazard from this appliance. The customer should have the wall receptacle and - GE PGP989TNWW | Use and Care Manual - Page 30
gas line. • Turn knob to OFF. • Repeat the procedure for each burner. • Make sure it rests, at an angle, on the supports in the vent opening. • Fit the vent grille gasket around the edge of the downdraft vent opening. Make sure the front of the gasket is installed toward the front of the cooktop - GE PGP989TNWW | Use and Care Manual - Page 31
Safety Instructions Operating Instructions Care and Cleaning Troubleshooting Tips Consumer Support Before you call for service... Troubleshooting Tips Save time and money! Review the chart on this page first and you may not need to call for service. ge.com Problem Water won't boil Possible - GE PGP989TNWW | Use and Care Manual - Page 32
Consumer Support Troubleshooting Tips Care and Cleaning Operating Instructions Safety Instructions Before you call for service... Troubleshooting Tips Problem Possible Causes What To Do Control knobs will not turn Controls improperly set. • To turn from the OFF position, push the knob in and - GE PGP989TNWW | Use and Care Manual - Page 33
to provide you with excellent service in a professional and timely manner. Place your confidence in GE and call us in the U.S. toll-free at 1.800.626.2224 for more information. *Most brands covered up to 15 years old in the continental U.S. SPP is a trademark of General Electric Company. ✁ Cut here - GE PGP989TNWW | Use and Care Manual - Page 34
yt ! Model Number Serial Number First Name Mr. s Ms. s Mrs. s Miss s Last Name Street Address Apt. # E-mail Address* Zip City State Code Date Placed In Use Month Day Year Phone _ _ Number GE Consumer & Industrial Appliances General Electric Company Louisville, KY 40225 ge.com - GE PGP989TNWW | Use and Care Manual - Page 35
Safety Instructions Operating Instructions Care and Cleaning Troubleshooting Tips Consumer Support GE Gas Cooktop Warranty. All warranty service provided by our Factory Service Centers, or an authorized Customer Care® technician. To schedule service, on-line, visit us at ge.com, or call 800.GE. - GE PGP989TNWW | Use and Care Manual - Page 36
Website 24 hours a day, any day of the year! For greater convenience and faster service, you can now download Owner's Manuals, order parts or even schedule service on-line. Schedule Service ge.com Expert GE repair service is only one step away from your door. Get on-line and schedule your - GE PGP989TNWW | Use and Care Manual - Page 37
gas de ventilación descendente (downdraft) ge.com Instrucciones de seguridad 2-7 Instrucciones de operación Características de su estufa 8 Cómo usar la estufa 10 Quemadors à gas 23, 28, 29 Ensambladura final 30 Índices de soplado de escape 36 Garantía 35 Manual del propietario e Instrucciones - GE PGP989TNWW | Use and Care Manual - Page 38
. ADVERTENCIA: Si no se sigue con precisión la información en este manual, un incendio o explosión puede resultar causando daños a la propiedad o líquidos inflamables cerca de este o cualquier otro aparato. - SI HUELE A GAS ■ No trate de encender ningún aparato. ■ No toque ningún interruptor elé - GE PGP989TNWW | Use and Care Manual - Page 39
de seguridad Instrucciones de operación Cuidado y limpieza ge.com AVISO IMPORTANTE DE SEGURIDAD La Ley sobre los de gas o técnicos calificados en servicio. ■ No trate de reparar o reemplazar cualquier parte de su estufa a menos que se recomiende en forma específica en este manual. Cualquier - GE PGP989TNWW | Use and Care Manual - Page 40
se acumulen sobre la estufa. ■ No opere el quemador sin todas las partes del quemador colocadas en su lugar. ■ No coloque sartenes calientes en el vidrio de alimento que se encuentra preparando. PRECAUCION: Para ventilación general rasguñarse con objetos como instrumentos solamente. No use para - GE PGP989TNWW | Use and Care Manual - Page 41
Instrucciones de seguridad Instrucciones de operación ge.com UNIDADES DE SUPERFICIE RADIANTE (en algunos modelos) Sea cuidadoso cuando toque la estufa. La superficie de vidrio de la estufa se mantendrá caliente después - GE PGP989TNWW | Use and Care Manual - Page 42
INSTRUCCIONES DE SEGURIDAD IMPORTANTES. LEA TODAS LAS INSTRUCCIONES ANTES DE USAR. Instrucciones de seguridad Instrucciones de operación Cuidado y limpieza ¡ADVERTENCIA! QUEMADORES DE SUPERFICIE Use sartenes de tamaño apropiado-evite sartenes que no sean estables o que se volteen fácilmente. - GE PGP989TNWW | Use and Care Manual - Page 43
ge.com plástico alejados de los quemadores de superficie. ■ Si huele gas, suspenda el gas hacia la estufa y llame a un técnico de servicio calificado para el rendimiento del quemador. ■ Limpie solamente las partes indicadas en el Manual del propietario. Cuidado y limpieza Solución e identificación - GE PGP989TNWW | Use and Care Manual - Page 44
Instrucciones de seguridad Características de su estufa. A través de este manual, las características y la apariencia podrían variar de acuerdo con su modelo. 10 1 2 4 3 4 5 Instrucciones de operación Cuidado y limpieza Solución e identificación de averías 9 6 7 8 9 Índice - GE PGP989TNWW | Use and Care Manual - Page 45
seguridad Instrucciones de operación Cómo usar los quemadores de superficie de gas. ge.com A través de este manual, las características y la apariencia podría variar de acuerdo al modelo. Cómo encender un quemador de superficie de gas Empuje el botón de control hacia abajo girándolo hasta la - GE PGP989TNWW | Use and Care Manual - Page 46
Parrillas para la superficie de la estufa No use parrillas para la superficie de la estufa en su quemador de gas sellado. Si usted usa estas parrillas en el quemador de gas sellado causará una combustión incompleta y podría resultar en la producción de monóxido de carbono en niveles mayores de los - GE PGP989TNWW | Use and Care Manual - Page 47
ge.com Cerciórese de que el suministro eléctrico está suspendido y que todas las superficies están frías antes de limpiar cualquiera de las partes agua caliente de 20 a 30 minutos. Para manchas más seca para encender el gas de forma adecuada Para limpiar Cooktop C Tapa y cabeza medias - GE PGP989TNWW | Use and Care Manual - Page 48
pie de latón y tres pies de goma. Para ordenar reemplazos de las patas de parrillas de goma, por favor llámenos gratuitamente: Centro de partes nacional 800.626.2002 Patas de parrilla de goma WB02T10101 Las rejillas del quemador, la parrilla de ventilación y la junta Levántelas cuando estén fr - GE PGP989TNWW | Use and Care Manual - Page 49
o lustradores de aparatos de acero inoxidable, o para encontrar la ubicación del distribuidor más cercano, llame a nuestro número gratuito: Centro de partes nacional 1.800.626.2002 ge.com Cómo limpiar la estufa de vidrio. Limpie su estufa después de cada derrame. Use el limpiador de estufas de cer - GE PGP989TNWW | Use and Care Manual - Page 50
la superficie de vidrio, el vidrio de la estufa tendrá que ser reemplazado. En este caso, será necesario darle servicio a la estufa. Para ordenar partes Para ordenar el limpiador de estufas de Raspador de estufas cerámica CERAMA BRYTE® y el raspador de cerámica para estufas, por favor llámenos - GE PGP989TNWW | Use and Care Manual - Page 51
gas y genere calor, hay ciertas precauciones de seguridad que debe seguir. Encontrará estas precauciones en la sección Instrucciones importantes de seguridad en esta manual Si una tolerancia de 30″ entre la superficie de cocina superficie para cocinar hasta la parte inferior de los gabinetes adyacentes - GE PGP989TNWW | Use and Care Manual - Page 52
Instrucciones de instalación DESEMPACANDO SU ESTUFA PARTES INCLUIDAS (EMPACADAS DEBAJO DE LA ESTUFA) • Ensambladura del quemador (1 pequeña, 2 medias, 1 grande) • Regulador de presión de gas y Instrucciones de conversión a gas LP • Cable de enchufe con conexión a tierra de 120 voltios adjunto - GE PGP989TNWW | Use and Care Manual - Page 53
de tubos • Válvula de cierre de línea de gas manual • Sello de juntas de tubos que resista la acción de gas LP • Trabajo de conductos que es apropiado para la Elevada a gas LP WB28X10115 Para ordenar, llame a nuestro número gratuito: Centro partes de nacional 800.626.2002 ESTUFA DE 30″ ( - GE PGP989TNWW | Use and Care Manual - Page 54
ada para lucir mejor cuando está centrada en un gabinete de por lo menos 30″ de ancho. La ventanilla de escape debajo de la estufa debe estar localizada una profundidad mínima de 24″. El gabinete debe ser de por lo menos 30″ de ancho. Preparando un gabinete que ajuste contra la pared En algunos - GE PGP989TNWW | Use and Care Manual - Page 55
requerido de 25″ La tolerancia entre el frente interno del gabinete y la parte posterior del corte en la encimera debe ser de 205⁄8″ para poder posterior Ventilación vertical 5 ALINEACIÓN DE LOS CONDUCTOS DEL SOPLADOR En general, no instamos al uso de conductos flexibles porque éste puede causar - GE PGP989TNWW | Use and Care Manual - Page 56
Instrucciones de instalación CÁLCULOS DE LOS CONDUCTOS Calcule la longitud de conducto equivalente total Piezas de conducto Longitud Número equivalente* x usado = Longitud equivalente Redondos rectos de 6″ 1 Pie x ( )† = Pies Recto 31⁄ 4″ x 10″ 1 Pie x ( )† = Pies Codo de 6″, 90° - GE PGP989TNWW | Use and Care Manual - Page 57
320 CFM. 100 pies equivalentes de conducto tiene aproximadamente 265 CFM. CFM del soplador de escape de la estufa de ventilación de aire descendente (downdraft) 450 Flujo de aire (CFM) 400 350 300 250 200 150 100 50 00 25 50 75 100 125 150 Longitud de conducto equivalente - GE PGP989TNWW | Use and Care Manual - Page 58
CORTOS de 3 pies o menores, tales como para una salida de ventilación directa por la parte exterior. A través del espacio de la base del gabinete Entre las vigas del piso Ventilación descendente Instale el trabajo de conductos, haciendo que la dirección de las conexiones vaya de macho a hembra - GE PGP989TNWW | Use and Care Manual - Page 59
de longitud. NOTA: Compre una línea flexible nueva. NO USE UNA LÍNEA USADA ANTERIORMENTE. • Haga la conexión de gas a través de la pared posterior, o a través el piso del gabinete en la parte posterior, como se ilustra. SUMINISTRO ELÉCTRICO: 291⁄2″ 2″ Mín 3″ Mín CL Localización de la línea de - GE PGP989TNWW | Use and Care Manual - Page 60
en la encimera como se muestra. No instale la estufa en la encimera sin haber instalado de envío de la abertura de ventilación descendente (downdraft) y colóquela debajo de la almohadilla de env del vidrio en los lados y parte posterior de la unidad. Pele la parte posterior blanca para instalar la - GE PGP989TNWW | Use and Care Manual - Page 61
ón opcional y tornillo de apriete manual (no incluido) Estufa Mostrador de encimera Tornillos provistos con la estufa Tornillo de apriete manual Para solicitar soportes de instalación . IMPORTANTE: Gire el tornillo de apriete hasta que toque la parte inferior de la estufa. No ajuste de más. 25 - GE PGP989TNWW | Use and Care Manual - Page 62
cámara hacia adelante y hacia atrás para encontrar su lugar exacto.) Instale 2 tornillos 12 CÓMO INSTALAR LA CÁMARA DEL SOPLADOR Oriente la tornillos proporcionados. A partir de la abertura de ventilación en la parte superior de la estufa, apriete la ensambladura del soplador de manera firme - GE PGP989TNWW | Use and Care Manual - Page 63
la cocina. Cualquier otra posición afectará la presión de salida del regulador. Esta flecha indica que el flujo de gas es correcto. • Instale una válvula de cierre manual de la tubería de gas en una ubicación de fácil acceso. NOTA: En vez de usar tubería sólida para conectar el regulador de presi - GE PGP989TNWW | Use and Care Manual - Page 64
o prepare una solución de jabón y agua. Una parte de agua una parte detergente líquido. 2. Cuando todas las conexiones hayan sido hechas de gas cerrando la válvula de cierre de gas individual manual hacia la estufa durante cualquier prueba del sistema de presión de las tuberías de presión de gas - GE PGP989TNWW | Use and Care Manual - Page 65
Instrucciones de instalación CONEXIONES ELÉCTRICAS 17 REQUISITOS ELÉCTRICOS Un ramal de circuito de 120 voltios y 60 Hertz protegido por un interruptor de circuito de 15 ó 20 amperios o un fusible de dilatación de tiempo. PRECAUCIONES SOBRE EL USO DE CABLES DE EXTENSIÓN Debido a los riesgos de - GE PGP989TNWW | Use and Care Manual - Page 66
partes del quemador en su lugar. Tapa y cabeza medias Tapa y cabeza pequeñas Tapa y cabeza medias Frente de la estufa Tapa y cabeza grandes 19 INSTALE ún tiempo, mientras el aire circula a través de la línea de gas. • Gire el botón a OFF (APAGADO). • Repita el procedimiento correctamente. 30 - GE PGP989TNWW | Use and Care Manual - Page 67
esta tabla primero y es posible que no necesite llamarnos en busca de servicio. ge.com Problema El agua no hierve Causas posibles Qué hacer • Cubra la sart en busca conos exteriores - B. Normal para gas de servicio Normal para gas LP. natural. Las partes del quemador no han • Ver la sección - GE PGP989TNWW | Use and Care Manual - Page 68
del Proporción de aire a gas no quemador son grandes es apropiada. o amarillas • Si la estufa está conectada a gas LP, póngase en contacto partes • Asegúrese que las partes inferiores de los utensilios estén inferiores ásperas o partículas limpias antes de su uso. Use utensilios con partes - GE PGP989TNWW | Use and Care Manual - Page 69
Instrucciones de seguridad Instrucciones de operación Notas. Problema Causas posibles Qué hacer Áreas de decoloración Se usaron utensilios o rayas oscuras en inadecuados. la estufa • Las marcas de cacerolas de aluminio y cobre, como también depósitos de minerales de agua o comida se pueden - GE PGP989TNWW | Use and Care Manual - Page 70
Notas. 34 Apoyo al consumidor Solución e identificación de averías Cuidado y limpieza Instrucciones de operación Instrucciones de seguridad - GE PGP989TNWW | Use and Care Manual - Page 71
de GE para su estufa a gas. Todos a las direcciones en el Manual del propietario. ■ Reemplazo dispone de servicio por parte de un proveedor de servicio autorizado de GE, podría tener que General) en su localidad. Solución e identificación de averías Apoyo al consumidor Garante: General Electric - GE PGP989TNWW | Use and Care Manual - Page 72
durante horas normales de oficina. GE Consumer Home Services estará aún ahí cuando su garantía termine. Piezas y accesorios ge.com Aquellos individuos con la en este manual cubren los procedimientos a seguir por cualquier usuario. Cualquier otra reparación debería, por regla general, referirse a
-
 1
1 -
 2
2 -
 3
3 -
 4
4 -
 5
5 -
 6
6 -
 7
7 -
8
-
9
-
10
-
11
-
12
-
13
-
14
-
15
-
16
-
17
-
18
-
19
-
20
-
21
-
22
-
23
-
24
-
25
-
26
-
27
-
28
-
29
-
30
-
31
-
32
-
33
-
34
-
35
-
36
-
37
-
38
-
39
-
40
-
41
-
42
-
43
-
44
-
45
-
46
-
47
-
48
-
49
-
50
-
51
-
52
-
53
-
54
-
55
-
56
-
57
-
58
-
59
-
60
-
61
-
62
-
63
-
64
-
65
-
66
-
67
-
68
-
69
-
70
-
71
-
72
 |
 |

PGP989
ge.com
49-80516
07-08 JR
Owner’s
Manual &
Installation
Instructions
Safety Instructions
. . .2–7
Operating Instructions
Downdraft Vent System
. . .10
Features
. . . . . . . . . . . . . . . . . .8
Gas Surface Burners . . . . . . .9
Using Your Cooktop
. . . . . .10
Care and Cleaning
Burner Assemblies . . . . . . . .11
Burner Caps, Heads
and Electrodes . . . . . . . . . . . .11
Burner Grates,
Vent Grille and Gasket . . . .12
Control Knobs . . . . . . . . . . . .13
Glass Surface . . . . . . . . .13, 14
Vent Filter . . . . . . . . . . . . . . . .12
Installation Instructions
Ductwork . . . . . . . . .19–22, 27
Electrical
Connections . . . . . . .23, 28, 29
Exhaust Blower Ratings
. . .21
Final Assembly . . . . . . . . . . .30
Installing
the Cooktop . . . . . . . . . .25–28
Installing the Gasket . . . . . .24
Power Supply
. . . . . . . . . . . .23
Preparation . . . . . . . . . . .17–19
Safety Precautions
. . . . . . .15
Unpacking
the Cooktop
. . . . . . . . . .16, 24
Troubleshooting
Tips
. . . . . . . . . . . . . . . . .31, 32
Consumer Support
Consumer Support
. . . . . . .36
Product
Registration . . . . . . . . . . .33, 34
Warranty
. . . . . . . . . . . . . . . .35
Write the model and serial
numbers here:
Model #
__________________
Serial #
__________________
Find these numbers on a label
under the cooktop, on the side
of the vent chamber.
Cooktop
Gas Downdraft