GE WVSR1060GWW Owners Manual - Page 4
Quick Start Guide, About the control panel-for models with pull knob start. - top load washer
 |
UPC - 084691145967
View all GE WVSR1060GWW manuals
Add to My Manuals
Save this manual to your list of manuals |
Page 4 highlights
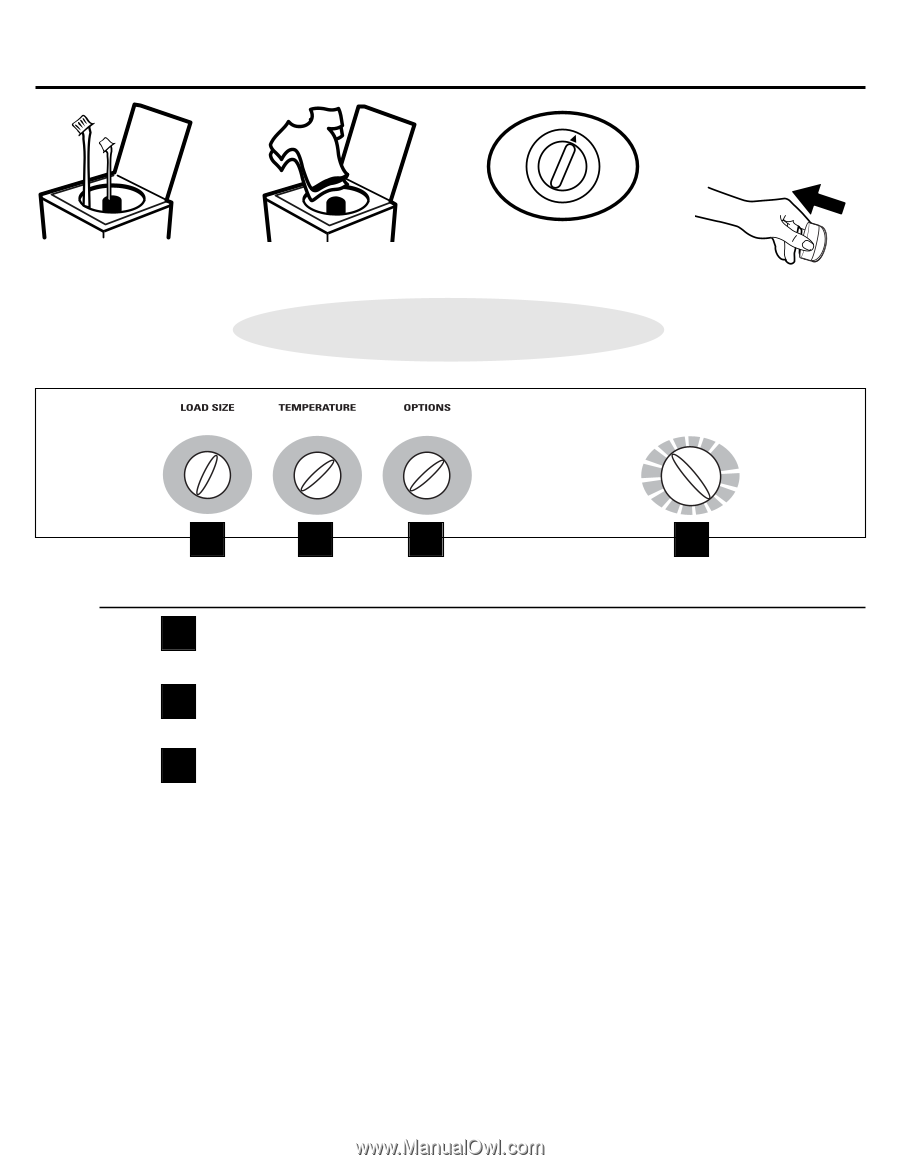
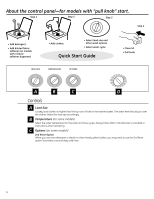
About the control panel-for models with "pull knob" start. Step 1 Step 2 Step 3 Step 4 • Add detergent • Add diluted fabric softener (on models with a fabric softener dispenser) • Add clothes • Select load size and other wash options • Select wash cycle Quick Start Guide • Close lid • Pull knob A B C D Controls A Load Size Loosely load clothes no higher than the top row of holes in the washer basket. The water level should just cover the clothes. Adjust the load size accordingly. B Temperature (on some models) Select the water temperature for the wash and rinse cycles. Always follow fabric manufacturer's care label or instructions when laundering. C Options (on some models) 2nd Rinse Option When you use extra detergent or bleach to clean heavily soiled clothes, you may want to use the 2nd Rinse option. It provides a second deep cold rinse. 4
-
 1
1 -
 2
2 -
 3
3 -
 4
4 -
 5
5 -
 6
6 -
 7
7 -
 8
8 -
 9
9 -
 10
10 -
11
-
12
-
13
-
14
-
15
-
16
-
17
-
18
-
19
-
20
-
21
-
22
-
23
-
24
-
25
-
26
-
27
-
28
-
29
-
30
-
31
-
32
 |
 |