Gigabyte GA-8I865GVMK Manual - Page 27
SATA0 / SATA1 Serial ATA Connector, BAT BATTERY, CAUTION
 |
View all Gigabyte GA-8I865GVMK manuals
Add to My Manuals
Save this manual to your list of manuals |
Page 27 highlights
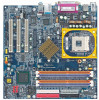
English 7) SATA0 / SATA1 (Serial ATA Connector) You can connect the Serial ATA device to this connector, it pr ovides you high speed transfer rates (1 50M B/sec ). 7 1 SATA1 7 1 SATA0 Pin No. 1 2 3 4 5 6 7 Definition GND TXP TXN GND RXN RXP GND 8) BAT (BATTERY) CAUT ION Danger of explosion if battery is incorrectly rep lace d. Replace only with the sam e or equivalent type recommended by the manufacturer. Dispose of used batteries according to the manufacturer's instructions. If you want to erase CMOS... 1. Turn OFF the computer and unplug the power cord. 2. Rem ove the battery, wait for 30 second. 3. Re-install the battery. 4. Plug the power cord and turn ON the computer. - 23 - Hardware Installation Process
-
 1
1 -
2
-
3
-
4
-
5
-
6
-
7
-
8
-
9
-
10
-
11
-
12
-
13
-
14
-
15
-
16
-
17
-
18
-
19
-
20
-
21
-
 22
22 -
 23
23 -
 24
24 -
 25
25 -
 26
26 -
 27
27 -
 28
28 -
 29
29 -
 30
30 -
 31
31 -
 32
32 -
33
-
34
-
35
-
36
-
37
-
38
-
39
-
40
-
41
-
42
-
43
-
44
-
45
-
46
-
47
-
48
-
49
-
50
-
51
-
52
-
53
-
54
-
55
-
56
-
57
-
58
-
59
-
60
-
61
-
62
-
63
-
64
-
65
-
66
-
67
-
68
-
69
-
70
-
71
-
72
-
73
-
74
-
75
-
76
-
77
-
78
-
79
-
80
-
81
-
82
-
83
-
84
-
85
-
86
-
87
-
88
-
89
-
90
-
91
-
92
-
93
-
94
-
95
-
96
-
97
-
98
-
99
-
100
-
101
-
102
-
103
-
104
-
105
-
106
-
107
-
108
-
109
-
110
-
111
-
112
 |
 |

- 23 -
Hardware Installation Process
English
7)
SATA0 / SATA1 (Serial ATA Connector)
You can connect the Serial ATA device to this connector, it provides you high speed transfer rates
(150MB/sec).
8)
BAT (BATTERY)
CAUTION
Danger of explosion if battery is incorrectly
replaced.
Replace only with the sam e or equivalent type
recommended by the manufacturer.
Dispose of used batteries according to the
manufacturer's instructions.
If you want to erase CMOS...
1. Turn OFF the computer and unplug the power cord.
2. Remove the battery, wait for 30 second.
3. Re-install the battery.
4. Plug the power cord and turn ON the computer.
Pin No.
Definition
1
GND
2
TXP
3
TXN
4
GND
5
RXN
6
RXP
7
GND
SATA1
1
SATA0
7
1
7