Gigabyte GA-9ITDW Raid Configuration Guide
Gigabyte GA-9ITDW Manual
 |
View all Gigabyte GA-9ITDW manuals
Add to My Manuals
Save this manual to your list of manuals |
Gigabyte GA-9ITDW manual content summary:
- Gigabyte GA-9ITDW | Raid Configuration Guide - Page 1
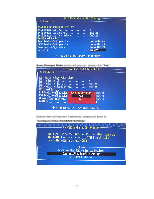
Server Systems and Motherboards Raid Configuration and Driver installation guide For Adaptec 7902W chip 1 - Gigabyte GA-9ITDW | Raid Configuration Guide - Page 2
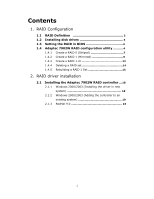
Setting the RAID in BIOS 4 1.4 Adaptec 7902W RAID configuration utility ..........4 1.4.1 Create a RAID 0 (Striped 7 1.4.2 Create a RAID 1 (Mirrored 9 1.4.3 Create a RAID 1+0 12 1.4.4 Deleting a RAID set 14 1.4.5 Rebuilding a RAID 1 Set 15 2. RAID driver installation 2.1 Installing the Adaptec - Gigabyte GA-9ITDW | Raid Configuration Guide - Page 3
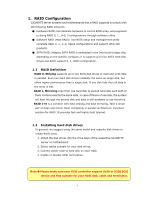
GIGABYTE server systems and motherboards that a RAID supports is comply with the following RAID solutions: ● Hardware RAID: Use dedicate hardware to control RAID array, and supposed to doing RAID 0, 1, 1+0, 5 configurations through software utility. ● Software RAID (Host RAID): Use BIOS - Gigabyte GA-9ITDW | Raid Configuration Guide - Page 4
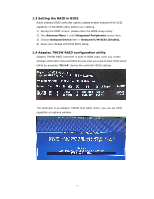
screen item. 3) Choose Onboard Device item > Onboard H/W SCSI [Enable]. 4) Save your change and Exist BIOS setup. 1.4 Adaptec 7902W RAID configuration utility Adaptec 7902W RAID controller is built-in BIOS code, even you create software RAID after detected SCSI devices that you need to start SCSI - Gigabyte GA-9ITDW | Raid Configuration Guide - Page 5
Disk Utility screen, you can check your SCSI hard disk drives be detected on your system, in general, a SCSI bus can support up to 15 devices and the controller connected to its 16-bit bus. Return Options, choose "Configure/View SCSI Controller Settings". Select HostRAID options and "Enabled" it. 5 - Gigabyte GA-9ITDW | Raid Configuration Guide - Page 6
Save Changes Made screen will pop-up , please click "Yes". Options item will become 3 selections, please pull down to "Configure/View HostRAID Settings". 6 - Gigabyte GA-9ITDW | Raid Configuration Guide - Page 7
Click "Configure/ View HostRAID settings" icon that will allow you to check and create RAID array or Spare capability of SCSI hard disk drives. 1.4.1 Create a RAID 0 (Stripe) From the Create RAID menu, please click "RAID-0 (High Performance, No Fault Tolerance)" that disk drives set requires for the - Gigabyte GA-9ITDW | Raid Configuration Guide - Page 8
Select default Strip size 64-KB from the menu, then press . (Of course, you also can select 16-KB or 32-KB by your application) Enter 1 ~15 alphabetic or - Gigabyte GA-9ITDW | Raid Configuration Guide - Page 9
The RAID-0 is complete the array propertied. After configure successfully, please exit Adaptec SCSISelct Utility window and restart system. 1.4.2 Create RAID 1 ( Mirrored ) From the Create RAID menu, click RAID-1 (Fault Tolerance) that disk drives set requires for the maximum of 2 drives. 9 - Gigabyte GA-9ITDW | Raid Configuration Guide - Page 10
All required SCSI hard disk drives will appears in the Select RAID members screen. Select default "Create new RAID-1" on RIAD-1 build option. In the RAID-1 Build Option item, you also can choose copy data from one hard disk to the second hard disk. Enter 1 ~15 alphabetic or numeric characters to - Gigabyte GA-9ITDW | Raid Configuration Guide - Page 11
If you would like to set this array on bootable, please select "Yes" on this window and apposite, please select "No". After RAID-1 builds the array propertied completed, you can select other disk drives for Spare. ※ SPARE: Set one drive on stand by should prompt for replacement of the dead one if - Gigabyte GA-9ITDW | Raid Configuration Guide - Page 12
RAID menu, please click RAID-10 (Fault Tolerance, High Performance) that you want to add to create array, then press . Select default Strip size 64-KB from the menu, then press . (Of course, you also can select 16-KB or 32-KB by your application) 12 - Gigabyte GA-9ITDW | Raid Configuration Guide - Page 13
Enter 1 ~15 alphabetic or numeric characters to assign RIAD name. All required SCSI hard disk drives will appears in the Select RAID members screen. If you would like to set this array on bootable, please select "Yes" on this window, whereas select "No". Click to proceed. 13 - Gigabyte GA-9ITDW | Raid Configuration Guide - Page 14
The RAID-10 is completed array propertied. After configure successfully, please exit Adaptec SCSISelct Utility window and restart system. 1.4.4 Deleting a RAID set From the Adaptec SCSIselect utility menu, go to the Stiped (R0) properties. Press "Del" key to display the Main Menu below. This is the - Gigabyte GA-9ITDW | Raid Configuration Guide - Page 15
When the dialogue windows appear, click to proceed. 1.4.5 rebuilding a RAID 1 Set During the post screen, SCSI HostRAID BIOS does checks RAID 1 condition each time. If one of the disk broken, it is appears which drive failure. After replaced a drive, restart a system and during - Gigabyte GA-9ITDW | Raid Configuration Guide - Page 16
From the SCSISelect Utility menu, press on ID-1 Mirrored (R1) property. From the SCSIRAID properties menu, press key to rebuild a replaced drive. A prompt message will pop-up after you ready for rebuild replaced drive, please choose button 16 - Gigabyte GA-9ITDW | Raid Configuration Guide - Page 17
RAID controller to operate properly. If you would like add RAID driver to an existing system, the driver may be direct installed from the CD, whereas install the RAID driver in new system usually will require a driver disk, please extract RAID driver into floppy disk form CD or GIGABYTE web site. 17 - Gigabyte GA-9ITDW | Raid Configuration Guide - Page 18
in new system, please press during the message appears "Press F6 if you need to install a third party SCSI or RAID driver...". Note You only have 5 seconds to press the F6 key during the installation startup. Press F6 at this time; otherwise, you must restart the Windows - Gigabyte GA-9ITDW | Raid Configuration Guide - Page 19
disk that you earlier extract RAID driver into floppy disk, then press Select the Adaptec Ultra 320 SCSI cards (Windows XXXX) depend on your type of operating system, then press to proceed. 2.1.2 Windows 2000/XP/2003 (Adding the controller to an existing system) If you would like - Gigabyte GA-9ITDW | Raid Configuration Guide - Page 20
Note Windows will automatic detect the RAID controller and then pop-up "New Hardware Found" window, please click "Cancle" and install driver by manually. Double click RAID Controller item, RAID Controller Properties window is pop-up, then click "Reinstall Driver" button. 20 - Gigabyte GA-9ITDW | Raid Configuration Guide - Page 21
Insert original CD or floppy disk that you earlier extract RAID driver into floppy disk. Select Install the software automatically (Recommended), then press . Hardware Update Wizard window appears, system doing search a suitable driver automatically. 21 - Gigabyte GA-9ITDW | Raid Configuration Guide - Page 22
After the driver installation is done, click Please repeat the above step and installing Host RAID SCSI Processor Device. After the Host RAID SCSI Processor Device installed completely, please restart system, then initial partition. 22 - Gigabyte GA-9ITDW | Raid Configuration Guide - Page 23
7902W or SCSI RAID controller in a Red Hat 9.0 Linux system does require SCSI RAID driver installation. To install the host RAID controller: 1. Boot Red Hat 9 from the CD 1. 2. When the Red Hat Linux 9 screen appears, type "linux dd", then press enter. When dialogue window "Do you have a drive disk - Gigabyte GA-9ITDW | Raid Configuration Guide - Page 24
Please extract SCSI RAID driver for Red Hat 9.0 file to a floppy disk, insert this disk and click "fd0" item when the system asks -up after your floppy disk has already inserted. Choose button while the system has ready for loading this driver. Please continue with the Linux install while the
-
 1
1 -
 2
2 -
 3
3 -
 4
4 -
 5
5 -
 6
6 -
 7
7 -
8
-
9
-
10
-
11
-
12
-
13
-
14
-
15
-
16
-
17
-
18
-
19
-
20
-
21
-
22
-
23
-
24
 |
 |

1
Server Systems and
Motherboards
Raid Configuration and
Driver installation guide
For Adaptec 7902W chip