Gigabyte GA-B75-DS3V Manual - Page 3
Installing the Motherboard, Installing an Expansion Card, Installing IDE and SATA Devices
 |
View all Gigabyte GA-B75-DS3V manuals
Add to My Manuals
Save this manual to your list of manuals |
Page 3 highlights
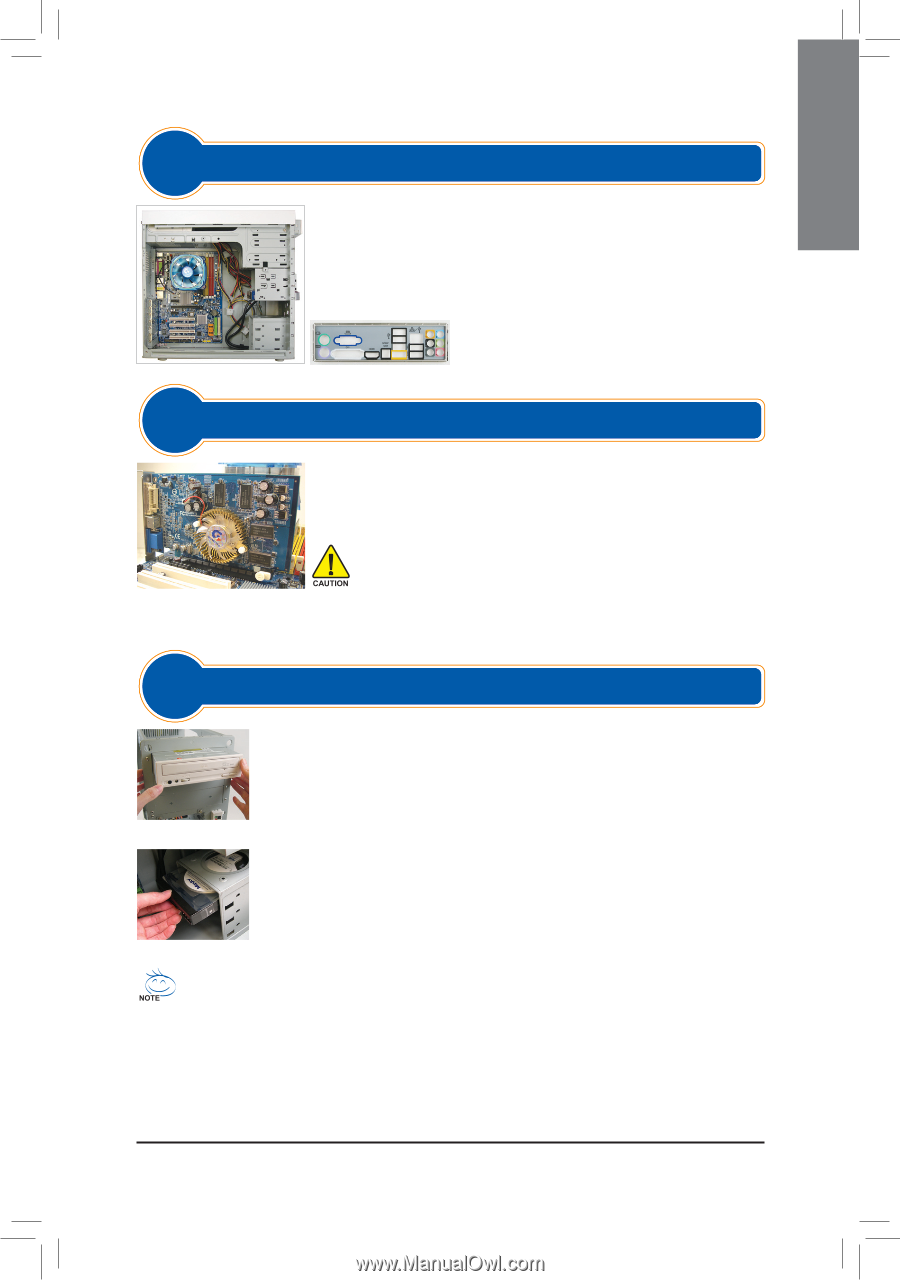
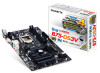
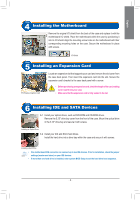
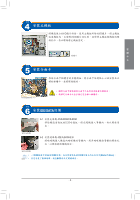
English Step 4 Installing the Motherboard Remove the original I/O shield from the back of the case and replace it with the motherboard I/O shield. Place the motherboard within the case by positioning it into its I/O shield. Align the mounting screw holes on the motherboard with their corresponding mounting holes on the case. Secure the motherboard in place with screws. I/O Shield Step 5 Installing an Expansion Card Locate an expansion slot that supports your card and remove the slot cover from the case back panel. Then insert the expansion card into the slot. Secure the expansion card's bracket to the case back panel with a screw. PCI Express Graphics Card •• Before purchasing an expansion card, check the length of the card, making sure it can fit into your case. •• Make sure that the expansion card is fully seated in its slot. Step 6 Installing IDE and SATA Devices 6-1 Install your optical drives, such as DVD-ROM and CD-ROM drives. Remove the 5.25" drive bay cover from the front of the case. Mount the optical drive in the 5.25" drive bay and secure it with screws. Installing an Optical Drive 6-2 Install your IDE and SATA hard drives. Install the hard drive into a drive bay within the case and secure it with screws. Installing a Hard Drive •• One motherboard IDE connector can connect up to two IDE devices. Prior to installation, check the jumper settings (master and slave) on your IDE devices. •• If more than one hard drive is installed, enter system BIOS Setup to set the hard drive boot sequence. - 3 -
-
 1
1 -
 2
2 -
 3
3 -
 4
4 -
 5
5 -
 6
6 -
 7
7 -
 8
8 -
 9
9 -
10
-
11
-
12
-
13
-
14
-
15
-
16
-
17
-
18
-
19
-
20
-
21
-
22
-
23
-
24
-
25
-
26
-
27
-
28
-
29
-
30
-
31
-
32
-
33
-
34
-
35
-
36
-
37
-
38
-
39
-
40
 |
 |