Gigabyte GV-N68T256D Manual - Page 9
Replace the screw to fasten the card
 |
View all Gigabyte GV-N68T256D manuals
Add to My Manuals
Save this manual to your list of manuals |
Page 9 highlights
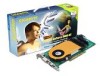
English 4. Locate the AGP slot. If necessary, remove the metal cover from this slot; then align your graphics card with the AGP slot, and press it in firmly until the card is fully seated. 5. Replace the screw to fasten the card in place, and replace the computer cover. After installation, please connect the power cable to your GV-N68T256D graphics card, or the system will not boot. 6. Plug the display cable into your card; then turn on the computer and monitor. If your graphics card came with a DVI-I connector, you can connect a flat panel display to the appropriate connector, as shown below... To TV or VCR You are now ready to proceed with the installation of the graphics card driver. For detailed instructions, select your operating system from the list below. - 7 - Hardware Installation
-
 1
1 -
2
-
3
-
 4
4 -
 5
5 -
 6
6 -
 7
7 -
 8
8 -
 9
9 -
 10
10 -
 11
11 -
 12
12 -
 13
13 -
 14
14 -
15
-
16
-
17
-
18
-
19
-
20
-
21
-
22
-
23
-
24
-
25
-
26
-
27
-
28
-
29
-
30
-
31
-
32
-
33
-
34
-
35
-
36
-
37
-
38
-
39
-
40
 |
 |
