Gigabyte GV-NX68G256D-B Manual
Gigabyte GV-NX68G256D-B Manual
 |
View all Gigabyte GV-NX68G256D-B manuals
Add to My Manuals
Save this manual to your list of manuals |
Gigabyte GV-NX68G256D-B manual content summary:
- Gigabyte GV-NX68G256D-B | Manual - Page 1
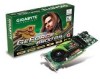
VGA Card GV-NX68G256D-B Dec. 1, 2005 - Gigabyte GV-NX68G256D-B | Manual - Page 2
VGA Card GV-NX68G256D-B Dec. 1, 2005 - Gigabyte GV-NX68G256D-B | Manual - Page 3
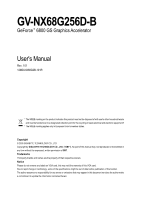
GV-NX68G256D-B GeForce™ 6800 GS Graphics Accelerator User's Manual Rev. 101 12MD-NX68G2B-101R * The WEEE marking Union's member states. Copyright © 2005 GIGABYTE TECHNOLOGY CO., LTD Copyright by GIGA-BYTE TECHNOLOGY CO., LTD. ("GBT"). No part of this manual may be reproduced or transmitted in any - Gigabyte GV-NX68G256D-B | Manual - Page 4
on driver CD ...14 3.1.5. Taskbar icon ...16 3.1.6. Display Properties pages 19 3.1.7. nView Properties pages 23 3.2. Windows® 2000 Driver Installation 28 4. Troubleshooting Tips 29 5. Appendix 30 5.1. How to Reflash the BIOS 30 5.1.1. Reflash BIOS in MS-DOS mode 30 5.1.2. Reflash BIOS in - Gigabyte GV-NX68G256D-B | Manual - Page 5
motherboard with two x16 physical connectors. Graphics cards working in an SLI configuration must be of the same model and from the same vendor. To support SLI technology via the PCI Express bus, the GV-NX68G256D-B requires driver version 81.85 or later. - 3 - Introduction - Gigabyte GV-NX68G256D-B | Manual - Page 6
Output S-Video Output OR VGA Output Analog LCD Monitor Analog Monitor Analog LCD Monitor VGA Output DVI-I to D-Sub Adapter Digital LCD Monitor DVI Output GV-NX68G256D-B Graphics Accelerator - 4 - TV-out VGA Monitor Connector (15-pin) DVI-I Connector - Gigabyte GV-NX68G256D-B | Manual - Page 7
APPLY POWER TO YOUR SYSTEM IF IT HAS BEEN DAMAGED ON THE CARD. In order to ensure your graphics card working correctly, please use official Gigabyte BIOS only. Use none official Gigabyte BIOS might cause problem on the graphics card. - 5 - Hardware Installation - Gigabyte GV-NX68G256D-B | Manual - Page 8
back of your computer. 2. Remove the computer cover. If necessary, consult your computer's manual for help in removing the cover. 3. Remove any existing graphics card from your computer. Or . For more information, see your computer documentation. GV-NX68G256D-B Graphics Accelerator - 6 - - Gigabyte GV-NX68G256D-B | Manual - Page 9
To Flat Panel Display You are now ready to proceed with the installation of the graphics card driver. Please refer to next chapter for detailed instructions. - 7 - Hardware Installation - Gigabyte GV-NX68G256D-B | Manual - Page 10
manufacturers on an SLI motherboard. After installing the graphics card driver (For the GV-NX68G256D-B, driver version must be at least 81.85), you can follow the system, refer to motherboard user's manual. (Note) Only Windows XP operating system supports SLI mode. Please do not enable SLI - Gigabyte GV-NX68G256D-B | Manual - Page 11
English 3. Software Installation In this manual, we assume that your CD-ROM Drive letter to be AUTORUN window (if it does not show up, run "D:\setup.exe"). Then you can follow the guides to setup your graphics card driver. (Please follow the subsection 3.1.3 "Driver installation" to install the - Gigabyte GV-NX68G256D-B | Manual - Page 12
for Windows® 2000 or Windows® XP to achieve better 3D performance. 0 Note: For software MPEG support in Windows® 2000 or Windows® XP, you must install DirectX first. Users who run Windows XP with Service Pack 2 or above do not need to install DirectX separately. Step 1. When autorun window show up - Gigabyte GV-NX68G256D-B | Manual - Page 13
will automatically detect a new hardware in the system and pop out a "New Hardware Found" message. The following is the step-by-step installation guide. Step 1: Found new hardware wizard: Video controller (VGA Compatible) Click the Next button to install the driver. (There is a driver CD disk that - Gigabyte GV-NX68G256D-B | Manual - Page 14
Driver item. Step 2. Click the Next button. Windows installings the components. Step 3. Click the Finish button to restart computer. Then the driver installation is completed. GV-NX68G256D-B Graphics Accelerator - 12 - - Gigabyte GV-NX68G256D-B | Manual - Page 15
English 3.1.4. Taskbar icon After installation of the display drivers, you will find a NVIDIA icon area. Click this icon to open the control panel. on the taskbar's status Right click the icon. You can adjust the properties of the graphics accelerator from here. - 13 - Software Installation - Gigabyte GV-NX68G256D-B | Manual - Page 16
3.1.5. Display Properties pages To access Display Properties pages, right-click the GIGABYTE icon on the taskbar and select Display Properties or right-click on Desktop Driver versions information. You can select other properties from the pop-out menu. GV-NX68G256D-B Graphics Accelerator - 14 - - Gigabyte GV-NX68G256D-B | Manual - Page 17
"Apply" followed by "OK". Display Matrix Model CRT+TV CRT+DVI GV-NX68G256D-B Yes Yes DVI+TV Yes Performance and Quality Settings properties SLI improvements in rendering performance. Note: Only Windows XP operating system supports the dual GPUs mode. Please do not enable SLI multi-GPU - Gigabyte GV-NX68G256D-B | Manual - Page 18
is only available on the Primary display. The video overlay controls are automatically activated during playback of any video file type that supports overlay adjustments. The "Adjust Colors" button will access "Color Correction" properties page. Full Screen Video properties „ The Full Screen Video - Gigabyte GV-NX68G256D-B | Manual - Page 19
to NVIDIA features. • Display Optimization: Run the Display Optimization Wizard to adjust your display(s) for optimal viewing and representation of colors . • Troubleshooting: If you have a TV connected and it is not being detected, select the check box below. „ The NV Rotate Properties is used - Gigabyte GV-NX68G256D-B | Manual - Page 20
individually, or click Restore Defaults. To begin, check the Enable screen menu editing check box. To return to normal navigation mode, uncheck the check box. GV-NX68G256D-B Graphics Accelerator - 18 - - Gigabyte GV-NX68G256D-B | Manual - Page 21
English 3.1.6. nView properties pages nView is a set of desktop tools designed to help you be more productive when using your graphics card. With nView you can set up multiple desktops to work with your applications. Multiple desktops give you extra desktop areas on which to run your applications - Gigabyte GV-NX68G256D-B | Manual - Page 22
display settings for easy software setup. nView Windows properties „ This tab allows you to control of window and dialog box placement when using multiple monitors. GV-NX68G256D-B Graphics Accelerator - 20 - - Gigabyte GV-NX68G256D-B | Manual - Page 23
English nView Applications properties „ This tab allows you to control nView settings depending on different applications. nView Desktops properties „ This tab allows you to create up to 32 unique desktops. nView User Interface properties „ This tab allows customization of the nView user interface - Gigabyte GV-NX68G256D-B | Manual - Page 24
video playback via the video mirroring control button. nView Hot Keys properties „ This tab lets you perform various actions with shortcut keys or key combinations. GV-NX68G256D-B Graphics Accelerator - 22 - - Gigabyte GV-NX68G256D-B | Manual - Page 25
English nView Mouse properties „ This tab can modify and extend mouse behavior with kinematic actions. nView Tools properties „ This tab can improve nView functionality for mobile and desktop users. - 23 - Software Installation - Gigabyte GV-NX68G256D-B | Manual - Page 26
the Installation Wizard. 6. Click "Next". 7. Click "Yes" to the license agreement. 8. Follow the Wizard's on-screen instructions to complete the installation. Please make sure the Windows® 2000 have installed Windows® 2000 Service Pack (or later) before installing the graphics accelerator driver - Gigabyte GV-NX68G256D-B | Manual - Page 27
experience problems. Contact your dealer or Gigabyte for more advanced troubleshooting information For more information, consult your computer's manual or manufacturer. (NOTE: Some manufacturers do correct. „ For more assistance, use the Troubleshooting Guide located in the Windows® Help or contact - Gigabyte GV-NX68G256D-B | Manual - Page 28
the A:\> prompt, type [BIOS flash utility name] -p [BIOS file name] (example: gvf11 -p nx68256d.f2) and press Enter. 6. Wait until it's done, then restart your computer. GV-NX68G256D-B Graphics Accelerator - 26 - - Gigabyte GV-NX68G256D-B | Manual - Page 29
English 5.2. Resolutions and Color Depth Table (In Windows® XP) Display Screen Resolution 320 x 200 320 x 240 400 x 300 480 x 360 512 x 384 640 x 400 640 x 480 720 x 480 720 x 576 800 x 600 848 x 480 960 x 600 1024 x 768 1088 x 612 1152 x 864 1280 x 720 1280 x 768 1280 x 960 1280 x 1024 1360 x 768 - Gigabyte GV-NX68G256D-B | Manual - Page 30
(bpp) 8bpp(256 color) Standard mode 3 3 3 3 3 3 3 3 16bpp (65K color) High mode 3 3 3 3 3 3 3 3 32bpp (16.7M) True mode 3 X 3 X 3 X 3 3 * This table is for reference only. The actual resolutions supported depend on the monitor you use. GV-NX68G256D-B Graphics Accelerator - 28 -
-
 1
1 -
 2
2 -
 3
3 -
 4
4 -
 5
5 -
 6
6 -
 7
7 -
8
-
9
-
10
-
11
-
12
-
13
-
14
-
15
-
16
-
17
-
18
-
19
-
20
-
21
-
22
-
23
-
24
-
25
-
26
-
27
-
28
-
29
-
30
 |
 |
Dec. 1, 2005
VGA Card
GV-NX68G256D-B