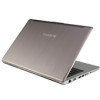
Gigabyte U2442F Manual - Page 3
Your GIGABYTE Notebook Tour - bios
 |
View all Gigabyte U2442F manuals
Add to My Manuals
Save this manual to your list of manuals |
Page 3 highlights
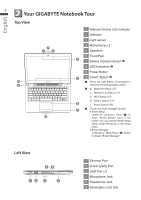
English 2 2 Your GIGABYTE Notebook Tour Top View 1 Webcam Status LED Indicator 2 Webcam 3 Light sensor 2 1 3 4 Microphone x 2 5 Speakers 6 TouchPad 4 7 Battery Indicator Button 8 LED Indicators 10 9 8 9 Power Button 5 10 Smart+ Button Press the right button of touchpad to check the remaining battery power. Bluetooth Status LED Wireless Lan Status LED HDD Status LED Battery Status LED 6 Power Status LED 7 To call out smart manager function. ● Smart Setup : Under off condition, Push " " to enter "Smart Setup" menu in off mode. You can choose BIOS Setup Utility, Smart Recovery in the setup menu. ● Smart Manager : In Windows® Mode Press " " button to initiate "Smart Manager". Left View 45 12 3 6 1 Ethernet Port 2 D-sub (VGA) Port 3 USB Port x 2 4 Microphone Jack 5 Headphone Jack 6 Kensington Lock Slot
-
 1
1 -
 2
2 -
 3
3 -
 4
4 -
 5
5 -
 6
6 -
 7
7
 |
 |
