Graco 3001643-043 Assembly Instructions - Page 8
Step 6, Step 5
 |
UPC - 654582316341
View all Graco 3001643-043 manuals
Add to My Manuals
Save this manual to your list of manuals |
Page 8 highlights
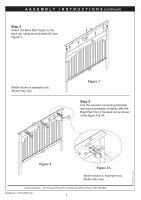
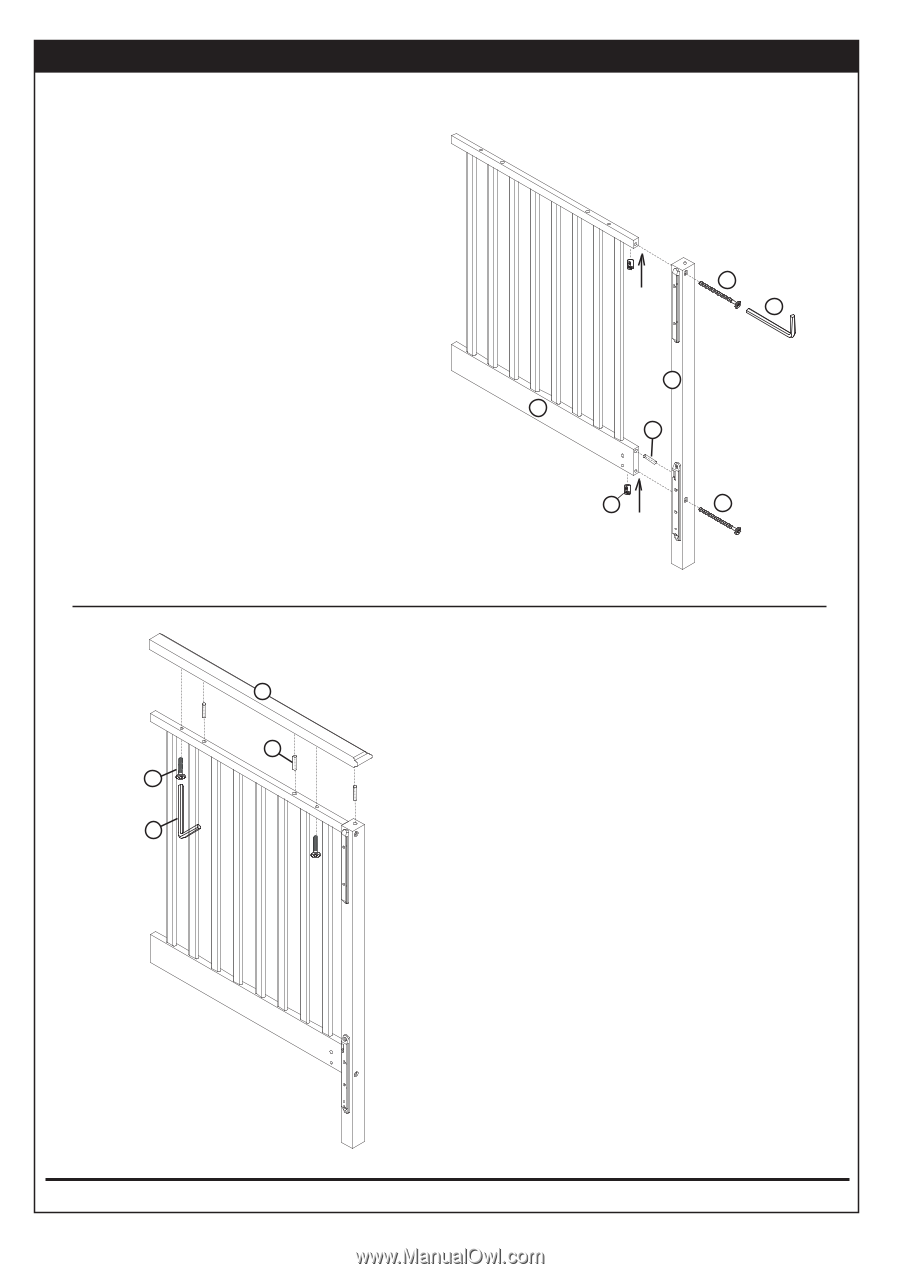
A S S E M B L Y I N S T R U C T I O N S (continued) Step 5 Attach the Front leg(C) to the crib end bottom(B) rail using wood dowels (R) and Bolts(L) & Barrel nuts(P),see Figure 5. Repeat on the other end. Model shown is example only. Styles may vary. A R N Q B Figure 5 L Q C R P L Step 6 Attach the Crib End Top(A) to the Crib end using wood dowels (R), then insert bolts(N), through the top rail of crib ends bottom into the threaded insets onto the crib end top as shown in Figure 6.Repeat on the other end. PRINTED IN CHINA Figure 6 Model shown is example only. Styles may vary. LaJobi Industries. - 257 Prospect Plains Rd. Cranbury,NJ 08512-Phone: 888-266-2848 Bulletin No. A-RTAUPS01-00 8
-
 1
1 -
2
-
 3
3 -
 4
4 -
 5
5 -
 6
6 -
 7
7 -
 8
8 -
 9
9 -
 10
10 -
 11
11 -
 12
12 -
 13
13
 |
 |
ASSEMBLY INSTRUCTIONS
(continued)
PRINTED IN
CHINA
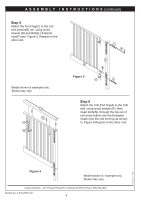
Step 6
Attach the Crib End Top(A) to the Crib
end
using wood dowels (R), then
insert bolts(N), through the top rail of
crib ends bottom into the threaded
insets onto the crib end top as shown
in
Figure 6.Repeat on the other end.
8
Figure 5
Figure 6
LaJobi Industries. - 257 Prospect Plains Rd. Cranbury,NJ 08512-Phone: 888-266-2848
Model shown is example only.
Styles may vary.
Model shown is
example only.
Styles may vary.
Bulletin No. A-RTAUPS01-00
Step 5
Attach the Front leg(C) to the crib
end bottom(B) rail
using wood
dowels (R) and Bolts(L) & Barrel
nuts(P),see
Figure 5. Repeat on the
other end.
L
Q
R
B
C
L
P
A
R
N
Q