HTC Google Nexus One User Guide - Page 67
To disable data when roaming, To limit your data connection to 2G networks
 |
View all HTC Google Nexus One manuals
Add to My Manuals
Save this manual to your list of manuals |
Page 67 highlights
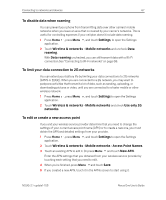
Connecting to networks and devices 67 To disable data when roaming You can prevent your phone from transmitting data over other carriers' mobile networks when you leave an area that is covered by your carrier's networks. This is useful for controlling expenses if your cell plan doesn't include data roaming. 1 Press Home , press Menu , and touch Settings, to open the Settings application. 2 Touch Wireless & networks > Mobile networks and uncheck Data roaming. With Data roaming unchecked, you can still transmit data with a Wi-Fi connection.See "Connecting to Wi-Fi networks" on page 68. To limit your data connection to 2G networks You can extend your battery life by limiting your data connections to 2G networks (GPRS or EDGE). When you are connected to a 2G network, you may want to postpone activities that transmit a lot of data, such as sending, uploading, or downloading pictures or video, until you are connected to a faster mobile or other wireless network. 1 Press Home , press Menu , and touch Settings to open the Settings application. 2 Touch Wireless & networks > Mobile networks and check Use only 2G networks. To edit or create a new access point If you and your wireless service provider determine that you need to change the settings of your current access point name (APN) or to create a new one, you must obtain the APN and detailed settings from your provider. 1 Press Home , press Menu , and touch Settings to open the Settings application. 2 Touch Wireless & networks > Mobile networks > Access Point Names. 3 Touch an existing APN to edit it. Or press Menu and touch New APN. Enter the APN settings that you obtained from your wireless service provider by touching each setting that you need to edit. 4 When you're finished, press Menu and touch Save. 5 If you created a new APN, touch it in the APNs screen to start using it. NOUG-2.1-update1-105 Nexus One User's Guide
-
 1
1 -
2
-
3
-
4
-
5
-
6
-
7
-
8
-
9
-
10
-
11
-
12
-
13
-
14
-
15
-
16
-
17
-
18
-
19
-
20
-
21
-
22
-
23
-
24
-
25
-
26
-
27
-
28
-
29
-
30
-
31
-
32
-
33
-
34
-
35
-
36
-
37
-
38
-
39
-
40
-
41
-
42
-
43
-
44
-
45
-
46
-
47
-
48
-
49
-
50
-
51
-
52
-
53
-
54
-
55
-
56
-
57
-
58
-
59
-
60
-
61
-
 62
62 -
 63
63 -
 64
64 -
 65
65 -
 66
66 -
 67
67 -
 68
68 -
 69
69 -
 70
70 -
 71
71 -
 72
72 -
73
-
74
-
75
-
76
-
77
-
78
-
79
-
80
-
81
-
82
-
83
-
84
-
85
-
86
-
87
-
88
-
89
-
90
-
91
-
92
-
93
-
94
-
95
-
96
-
97
-
98
-
99
-
100
-
101
-
102
-
103
-
104
-
105
-
106
-
107
-
108
-
109
-
110
-
111
-
112
-
113
-
114
-
115
-
116
-
117
-
118
-
119
-
120
-
121
-
122
-
123
-
124
-
125
-
126
-
127
-
128
-
129
-
130
-
131
-
132
-
133
-
134
-
135
-
136
-
137
-
138
-
139
-
140
-
141
-
142
-
143
-
144
-
145
-
146
-
147
-
148
-
149
-
150
-
151
-
152
-
153
-
154
-
155
-
156
-
157
-
158
-
159
-
160
-
161
-
162
-
163
-
164
-
165
-
166
-
167
-
168
-
169
-
170
-
171
-
172
-
173
-
174
-
175
-
176
-
177
-
178
-
179
-
180
-
181
-
182
-
183
-
184
-
185
-
186
-
187
-
188
-
189
-
190
-
191
-
192
-
193
-
194
-
195
-
196
-
197
-
198
-
199
-
200
-
201
-
202
-
203
-
204
-
205
-
206
-
207
-
208
-
209
-
210
-
211
-
212
-
213
-
214
-
215
-
216
-
217
-
218
-
219
-
220
-
221
-
222
-
223
-
224
-
225
-
226
-
227
-
228
-
229
-
230
-
231
-
232
-
233
-
234
-
235
-
236
-
237
-
238
-
239
-
240
-
241
-
242
-
243
-
244
-
245
-
246
-
247
-
248
-
249
-
250
-
251
-
252
-
253
-
254
-
255
-
256
-
257
-
258
-
259
-
260
-
261
-
262
-
263
-
264
-
265
-
266
-
267
-
268
-
269
-
270
-
271
-
272
-
273
-
274
-
275
-
276
-
277
-
278
-
279
-
280
-
281
-
282
-
283
-
284
-
285
-
286
-
287
-
288
-
289
-
290
-
291
-
292
-
293
-
294
-
295
-
296
-
297
-
298
-
299
-
300
-
301
-
302
-
303
-
304
-
305
-
306
-
307
-
308
-
309
-
310
-
311
-
312
-
313
-
314
-
315
-
316
-
317
-
318
-
319
-
320
-
321
-
322
-
323
-
324
-
325
-
326
-
327
-
328
-
329
-
330
-
331
-
332
-
333
-
334
 |
 |
