HTC Touch Pro2 T-Mobile Quick Start Guide - Page 12
Facebook, Album, Camera, Shutter, Back Arrow, My Pictures, My Icons, Step 8, Ring tone, Call [number
 |
View all HTC Touch Pro2 T-Mobile manuals
Add to My Manuals
Save this manual to your list of manuals |
Page 12 highlights
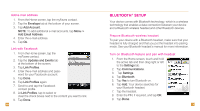
Assign icon to myFaves 5. Tap the myFaves icon circle at the top right corner of your screen. 6. Tap one of the following: n Facebook: Enter the e-mail address and password for your Facebook account. Tap Done. Swipe up or down to scroll to and tap the Facebook contact. At Link Profiles, tap Done. n Album: Tap the desired picture. Touch and drag to move the crop circle to the desired location. Zoom the picture in or out by sliding your finger right or left on the Zoom bar. Tap Done. n Camera: Frame the subject and tap the Shutter icon to capture. Tap the Back Arrow icon. n My Pictures: Tap the desired picture. Touch and drag to move the crop circle to the desired location. Zoom the picture in or out by sliding your finger right or left on the Zoom bar. Tap Done. n My Icons: Tap the desired icon. 7. Tap Done now or go to Step 8 to assign a ringtone. NOTE: Each original icon/ringtone selection and each change to an icon/ringtone may incur a separate download charge. 20 Assign ringtone to myFaves 8. Scroll down and tap the Ring tone drop-down menu. 9. Tap the desired ringtone. 10. Tap Done. 11. When you are finished, tap Done. 12. Tap Yes to confirm saving the contact. An hourglass displays in the circle while the contact is being added to the phone book. You can use your device during this time. Once the contact is added, you will receive a confirmation and the hourglass is replaced by your new contact. Now you are ready to call your contact. From the Home screen, tap the contact circle and then tap Call [number type]. 21
-
 1
1 -
2
-
3
-
4
-
5
-
6
-
 7
7 -
 8
8 -
 9
9 -
 10
10 -
 11
11 -
 12
12 -
 13
13 -
 14
14 -
 15
15 -
 16
16 -
 17
17 -
18
-
19
-
20
-
21
-
22
-
23
-
24
-
25
-
26
-
27
-
28
-
29
-
30
-
31
 |
 |
