HTC Windows Phone 8X Quick Start Guide - Page 3
Email, Contacts, Camera - videos
 |
View all HTC Windows Phone 8X manuals
Add to My Manuals
Save this manual to your list of manuals |
Page 3 highlights
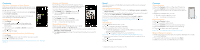
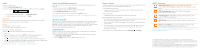
Contacts Get Your Contacts on Your Phone Adding your email accounts and social network is the easiest way to get your contacts set up on your phone. To set up an account: 1 On the Start screen, flick left and then tap Settings. 2 Tap email + accounts. If you need help getting other sorts of contacts on your phone, go to WindowsPhone.com. Adding a New Contact 1 Tap People. 2 On the all screen, tap and then select the account where you want to store the contact information. 3 Tap an item such as name or phone to enter the information. 4 Tap when finished. Adding a Contact from Your Call History 1 Tap Phone. 2 On the history screen, tap the number you want to add. 3 Tap to create a new contact. Note: You can also add the number to an existing contact by tapping a contact. Rooms and Groups Rooms let you chat and share with a group of your contacts. Groups let you see updates from members and easily send email or text messages to them. To create a Room or Group: 1 Tap People, flick to together, then tap . 2 Tap either Room or Group and follow the instructions. To edit a Room or Group: 1 Tap People, then flick to together. 2 Tap the Room or Group you want to edit. 3 Tap to see your editing options. Social Networking When you sign into a social network, your friends' status updates appear in the People hub. 1 To sign into an account, flick left from the Start screen, and then tap Settings > email+accounts. 2 Tap add an account, and then choose the social network you want to sign into. Email Your device supports POP3/IMAP, web-based, and Microsoft Exchange* email accounts. Set up Email Accounts 1 On the Start screen, flick left and then tap Settings > email + accounts > add an account. 2 Tap the account you want to set up. If you don't see the account you want to set up, tap other account or advanced setup. 3 Enter the email address and password, then tap next or sign in. 4 A tile for your email account will be added to the Start screen. Note: To view all your email accounts in a single inbox, tap > link inboxes. Send Email 1 Tap the email tile you want to use. 2 Tap to create a new email message. 3 Enter recipients in the To field. You can: • Enter email addresses or contact names. Select any matching contacts from the drop-down list. • Tap and select names from your contact list. Note: Tap to add cc and bcc lines and change the email priority. 4 Enter the email subject then tap the space below the subject line to compose. 5 Tap to add an attachment. 6 Tap to send. * Corporate email requires an Enterprise Data Plan. Camera Take a Picture 1 Press the Camera button on the side of the phone. 2 Press the Camera button halfway to focus on your subject, and then press it all the way down to take the shot. 3 Before you take the shot, you can: • Spread or pinch to zoom in or out. • Tap to change the resolution. Record a Video 1 Press the Camera button. 2 Tap to switch to video mode. 3 Press the Camera button to start recording video. 4 Press the Camera button again to stop recording. 5 Flick right to watch the video right away. Note: Tap to take a picture or video of yourself. Share a Picture or Video 1 After capturing a picture or video, flick right to see the photo or video you've just captured. 2 Press and hold the photo or video and tap share. 3 Select how you want to share the photo or video.
-
 1
1 -
 2
2 -
 3
3 -
 4
4
 |
 |
