Haier 13401 User Manual - Page 7
Defrosting, Draining, Freezer, Installing, Casters, Unpacking, Adjusting, Proper, Circulation
 |
View all Haier 13401 manuals
Add to My Manuals
Save this manual to your list of manuals |
Page 7 highlights
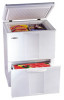
English Defrosting and Draining The Freezer * Defrost whenever the frost becomes 1/4" thick. Never use a sharp or metal-lic instrument to remove he frost as it may damage the cooling coils. (A punctured coil will void the warranty) * Turn the temperature control to OFF position and unplug the unit. Defrosting usually takes a few hours. To defrost faster keep the freezer door and drawer open. * Wipe the interior of the freezer and replace the electrical plug in the electrical outlet. * Reset the temperature control to the desired setting. Installing Casters * Casters are to be installed on the 4 bottom corners. Slide caster in the provided slot. Once the caster is in place, secure it with a provided screw. Installing Your Freezer English Unpacking Your Freezer 1. Remove all packaging material. This includes the foam base and all adhesive tape holding the freezer accessories and outside. 2. Inspect and remove any remains of packing, tape or printed materials before powering on the freezer. Adjusting Your Freezer * Your freezer is designed for freestanding installation only. It should not be recessed or built-in. * Place the freezer on a floor strong enough to support it fully loaded. * When moving the freezer, never tilt it more than a 45-degree angle. * This could damage the compressor and the sealed system * If the freezer is tilted let it stand in an upright position for at least 24 hours prior to plugging. This is to allow the refrigerant to settle. Proper Air Circulation * To assure your freezer works at the maximum efficiency it was designed for, you should install it in a location where there is proper air circulation, plumb- ing and electrical connections. * The following are recommended clearances around the freezer. Sides 4" (102mm) Top 4" (102mm) Back 4" (102mm) (bottom of freezer) 8 5
-
 1
1 -
 2
2 -
 3
3 -
 4
4 -
 5
5 -
 6
6 -
 7
7 -
 8
8
 |
 |
