Haier AB122FDAHA User Manual - Page 8
Indoor unit installation, Trial operation
 |
View all Haier AB122FDAHA manuals
Add to My Manuals
Save this manual to your list of manuals |
Page 8 highlights
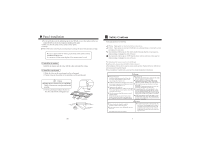
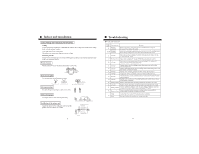
Indoor unit installation * Caution To enable normal discharge of water, use drainpipes according to the installation manual. To avoid forming of dewdrops, it must be treated for heat isolation. Inappropriate tubing may lead to water leakage in the room. Requirements: The indoor drainpipe should be treated for heat isolation. The indoor connections must have heat isolation. Inappropriate isolation may lead to dew forming. The drainpipe must have a falling gradient (above 1/100) and should not be made into an ì Sî form, otherwise, it will produce noises. The horizontal length of the pipe should be shorter than 20m. If the pipe is long, one support should be set up for every 1.5-2m. Avoid undulation of the pipe. Centralized piping is installed according to the following diagram. Never apply external forces on the connections of the drainpipe. 1. 5m~2m support isolation material falling gradient above 1/100 "S" shaped pipe as large as possible(about 10 cm) falling VP30 gradient (above 1/100) Pipe material and isolation material Unit attached parts: Pipe material Isolation material Hard PVC pipe 31.5mm (inner diameter) Foam polyethylene thickness above 10mm Trial operation Before operation Before the unit is turned on, test the resistance between the power block terminal (L, N terminals) and the earth.If it is below 1M , it can't allowed running. Turn on the outdoor unit. To protect the compressor during start-up, it should be switched on 12 hours in advance. Never operate the electromagnetic contactor manually for forced trial run. (It is dangerous when the protection device does not work.) Trial operation Refer to the service manual for the running procedure. When the unit fails to start under room temperature, try forced trial run by the following steps. Cooling mode Set the running mode to ì Coolî Press the ON/OFF button till an ì Lî blinks at the ì Setting Tempî area on the wire controller LCD and ì Autoî is displayed at the fan speed area. Now the unit enters into cooling trial run. Heating mode Set the running mode to ì Heatî Press the ON/OFF button till a blinking ì Hî and an ì Autoî sign appear on the wire controller. Now the unit enters into heating trial run. During forced trial run, working modes cannot be changed through the wire controller. After trial run, press the ON/OFF button to stop the unit. 6 15
-
 1
1 -
2
-
 3
3 -
 4
4 -
 5
5 -
 6
6 -
 7
7 -
 8
8 -
 9
9 -
 10
10 -
 11
11 -
 12
12
 |
 |
