Haier AT300 User Manual - Page 8
Preparation
 |
View all Haier AT300 manuals
Add to My Manuals
Save this manual to your list of manuals |
Page 8 highlights
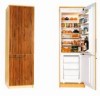
Preparation Built-in installation 1. Ensure that the doors of the kitchen unit and the refrigerator are of the same opening direction. (Take the right-opening door as an example) 2. Fix the joint sockets to the freezer and refrigerator doors with the provided screws (Figure 1). 3. Move the refrigerator into the kitchen unit, ensuring the left side panel of the refrigerator as close as possible to the wall. (Figure 2) 4. Insert the connecting pad into the joint socket and then fix the connecting pad on the door of the kitchen unit with a margin of 20-22mm. (Figure 3) 5. Properly place the refrigerator with a 3-4mm space between the left side to the wall, ensuring that the doors of the refrigerator and the kitchen unit can be easily opened and closed, and the connecting pad is correctly settled in the joint socket. 6. Fix the upper and lower stiffeners to the upper connection and base panel. The screw holes shall be plugged with the plastic stoppers. (Figure 4) 7. Fill the left gap of the kitchen unit with the gasket. (Figure 5) 8. Remove the screws and the hole stoppers on the left of the middle connection, and fix the connecting pivot to the refrigerator with one end in the hole which was plugged by the stopper and the other end to the inside wall of the kitchen unit. (Figure 6) Joint socket (Figure 1) CoCnnecting pad 20~22mm (Figure 2) (Figure 3) Plastic stopper (Figure 4) door gasket (Figure 5) (Figure 6) 7
-
 1
1 -
2
-
 3
3 -
 4
4 -
 5
5 -
 6
6 -
 7
7 -
 8
8 -
 9
9 -
 10
10 -
 11
11 -
 12
12 -
 13
13 -
14
-
15
-
16
-
17
-
18
-
19
-
20
-
21
-
22
-
23
 |
 |
