Haier ESA406K User Manual - Page 5
Installation Instructions - model
 |
UPC - 688057401362
View all Haier ESA406K manuals
Add to My Manuals
Save this manual to your list of manuals |
Page 5 highlights
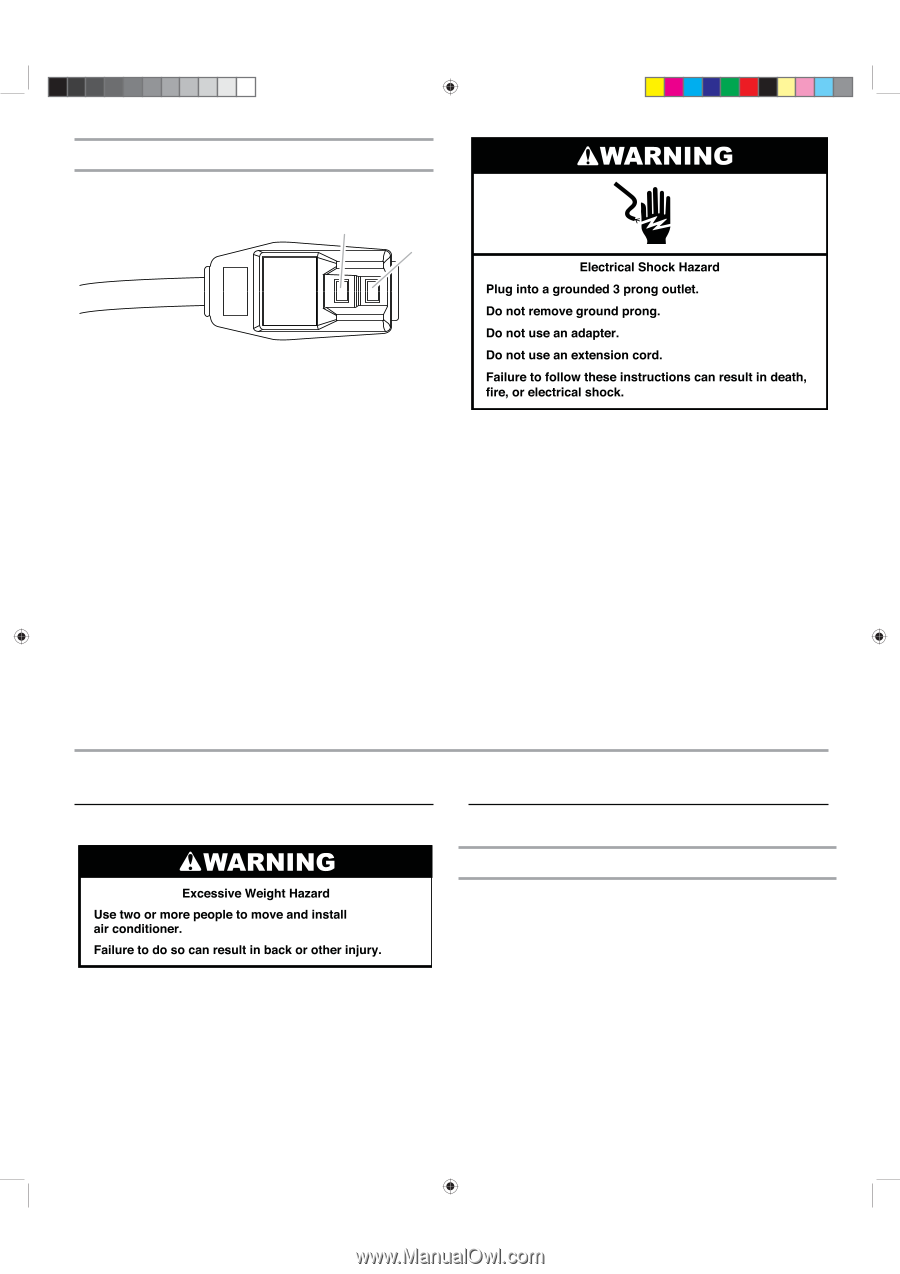
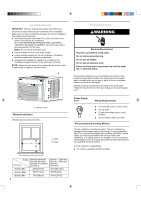
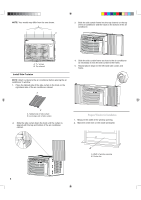
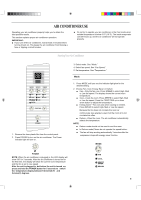
Power Supply Cord NOTE: Your air conditioner's device may differ from the one shown. A B RESET TEST A. Test button B. Reset button This room air conditioner is equipped with a power supply cord required by UL. This power supply cord contains state-of-the-art electronics that sense current leakage. If the cord is crushed, the electronics detect current leakage and power will be disconnected in a fraction of a second. To test your power supply cord: 1. Plug power supply cord into a grounded 3 prong outlet. 2. Press RESET (on some devices, a green light will turn on). 3. Press TEST (listen for click; Reset button will trip, and on some devices, a green light will turn off). 4. Press and release RESET (listen for click; Reset button will latch, and on some devices, a green light will turn on). The power supply cord is ready for operation. NOTES: ■ The Reset button must be pushed in for proper operation. ■ The power supply cord must be replaced if it fails to trip when the test button is pressed or fails to reset. ■ Do not use the power supply cord as an off/on switch. ■ A damaged power supply cord must be replaced with a new power supply cord obtained from the product manufacturer and must not be repaired. ■ The power supply cord contains no user serviceable parts. Opening the tamper-resistant case voids all warranty and performance claims. INSTALLATION INSTRUCTIONS Unpack theAir Conditioner Remove Packaging Materials ■ Remove and dispose of/recycle packaging materials. Remove tape and glue residue from surfaces before turning on the air conditioner. Rub a small amount of liquid dish soap over the adhesive with your fingers. Wipe with warm water and dry. ■ Do not use sharp instruments, rubbing alcohol, flammable fluids, or abrasive cleaners to remove tape or glue. These products can damage the surface of your air conditioner. ■ Handle the air conditioner gently. Prepare Air Conditioner for Installation Install Top Channel 1. Place the top channel on the top of the air conditioner, lining up the holes in the top channel with the holes in the top of the air conditioner. 2. Using four 13⁄32" screws, attach the top channel to the air conditioner. (For model ESA406K,ESA408K,ESA406K-L,ESA408K-L, ESA406K-T,ESA408K-T,ESA408K-E three 13⁄32" screws is needed to attach the top channel to the air conditioner. ) 5
-
 1
1 -
 2
2 -
 3
3 -
 4
4 -
 5
5 -
 6
6 -
 7
7 -
 8
8 -
 9
9 -
 10
10 -
 11
11 -
12
-
13
-
14
-
15
-
16
-
17
-
18
-
19
-
20
-
21
-
22
-
23
-
24
-
25
-
26
-
27
-
28
-
29
-
30
-
31
-
32
-
33
-
34
-
35
-
36
-
37
-
38
-
39
-
40
-
41
-
42
-
43
-
44
 |
 |