Haier HDW101WH User Manual - Page 10
Installation - dishwasher
 |
View all Haier HDW101WH manuals
Add to My Manuals
Save this manual to your list of manuals |
Page 10 highlights
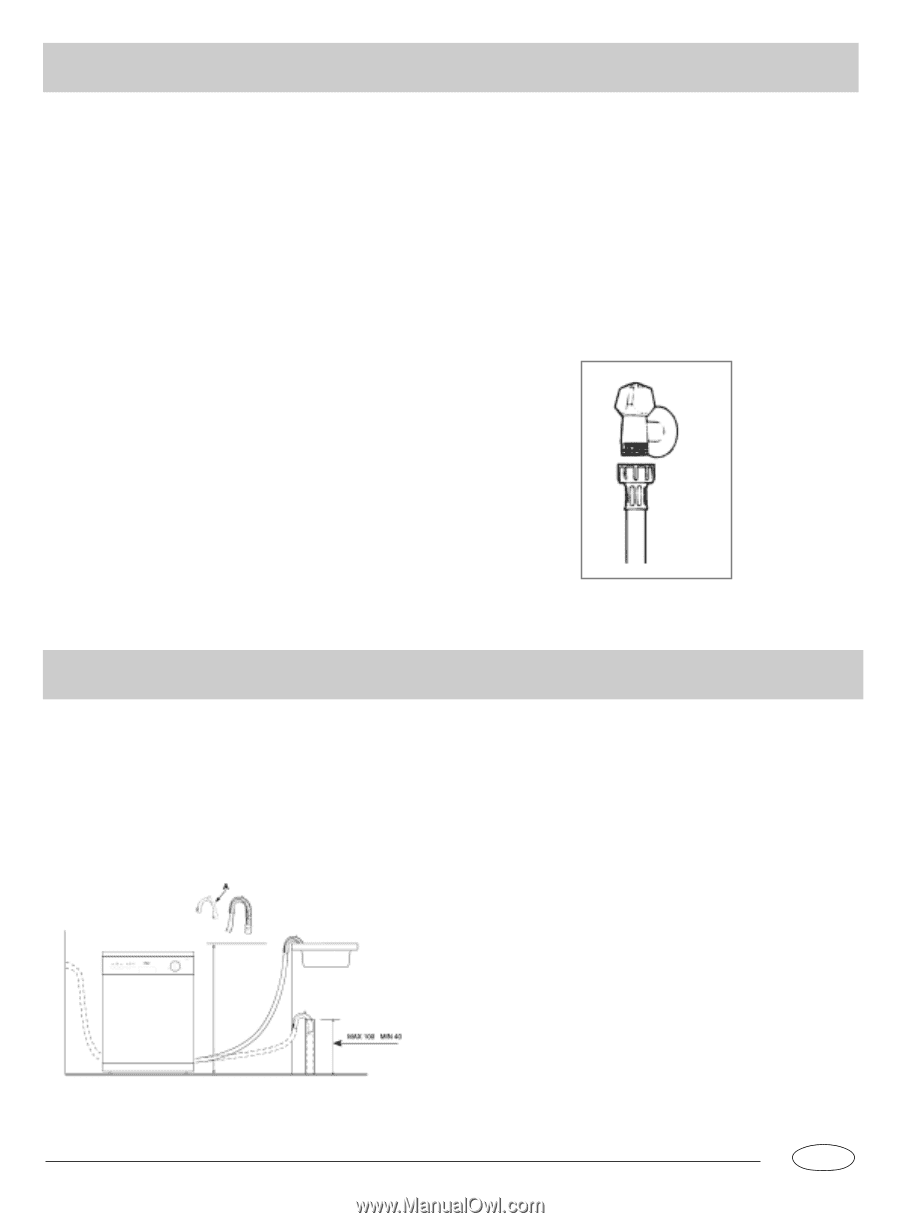
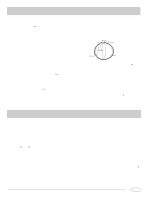
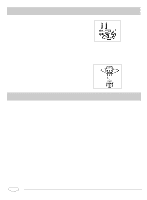
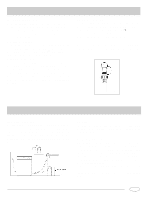
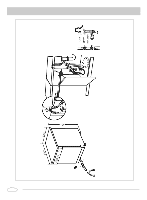
Installation Positioning the Appliance Position the appliance in the desired location. The back should rest against the wall behind it, and the sides, along the adjacent cabinets or wall. The dishwasher is equipped with water supply and drain hoses that can be positioned to the right or the left to ensure correct installation. Levelling the Appliance Once the appliance is positioned, adjust the feet (screwing them in or out) to adjust the dishwasher, making it level. The appliance should not be inclined more than 2 . If the appliance is level, it will help ensure proper performance. Cold Water Connection Connect the cold water supply hose to a threaded 3/4 (gas) connector and make sure that it is fastened tightly in place (see fig.1). If the water pipes are new or have not been used for an extended period of time, let the water run to make sure that the water is clear and free of impurities. If this precaution is not taken, there is a risk that the water inlet can get blocked and damage the appliance. Hot Water Connection The water supply to the appliance can also be connected to the house's hot water line (centralised system, heating system), as long as it does not exceed a temperature of 60 . In this case, the wash cycle time will be shortened by about 15 minutes and the wash efficiency slightly reduced. The connection must be made to the hot water line following the same procedures as those for the connection to the cold water line. fig.1 Installation Drain Hose Connection Insert the drain hose into a drain pipe with a minimum diameter of 4cm, or let it run into the sink, making sure to avoid bending or crimping it. Use the special plastic support that comes with the appliance (see fig.2). The free end of the hose must be at a height between 40 and 100 cm and must not be immersed in water. fig.2 Attention: The special plastic hose support must be solidly fastened to the wall to prevent the drain hose from moving and allowing water to spill outside the drain. Electrical Connection After making sure that the voltage and frequency values for the current in the home correspond to those on the rating plate (located on the stainless steel inner door of the appliance) and that the electrical system is sized for the maximum voltage on the rating plate, insert the plug into an electrical socket which is earthed properly (the earthing of the appliance is a safety requirement mandated by law). If the electrical socket to which the appliance must be connected is not appropriate for the plug, replace the plug, rather than using adaptors or the like as they could cause overheating and burns. .9. GB
-
 1
1 -
2
-
3
-
4
-
 5
5 -
 6
6 -
 7
7 -
 8
8 -
 9
9 -
 10
10 -
 11
11
 |
 |