Haier HRN-176 User Manual - Page 9
Reversing the door
 |
View all Haier HRN-176 manuals
Add to My Manuals
Save this manual to your list of manuals |
Page 9 highlights
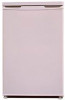
Reversing the door Warning! When changing the way the door opens, the appliance must not be connected to the mains. Remove the plug from the mains before working on the door. 1. Remove the screw (6) and remove the worktop by raising the rear and pushing it forwards. 2. Remove the screws (1) and remove the upper hinge (5) from the right side of the fridge. 3. Lift the door off the lower hinge pin and place in a safe location to avoid damaging it. 4. Unscrew the hinge pin (10) from the upper hinge (5) and screw it into the opposite side.(Reversed). 5. Remove the screws (8) and remove the lower hinge (2) with hinge pin (9). 6. Remove the left front foot (4) and transfer it to the right side. 7. Unscrew the hinge pin (9) from the lower hinge (2) and transfer it into the left hand hole. 8. Screw the lower hinge (2) to the screw holes on the bottom left side with screws (8). 9. Slot the door onto the lower hinge pin and align with the cavity opening in its closed position. 10. Screw the upper hinge (5) into place with screws (1) on the top left side of the fridge. 11. Make sure the hinge pin on the top hinge locates in the hole in the top left of the door. 12. Make sure you have tightened all the screws securely. 13. Re-fit the worktop in reverse order of step 1. DIAGRAMS SHOW LEFT AND RIGHT MOUNTING OF THE DOOR 8
-
 1
1 -
2
-
3
-
 4
4 -
 5
5 -
 6
6 -
 7
7 -
 8
8 -
 9
9 -
 10
10 -
 11
11 -
 12
12 -
 13
13 -
 14
14
 |
 |
