Haier HUF138PA Product Manual - Page 10
Freezer Interior Shelves, English
 |
View all Haier HUF138PA manuals
Add to My Manuals
Save this manual to your list of manuals |
Page 10 highlights
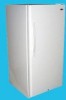
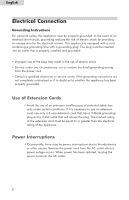
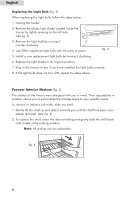
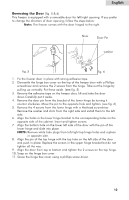
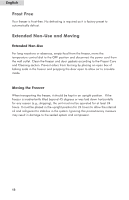
English Replacing the Light Bulb (fig. 3) When replacing the light bulb, follow the steps below: 1. Unplug the freezer. 2. Remove the plastic light shade located inside the freezer by lightly pressing to the left side. (see fig. 3) 3. Remove the light bulb by turning it counter-clockwise. 4. Use ONLY appliance light bulb with 25-watts of power. fig. 3 5. Install a new replacement light bulb by turning it clockwise. 6. Replace the light shade to its original position. 7. Plug in the freezer, to see if you have installed the light bulb correctly. 8. If the light bulb does not turn ON, repeat the steps above. Freezer Interior Shelves (fig. 4) The shelves of the freezer were designed with you in mind. Their adjustability in position allows you to personalize the storage space to your specific needs. To remove or adjust a full-width, slide-out shelf: 1. Gently tilt the shelf up and slide it towards you until the shelf has been completely removed. (see fig. 4) 2. To replace the shelf, select the desired setting and gently slide the shelf back until it rests in the locking position. Note: All shelves are not adjustable. fig. 4 9
-
 1
1 -
2
-
3
-
4
-
 5
5 -
 6
6 -
 7
7 -
 8
8 -
 9
9 -
 10
10 -
 11
11 -
 12
12 -
 13
13 -
 14
14 -
 15
15 -
16
-
17
 |
 |