Haier HW-09LM13 User Manual - Page 12
Installation of air-conditioner
 |
View all Haier HW-09LM13 manuals
Add to My Manuals
Save this manual to your list of manuals |
Page 12 highlights
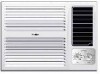
Installation Guide Installation of air-conditioner (only for reference) Iron frame 1. Make the wall hole or window hole (see Fig.1). 350 2. Fix the prefabricated iron frame to stable position by expansible screws. 450 3.Take out the conditioner and accessories from the package . Width of the wall Fig. 1 4. Cooling-only type air-conditioner: before dispatched from the factory, the drip hole at the bottom plate has been blocked by rubber lid in the accessories. If the surrounding humidity is high, should assemble drainage bend in the drainage hole at the back of bottom plate and connect the drainage tube as illustrated in Fig. 3. If the user doesn't need to Rubber lid retain the condensate in the bottom plate, can remove the rubber lid on the bottom and as Drain pan Screw illustrated in Fig. 2, assemble the attached drain Fig. 2 pan on the bottom of the air-conditioner, and connect drainage tube at the water outlet hole on the drain pan. Condenser Condenser 5. If you need to lead the condensed water to indicated position, please purchase a piece of plastic pipe , set it on the outlet pipe fitting and tie it tightly. 6. After installation of all the accessories, put the whole machine on the iron frame. If there's water outlet flexible pipe, lead the pipe to needed position(see Fig.4). 7. Fill any distance between the wall hole and the machine body with flexible sponge rubber strip to prevent the entering of outer noise and the leaking of the coolness. 8. After installation of the conditioner, insert the power plug into the outlet and perform test-run. 12 Outlet pipe fitting Water outlet flexible pipe(provide by user) Fig.3 Wall Water outlet flexible pipe(provide by user) Fig.4
-
 1
1 -
2
-
3
-
4
-
5
-
6
-
 7
7 -
 8
8 -
 9
9 -
 10
10 -
 11
11 -
 12
12
 |
 |
