Hamilton Beach 50100 Use&care - Page 3
Blender, Crush, Controls, Clean, Information
 |
View all Hamilton Beach 50100 manuals
Add to My Manuals
Save this manual to your list of manuals |
Page 3 highlights
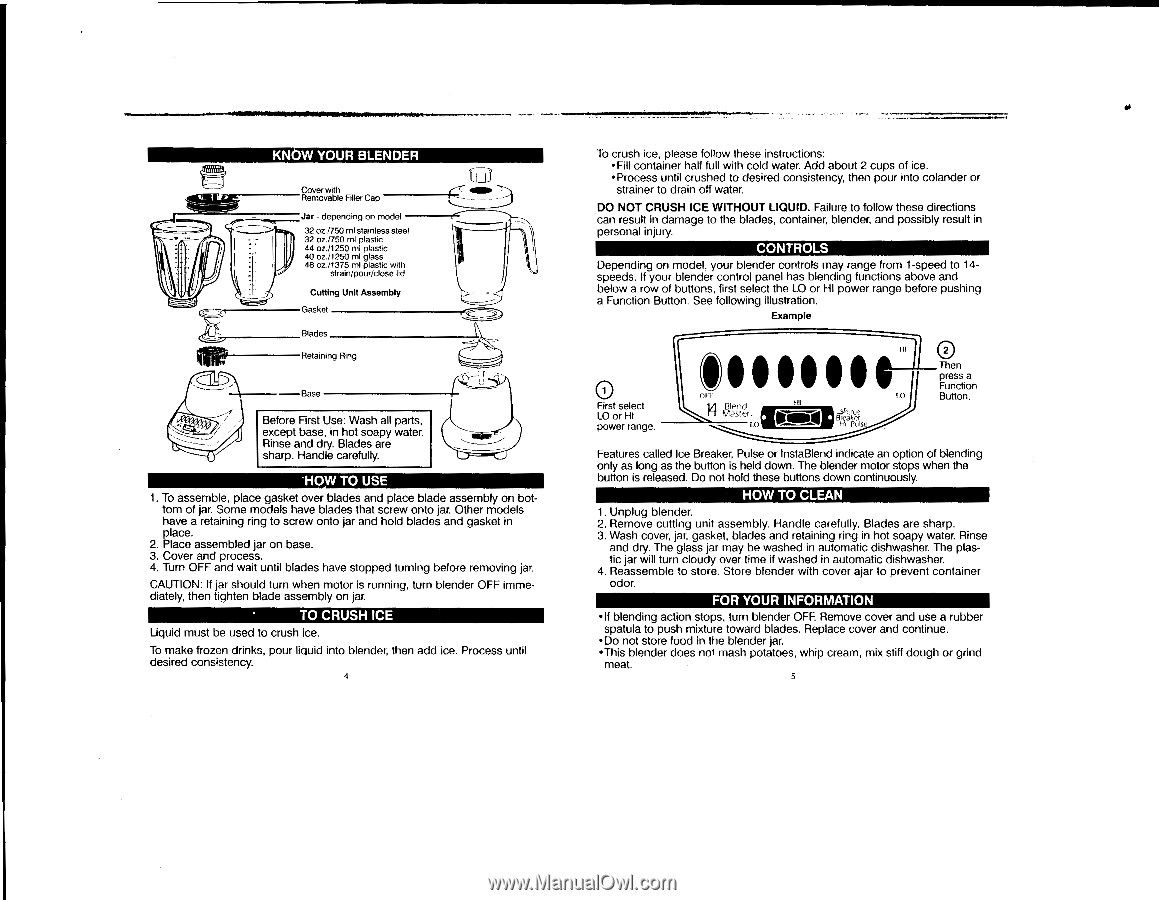
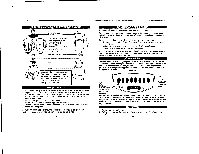
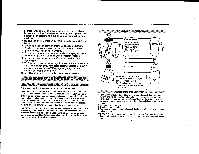
4it KNOW YOUR BLENDER Cover with Removable Filler Cap Jar - depending on model 32 oz./750 ml stainless steel 32 oz./750 ml plastic 44 oz./1250 nil plastic 40 oz./1250 ml glass 48 oz./1375 ml plastic with strain/pour/close lid Cutting Unit Assembly Gasket Blades Retaining Ring Base Before First Use: Wash all parts, except base, in hot soapy water. Rinse and dry. Blades are sharp. Handle carefully. 'HOW TO USE 1. To assemble, place gasket over blades and place blade assembly on bottom of jar. Some models have blades that screw onto jar. Other models have a retaining ring to screw onto jar and hold blades and gasket in place. 2. Place assembled jar on base. 3. Cover and process. 4. Turn OFF and wait until blades have stopped turning before removing jar. CAUTION: If jar should turn when motor is running, turn blender OFF immediately, then tighten blade assembly on jar. TO CRUSH ICE Liquid must be used to crush ice. To make frozen drinks, pour liquid into blender, then add ice. Process until desired consistency. To crush ice, please follow these instructions: •Fill container half full with cold water. Add about 2 cups of ice. •Process until crushed to desired consistency, then pour into colander or strainer to drain off water. DO NOT CRUSH ICE WITHOUT LIQUID. Failure to follow these directions can result in damage to the blades, container, blender, and possibly result in personal injury. CONTROLS Depending on model, your blender controls may range from 1-speed to 14speeds. If your blender control panel has blending functions above and below a row of buttons, first select the LO or HI power range before pushing a Function Button. See following illustration. Example 0 First select LO or HI power range. OFF OZ, 11) • Breaker Hi Pi dse O Then press a Function Button. Features called Ice Breaker, Pulse or InstaBlend indicate an option of blending only as long as the button is held down. The blender motor stops when the button is released. Do not hold these buttons down continuously. HOW TO CLEAN 1. Unplug blender. 2. Remove cutting unit assembly. Handle carefully. Blades are sharp. 3. Wash cover, jar, gasket, blades and retaining ring in hot soapy water. Rinse and dry. The glass jar may be washed in automatic dishwasher. The plastic jar will turn cloudy over time if washed in automatic dishwasher. 4. Reassemble to store. Store blender with cover ajar to prevent container odor. FOR YOUR INFORMATION •If blending action stops, turn blender OFF. Remove cover and use a rubber spatula to push mixture toward blades. Replace cover and continue. •Do not store food in the blender jar. •This blender does not mash potatoes, whip cream, mix stiff dough or grind meat.
-
 1
1 -
 2
2 -
 3
3 -
 4
4 -
 5
5 -
 6
6 -
 7
7 -
 8
8 -
 9
9
 |
 |