Hamilton Beach 76029 Use And Care - Page 4
Sharpening Knives - can opener
 |
UPC - 040094760299
View all Hamilton Beach 76029 manuals
Add to My Manuals
Save this manual to your list of manuals |
Page 4 highlights
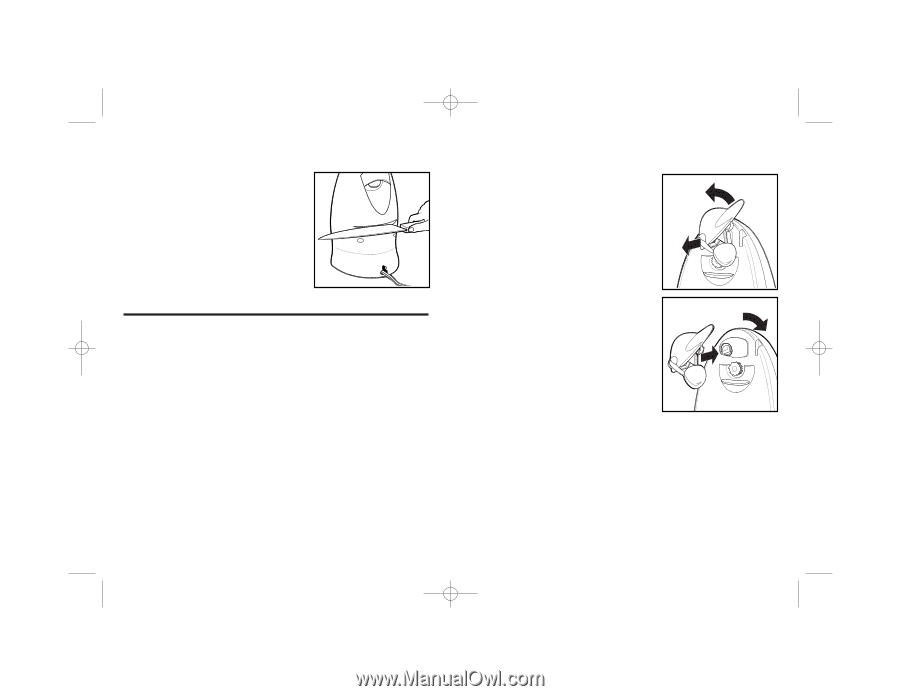
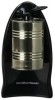
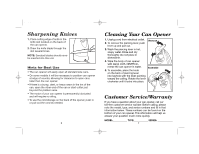
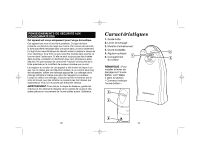
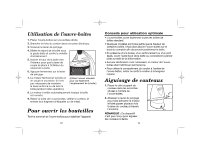
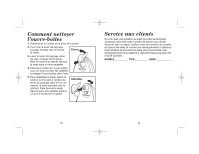
840097800 ENv01.qxd 2/28/02 10:37 AM Page 6 Sharpening Knives 1. Place cutting edge of knife in the knife slot located on the back of the can opener. 2. Draw the knife blade through the slot several times. NOTE: Serrated blades should never be inserted into this unit. Hints for Best Use • The can opener will easily open all standard size cans. • On some models it will be necessary to position can opener at edge of counter, allowing for clearance to open cans taller than the can opener. • If there is a bump, dent, or heavy seam in the rim of the can, open the other end of the can or start cutter just beyond the problem area. • The motor of your can opener is permanently lubricated and will require no oiling. • To use the cord storage on the back of the opener, push in or pull out the cord as needed. 6 Cleaning Your Can Opener 1. Unplug cord from electrical outlet. 2. To remove the piercing lever, push lever up and pull out. 3. Wash the piercing lever in hot, soapy water. Rinse and dry thoroughly. Do not place in dishwasher. 4. Wipe the body of can opener with damp cloth. NEVER immerse the can opener in water. 5. To assemble, place the knob on the back of piercing lever into keyhole with the lever pointing toward the ceiling. Rotate the lever clockwise until it locks into place. Remove Assemble Customer Service/Warranty If you have a question about your can opener, call our toll-free customer service number. Before calling, please note the model, type, and series numbers and fill in that information below. These numbers can be found on the bottom of your can opener. This information will help us answer your question much more quickly. MODEL TYPE SERIES 7
-
 1
1 -
 2
2 -
 3
3 -
 4
4 -
 5
5 -
 6
6 -
 7
7 -
 8
8 -
 9
9 -
 10
10
 |
 |