Hamilton Beach 80385 Use and Care Manual - Page 4
Using the Coffee Grinder
 |
View all Hamilton Beach 80385 manuals
Add to My Manuals
Save this manual to your list of manuals |
Page 4 highlights
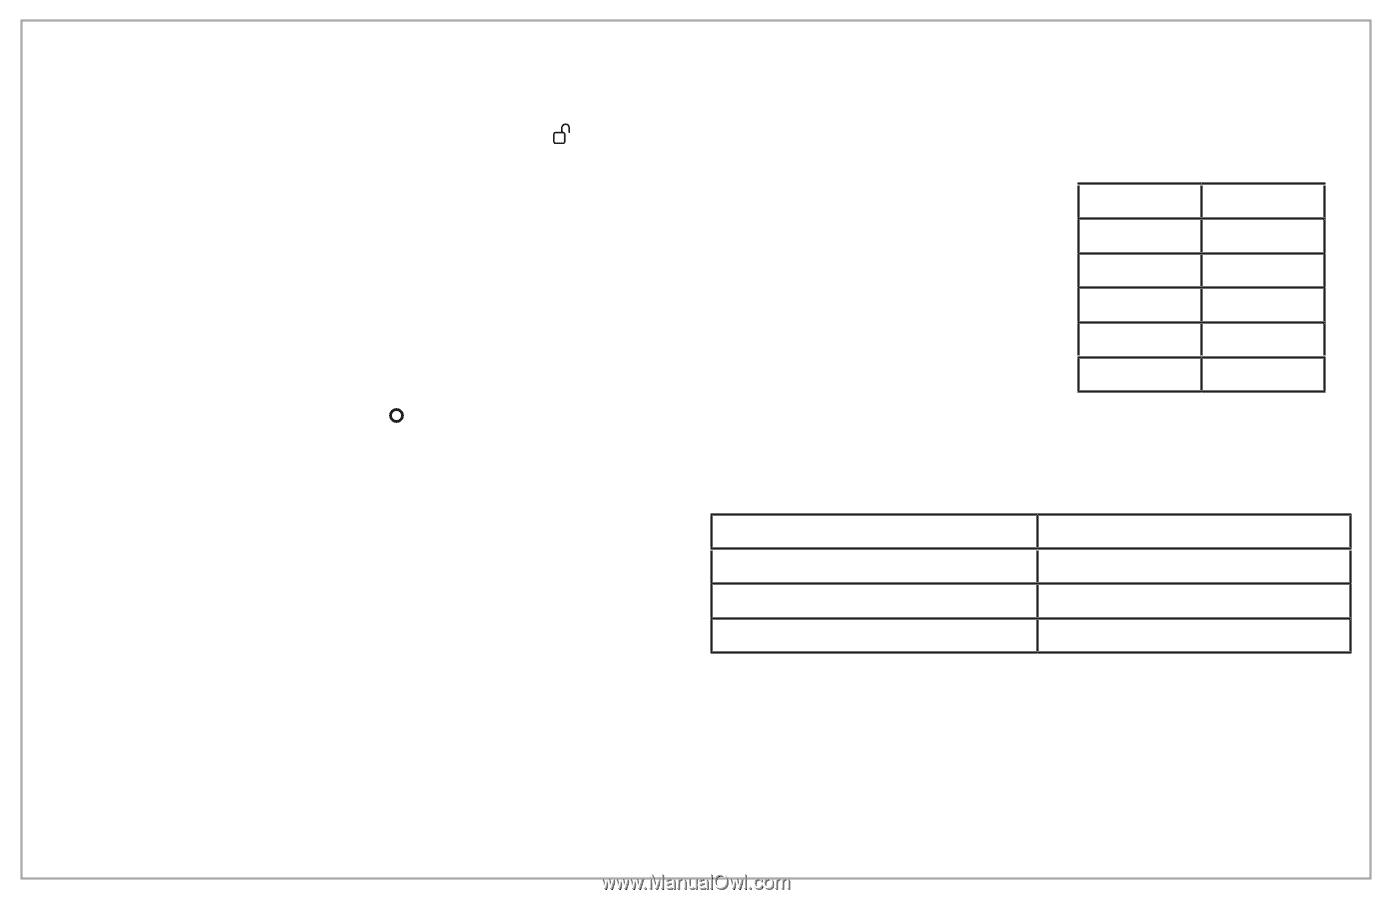
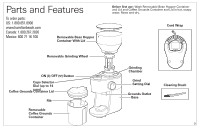
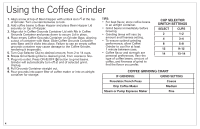
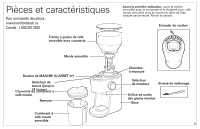
Using the Coffee Grinder 1. Align arrow at top of Bean Hopper with unlock icon at the top of Grinder. Turn counterclockwise to lock. 2. Add coffee beans to Bean Hopper and place Bean Hopper Lid securely on top of Hopper. 3. Align slot in Coffee Grounds Container Lid with Rib in Coffee Grounds Container and press down to secure Lid in place. 4. Place empty Coffee Grounds Container on Grinder Base, aligning cutout of container with Base. Slide Coffee Grounds Container onto Base until it clicks into place. Failure to use an empty coffee grounds container may cause damage to the Coffee Grinder, rendering it inoperable. 5. Turn Cup Selector Dial to desired amount, from 2 to 14 cups. 6. Rotate Grind Setting Dial to desired grind, from coarse to fine. 7. Plug into outlet. Press ON (l)/OFF ( ) button to grind beans. Grinder will automatically turn off at end of selected grind. Unplug. 8. Pull Grounds Container straight out. 9. Pour grounds into paper filter of coffee maker or into an airtight container for storage. TIPS: • For best flavor, store coffee beans in an airtight container. • Grind beans immediately before brewing. • Grinding times will vary by amount and fineness setting. • To ensure optimal grinding performance, allow Coffee Grinder to cool for at least 1 minute between uses. • Coffee flavor and strength are personal preferences. Vary the type of coffee beans, amount of coffee, and fineness of grind to find the flavor you prefer. CUP SELECTOR SWITCH SETTINGS SELECT CUPS 2 1-2 4 3-4 8 5-8 12 9-12 14 13-14 COFFEE GRINDING CHART IF GRINDING: GRIND SETTING Percolator/French Press Coarse Drip Coffee Maker Medium Steam or Pump Espresso Maker Fine 4
-
 1
1 -
 2
2 -
 3
3 -
 4
4 -
 5
5 -
 6
6 -
 7
7 -
 8
8 -
 9
9 -
 10
10 -
11
-
12
-
13
-
14
-
15
-
16
-
17
-
18
-
19
-
20
 |
 |