Harbor Freight Tools 60562 User Manual - Page 3
B, C
 |
View all Harbor Freight Tools 60562 manuals
Add to My Manuals
Save this manual to your list of manuals |
Page 3 highlights
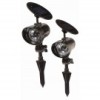
5. Replace the Internal Battery Cover and twist the Battery Cap back on. Internal Battery Cover 6. Insert Nut into nutshaped hole of Stake, then thread in Knob. Switch Figure B 4. Remove the tab(s) that disconnected the Batteries during shipment. Make sure that the two batteries are installed correctly. See Figure C. Batteries 7. Choose a location for the Solar Spotlights that receives full, direct sunlight a minimum of 6 hours a day. The location should not be near nighttime light sources such as porch lights or streetlights as this may trigger the lights to turn off or flicker. 8. Before inserting the Solar Spotlight into the ground, choose an area where there are no underground pipes, cables or other obstructions and the ground is soft enough to accept the Stake. 9. Gently insert it into the ground making certain that it is in solid. Completely insert the Stake into the ground to assure full stability for the Solar Spotlight. 10. The Light Assembly rotates up and down to obtain the best lighting situation. The Solar Panel pivots on a ball and can be set to a number of different angles to obtain the best angle for solar power. 11. Before operating at full power, the Solar Spotlights will need to charge for at least 6 hours. Figure C 12. After the initial charge is set, check to see that the LED Lights are on by viewing the light at night or in a dark location. If the LED Lights are not lit, check the position of the Switch. Note: During the day, the Solar Panel converts sunlight into electricity, recharging the batteries. The amount of light the Solar Panel receives depends on placement of the Solar Spotlights, geographic location and weather. If the weather is cloudy and the panel did not receive a full charge, the Solar Spotlights may not achieve the full hours of operating time. They will catch up on their own after two to three days of full sun. Item 60562 For technical questions, please call 1-800-444-3353. Page 3
-
 1
1 -
 2
2 -
 3
3 -
 4
4
 |
 |
