Harbor Freight Tools 63005 User Manual - Page 12
Work Piece and Work Area Set Up, General Operating Instructions
 |
View all Harbor Freight Tools 63005 manuals
Add to My Manuals
Save this manual to your list of manuals |
Page 12 highlights
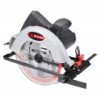
Safety Setup Rip Fence Installation and Use 1. Loosen Rip Fence Lock Knob. 2. Slide Rip Fence through slots on Base Plate. 3. Adjust Rip Fence, then tighten the Fence Lock Knob. Rip Fence Lock Knob Work Piece and Work Area Set Up 1. Work piece selection: a. Work piece must be free of foreign objects and loose knots. b. Do not use to cut logs, tree limbs, or uneven lumber. c. Wet lumber, green (unseasoned) lumber, and pressure treated lumber all have an increased potential for kickback and should only be cut with a blade designed for cutting that lumber. Wear a NIOSH-approved respirator and have appropriate ventilation whenever cutting pressure treated lumber. General Operating Instructions 2. Designate a work area that is clean and well‑lit. The work area must not allow access by children or pets to prevent distraction and injury. 3. Route the power cord along a safe route to reach the work area without creating a tripping hazard or exposing the power cord to possible damage. The power cord must reach the work area with enough extra length to allow free movement while working. 4. Secure loose workpieces using a vise or clamps (not included) to prevent movement while working. 5. Verify that there are no utility lines or hardware in or near the workpiece. This is especially critical for plunge cuts. 1. Make all necessary adjustments to the Circular Saw. 2. Make sure that all guards are in place in proper working order and that all adjustment knobs are tight before operation. 3. Make sure Trigger is in OFF position, then, plug the Power Cord into the nearest 120 volt, grounded, electrical outlet. 4. Firmly grip the Main Handle with one hand and the Auxiliary Handle with the other hand. 5. Press and hold Trigger Lock, then the Trigger to turn on the Circular Saw. 6. Release Trigger Lock. 7. Allow the Saw Blade to reach full speed before feeding Saw Blade into the workpiece. 8. Make straight cuts only. DO NOT twist Saw while cutting. If this occurs, the Saw Blade will "bind" in the workpiece causing kickback, potential injury, and/or damage to the workpiece and Circular Saw. 9. Do not force the Circular Saw to cut faster than it is designed to cut. Feed the Saw Blade gradually into the workpiece. 10. Release Trigger if the Saw Blade is to be backed out of an uncompleted cut. Wait until the Saw Blade stops spinning before removing the Saw. Do not press against the Saw Blade to stop it. 11. Once the cutting job is completed, release the Trigger and wait until the Saw Blade stops spinning. 12. To prevent accidents, unplug the Power Cord from its electrical outlet. Clean, then store the tool indoors out of children's reach. Operation Maintenance Page 12 For technical questions, please call 1-888-866-5797. Item 63005
-
 1
1 -
2
-
3
-
4
-
5
-
6
-
 7
7 -
 8
8 -
 9
9 -
 10
10 -
 11
11 -
 12
12 -
 13
13 -
 14
14 -
 15
15 -
 16
16
 |
 |
