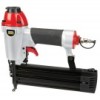
Harbor Freight Tools 63157 User Manual - Page 12
Workpiece and Work Area Set Up, Single Sequential Safety Trip Mechanism Definition, Single
 |
View all Harbor Freight Tools 63157 manuals
Add to My Manuals
Save this manual to your list of manuals |
Page 12 highlights
Safety Setup Operating Instructions Read the ENTIRE IMPORTANT SAFETY INFORMATION section at the beginning of this manual including all text under subheadings therein before set up or use of this product. Inspect tool before use, looking for damaged, loose, and missing parts. If any problems are found, do not use tool until repaired. Workpiece and Work Area Set Up 1. Designate a work area that is clean and well‑lit. The work area must not allow access by children or pets to prevent distraction and injury. 2. Route the air hose along a safe route to reach the work area without creating a tripping hazard or exposing the air hose to possible damage. The air hose must be long enough to reach the work area with enough extra length to allow free movement while working. 3. Secure loose workpieces using a vise or clamps (not included) to prevent movement while working. 4. There must not be hazardous objects (such as utility lines or foreign objects) nearby that will present a hazard while working. Single Sequential Safety Trip Mechanism Definition The single sequential safety trip mechanism is designed to prevent inadvertent firing. The tool should only fire if the Safety Nosepiece is pressed against the workpiece prior to pulling the Trigger. It should only fire again if the trigger is released and squeezed again. The Tool should not fire if the Safety Nosepiece is not pressed against an object. Single Sequential Safety Trip Mechanism Testing Procedure TO PREVENT SERIOUS INJURY FROM ACCIDENTAL OPERATION: Point the tool at a piece of scrap wood when testing. 1. Disconnect the tool from the air supply. 2. Load the magazine with fasteners. 3. Check that the Trigger and the Safety Nosepiece move freely, without sticking. 4. Connect the air supply to the tool and set within the Operating Air Pressure indicated on the Specification chart. 5. Test the tool by pressing the Safety Nosepiece against the workpiece without pulling the Trigger. The tool must not cycle (fire). If it cycles (fires), stop immediately and have it repaired by a qualified service technician. 6. Hold the tool away, or off of the workpiece. The Safety Nosepiece should return to its original position. Squeeze the Trigger. The tool must not cycle (fire). If it cycles (fires), stop immediately and take the tool to a qualified service technician. 7. Press the Safety Nosepiece against the workpiece and squeeze the Trigger. The tool must cycle (fire) only once. Release the trigger, slide the nailer to a fresh piece of wood, and squeeze it again. The tool must cycle (fire) again only once. With the Trigger depressed, carefully lift the tool and press it against the workpiece again. The tool must not cycle (fire). If it fails to act in the manner explained in bold, have it repaired by a qualified service technician. Operation Maintenance Page 12 For technical questions, please call 1-888-866-5797. Item 63157


