Harman Kardon AVR 7300 Owners Manual - Page 8
Video 5 Input/Output Jacks - won t turn on
 |
View all Harman Kardon AVR 7300 manuals
Add to My Manuals
Save this manual to your list of manuals |
Page 8 highlights
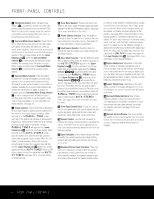
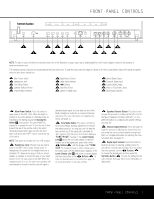
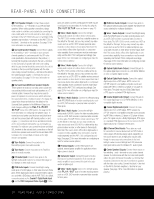
FRONT-PANEL CONTROLS 7 Delay Adjust Selector: Press this button to begin the process of adjusting the delay settings. See page 28 for more information on delay adjustments. 8 ‹/› Buttons: When making system configuration changes using the front-panel controls, press these buttons to scroll through the available choices for the option being adjusted. 9 Set/Video Button: This button has two functions. Press it to turn the video processing circuits on or off, as indicated by FAROUDJA:ON or FAROUDJA:OFF messages in the Lower Display Line $ and semi-OSD display. (See page 31 for more information on the video processing circuits.) The button is also used when making many of the configuration and setup adjustments from the front panel. When selecting a specific item to adjust, or after selecting a configuration setting with the ‹/› Buttons 8 , press this button to enter the setting information to the unit's memory. 10 Optical 4 Digital Input: Connect the optical digital output of an audio or video product to this jack. 11 Optical Digital Output: Connect this jack to the optical digital audio input of a compatible digital recorder. 12 Coaxial 4 Digital Input: Connect the coaxial digital output of a digital audio product such as a portable audio player or video game to this jack. 13 Coaxial Digital Output: Connect this jack to the digital audio input of a compatible digital recorder. 14 Video 5 Input/Output Jacks: These audio/video jacks may be used as either inputs or outputs for temporary connection to video games or portable audio/video products such as camcorders and portable audio players. (See page 40 for more information on switching these jacks between an input and output.) 15 Input/Output Status Indicator: This LED indicator will normally light green to show that the frontpanel Video 5 Input/Output Jacks 14 is operating as an input. When this jack is configured for use as an output, the appropriate indicator will turn red to show that the jack may be used as an output for recording. (See page 23 for more information on configuring the front-panel jacks as outputs, rather than inputs.) 8 FRONT-PANEL CONTROLS
-
 1
1 -
2
-
 3
3 -
 4
4 -
 5
5 -
 6
6 -
 7
7 -
 8
8 -
 9
9 -
 10
10 -
 11
11 -
 12
12 -
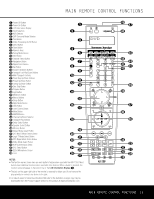 13
13 -
14
-
15
-
16
-
17
-
18
-
19
-
20
-
21
-
22
-
23
-
24
-
25
-
26
-
27
-
28
-
29
-
30
-
31
-
32
-
33
-
34
-
35
-
36
-
37
-
38
-
39
-
40
-
41
-
42
-
43
-
44
-
45
-
46
-
47
-
48
-
49
-
50
-
51
-
52
-
53
-
54
-
55
-
56
-
57
-
58
-
59
-
60
 |
 |
