Harman Kardon CITATION 5.2 Owners Manual - Page 8
System, Verification
 |
View all Harman Kardon CITATION 5.2 manuals
Add to My Manuals
Save this manual to your list of manuals |
Page 8 highlights
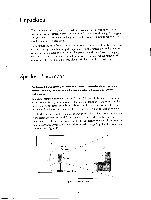
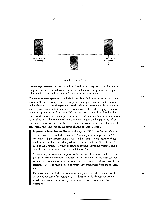
Banana plugs may simply be inserted into the jack provided on the speaker terminal connection. Before inserting the plugs, make certain that the binding post's screw cap is tightened down by turning it in a clockwise direction. This makes certain that the maximum contact area is available. Also, be certain that the plugs are firmly inserted so that a proper connection is made. Finally, run the cables to the amplifier, and connect the cables using the instructions provided by the manufacturer. When making connections at the amplifier end, be certain to observe proper polarity, connecting the "black" wire to the negative terminal and the "red" wire to the positive terminal. It is highly recommended that the length of cable connecting any set of speakers be identical. For example, make certain that the cable length connecting left, center and right front speakers, or the left and right rear (surround) speakers are identical, even though one speaker may be physically closer to the amplifier than the other. If one speaker has excess wire in its lead to maintain equal length, make certain the extra cable is NOT coiled in a circle, as this may form an inductor that will negatively impact the performance of your speakers. System Verification Before using your speakers with program material for the first time, it is always a good idea to verify that the speakers are connected to the proper amplifier and processor output channels with regard to their location. An easy way to do this is to use the test signal generator built into all Dolby Pro Logic' and Home THX processors. First, turn down the volume level on your processor, to avoid any damage to the speakers at turn on. Then, turn on your system and place it in the "test" mode as indicated in the processor's instructions. This will cause a pink noise signal to circulate around the room, starting with the left, then moving to the center, right and rear speakers. Take a minute to listen and note if the speakers are producing sound in the proper sequence. This process may also be done with the "WOW!" laser disc offered with many Home THX processors, such as the Citation 7.0. Chapter 7 on Side 2 of the disc contains circulating test signals, with an on-screen indication to assist you in making certain that the sound is emanating from the proper speaker. 9
-
 1
1 -
2
-
 3
3 -
 4
4 -
 5
5 -
 6
6 -
 7
7 -
 8
8 -
 9
9 -
 10
10
 |
 |
