Harman Kardon HK 3490 Owners Manual - Page 26
Recording - remote control
 |
View all Harman Kardon HK 3490 manuals
Add to My Manuals
Save this manual to your list of manuals |
Page 26 highlights
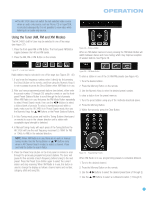
OPERATION 5. Press the Memory Button on the remote to complete the process and let the HK 3490 return to normal operation. To delete an XM Radio preset, tune to the preset station and press the Clear Button. To delete all XM Radio presets in all banks, press and hold the Clear Button until the ALL DELETED message appears. Table 2 may be helpful to you as a reference while using the XM Radio tuner. Table 2 - Using the XM Radio Tuner XM Radio Function Remote Control Key Front-Panel Button Toggle Search Modes FM Mode FM Mode Scroll Preset Numbers (1-8) Preset Up/Up Arrow (⁄ ) Preset Up Preset Down/Down Arrow (¤) Preset Down Channel Search Tuning Up Tuning Down Tuning Up Tuning Down Display Mode Preset Scan Preset Scan Exit All Channel Search Changes Category Left/Right Arrow (‹ /›) N/A Changes Preset Group Enter/OK OK N/A Preset Memory Mode Memory N/A Clear Preset Memory Mode Clear N/A Clear All Preset Memories Press and Hold Clear N/A Enter Numeric Numbers 0-9 Numeric Keys N/A Auto Preset (FM Only) You may automatically program all FM radio stations in your area that are received with acceptable signal strength into the HK 3490's presets. Press and hold the Auto Preset Button until the Memory and Preset Indicators flash in the front-panel display. The tuner will automatically scan through the entire FM band, entering all stations with acceptable signal strength into the presets until either all 30 presets have been filled, or the tuner has scanned the band twice. NOTE: If there are a large number of FM stations in your area, Auto Preset will overwrite any presets you programmed previously. Stations with exceptionally strong signals may be programmed into more than one preset. Using Docking Station The Bridge II docking station is an optional unit that may be used with a compatible iPod (not included). When The Bridge II docking station is connected to its proprietary input on the HK 3490 and the iPod is docked, you may play the audio materials on your iPod through your high-quality audio system, operate the iPod using the HK 3490 remote or the HK 3490's front-panel controls, and charge the iPod. Either press the front-panel Phono Selector repeatedly until the DMP/THE BRIDGE IS CONNECTED message scrolls across the front panel, or press The Bridge Button on the remote to select The Bridge II docking station as the input source. 26 In normal operation, information from the iPod will appear in the HK 3490's Message Display. While a track is playing, its title will scroll once on the upper line, and the elapsed and remaining track times will appear on the lower line. While navigating the iPod, the menu title or current setting will appear on the upper line, and the current menu line or setting option will appear on the lower line. Table 3 summarizes the controls available when The Bridge II unit is in use. Table 3 - Using The Bridge II iPod Function Remote Control Key Play Play ( › ) Pause Pause ( || ) Menu Menu Select OK Scroll Reverse Up Arrow (⁄ ) Scroll Forward Down Arrow (¤) Forward Search/Next Track Right Arrow ( › ›l) Reverse Search/Previous Track Left Arrow ( l‹ ‹ ) Switch between normal operation Press and hold Menu and iPod Manual mode Front Panel-Button Preset Scan Preset Scan FM Mode Preset Scan Preset Up Preset Down Tuning Up Tuning Down Press and hold FM Mode Button When the HK 3490 is in Standby mode, the iPod is not charged. It is not possible to view videos or still images stored on the iPod. To access the full functions of the iPod, press and hold the Menu Button (FM Mode Button on front panel) to switch it to Manual mode. You may navigate the iPod using the HK 3490 remote while viewing its menus on the iPod screen. Manual mode allows access to functions such as Repeat and Shuffle. Although the audio portion of video content may be played, it will not be possible to view the content on a video display connected to the HK 3490. To return to normal operation, press and hold the Menu Button again until the check mark appears on the screen of the iPod. Recording Two-channel analog audio signals, as well as composite video signals, are normally available at the appropriate recording outputs. Thus, to make a recording, you need only make sure to connect your audio or video recorder to the appropriate output jacks, as described in the Installation section, insert blank media and make sure the recorder is turned on and recording while the source is playing. You may monitor your recording if your recorder has separate record and playback heads. Press the front-panel T-Mon Button to monitor the recording using the playback head, indicated by the T-MON message flashing. This will not affect the recording being made from the original source. To hear the original source again, press the T-Mon Button again. If your recorder does not have off-head playback, then you will not hear anything when you press the T-Mon Button, unless the recorder is being used for playback.
-
 1
1 -
2
-
3
-
4
-
5
-
6
-
7
-
8
-
9
-
10
-
11
-
12
-
13
-
14
-
15
-
16
-
17
-
18
-
19
-
20
-
 21
21 -
 22
22 -
 23
23 -
 24
24 -
 25
25 -
 26
26 -
 27
27 -
 28
28 -
 29
29 -
 30
30 -
 31
31 -
32
 |
 |
