Hayward DV5000 DV5000 Owner's Manual - Page 8
of 39, DV5000ML, Rev. - disc pool cleaner
 |
View all Hayward DV5000 manuals
Add to My Manuals
Save this manual to your list of manuals |
Page 8 highlights
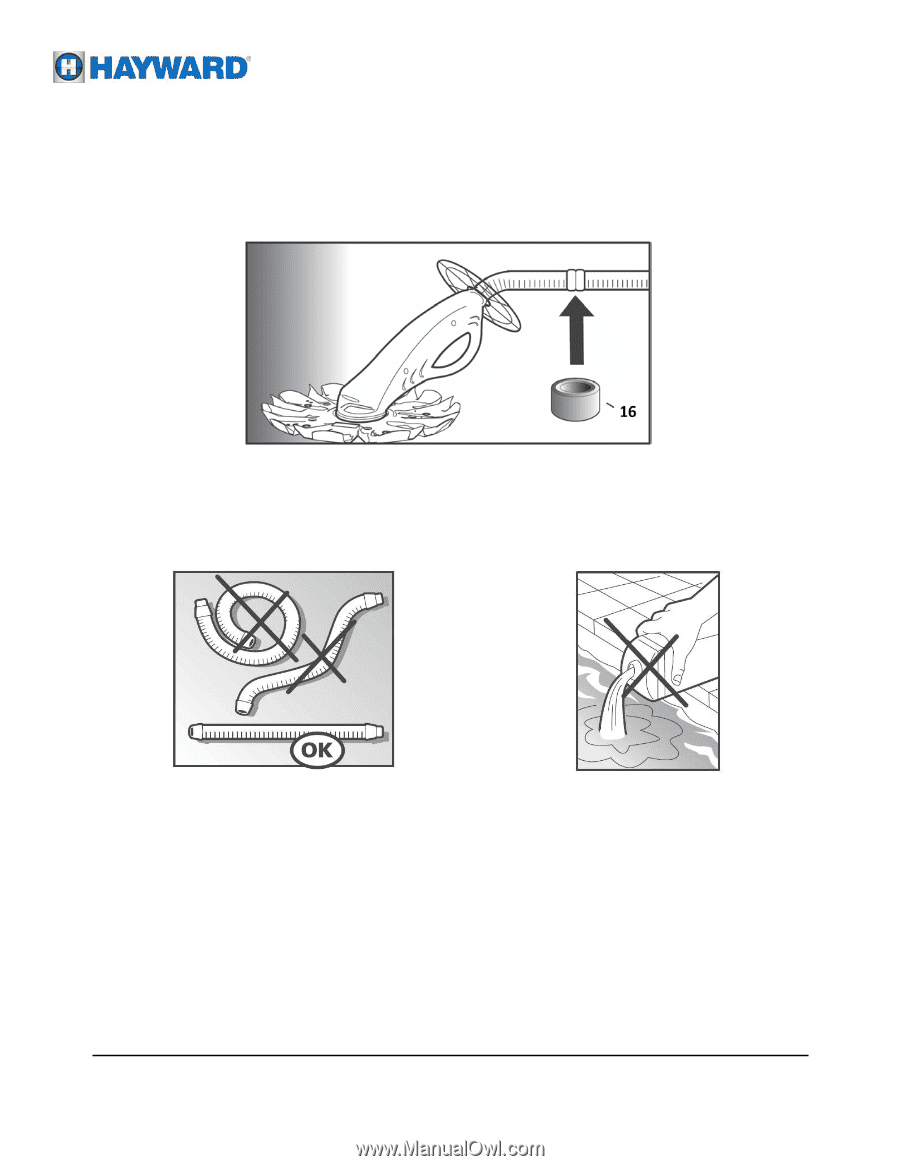
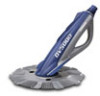
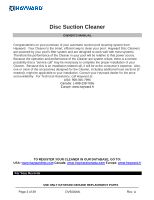
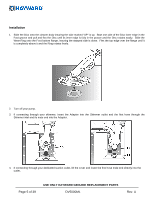
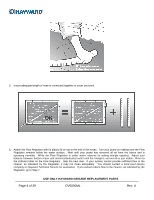
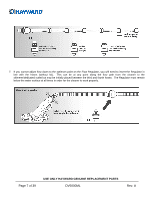
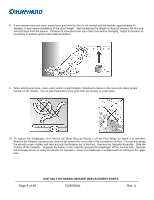
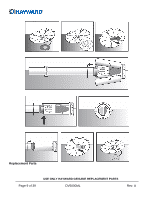
8. If your cleaner does not move around your pool with the Disc in full contact with the bottom, approximately 45 degrees, it may require installation of the Hose Weight. Start by placing the Weight at the joint between the first and second hoses from the cleaner. Observe its movement over your entire pool before changing. Adjust its location as necessary to achieve good contact with the bottom. 9. When storing your hose, insure each section is kept straight. Residual curvature in the hose will reduce proper function of the cleaner. Do not add chemicals to your pool while the cleaner is in the water. 10. To replace the Diaphragm, first remove the Wear Ring by flexing it off the Foot flange on which it is mounted. Remove the Retainer by prying one removal tab toward the center with a flat screwdriver and out. You can also grasp the tab with a pair of pliers and twist and pull the Retainer out of the Foot. Remove the Cassette Assembly. Slide the O-Ring off the Cassette. Separate the halves of the Cassette and pull the Diaphragm off the internal tube. Reverse the removal process to ready the cleaner for operation. Insure the Diaphragm is installed with its O-Ring on the upper end. Page 8 of 39 USE ONLY HAYWARD GENUINE REPLACEMENT PARTS DV5000ML Rev. A
-
 1
1 -
2
-
 3
3 -
 4
4 -
 5
5 -
 6
6 -
 7
7 -
 8
8 -
 9
9 -
 10
10 -
 11
11 -
 12
12 -
 13
13 -
14
-
15
-
16
-
17
-
18
-
19
-
20
-
21
-
22
-
23
-
24
-
25
-
26
-
27
-
28
-
29
-
30
-
31
-
32
-
33
-
34
-
35
-
36
-
37
-
38
-
39
 |
 |