Hayward SP1593 PowerFlo-Matrix-Pump-Owners-Manual-ISSP1591RevH - Page 6
New Installation - Start-Up & Operation
 |
View all Hayward SP1593 manuals
Add to My Manuals
Save this manual to your list of manuals |
Page 6 highlights
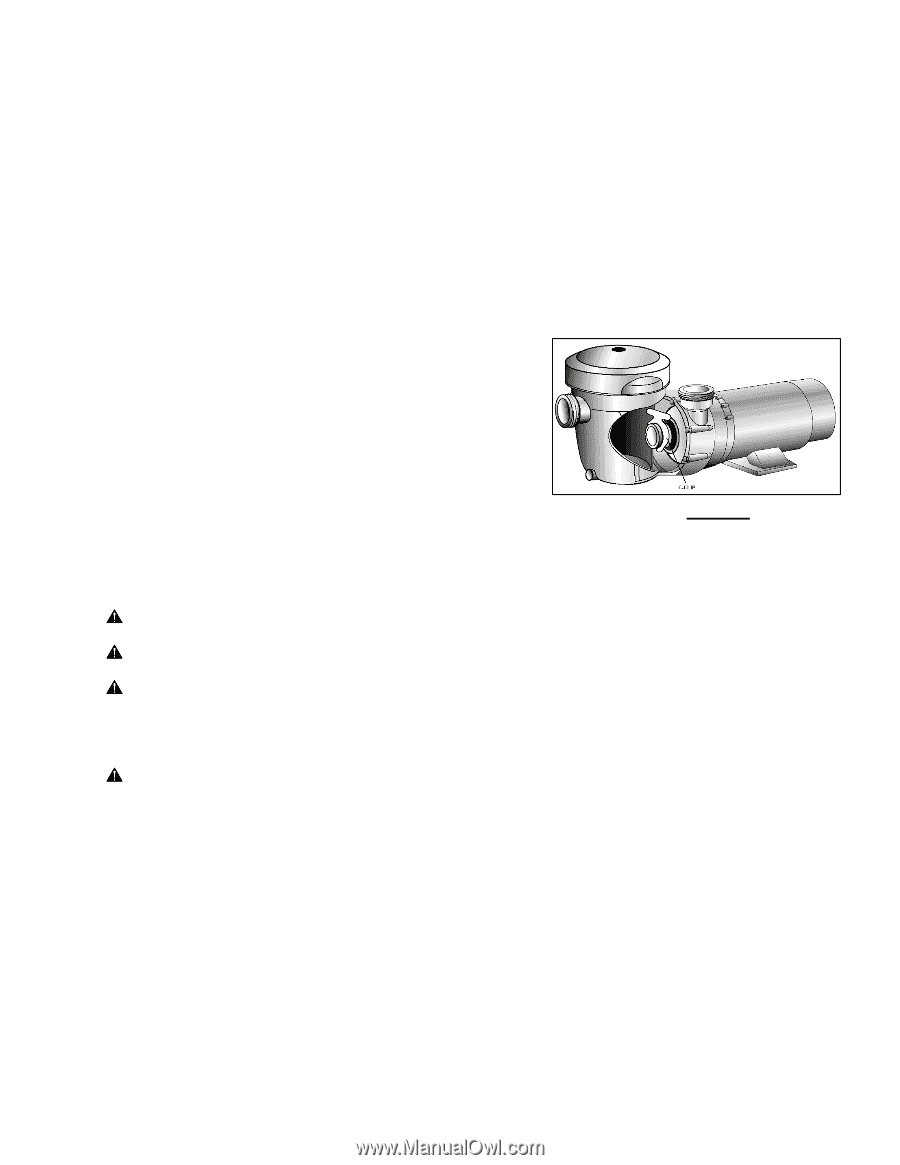
Wiring If other lights or appliances are also on the same circuit, be sure to add their amp loads before figuring wire and circuit breaker sizes. (NOTE: If unsure how to do this or if this is confusing, consult a licensed electrician). Use the load circuit breaker as the Master On-Off switch. NOTE: If you do not use conduit when wiring motor, be sure to seal wire opening on end of motor to prevent dirt, bugs, etc., from entering. New Installation - Start-Up & Operation Selecting Pump's Discharge Position (4 Steps) Your Hayward Power-Flo Matrix™ pump can be easily positioned for horizontal or vertical water discharge. Step 1: Remove ALL plumbing attached to pump. Remove pump from base (if applicable). Step 2: Remove strainer housing. Disengage and lift off strainer cover. Remove strainer basket. Lift up on strainer 'C' clip and remove. (See Fig. 1) Slide strainer housing forward and remove. Step 3: Press positioning button located on pump housing and rotate discharge port to desired position. (NOTE: Discharge port will only rotate ¼ turn.) Step 4: Assemble the pump by following the above directions in the reverse manner. Figure 1 Prior to Start-Up Fill strainer housing with water to suction pipe level. NEVER operate the pump without water. Water acts as a coolant and lubricant for the mechanical shaft seal. WARNING - NEVER run pump dry. Running pump dry may damage seals, causing leakage and flooding. Fill strainer housing with water before starting motor. CAUTION - Do NOT add chemicals to pool/spa system directly in front of pump suction. Adding undiluted chemicals may damage pump and voids warranty. CAUTION - Before removing strainer cover: 1. STOP PUMP before proceeding. 2. CLOSE VALVES in suction and outlet pipes. 3. RELEASE ALL PRESSURE from pump and piping system. WARNING - If pump is being pressure tested, be sure pressure has been released before removing strainer cover. Priming Pump Clean and lubricate strainer cover O-ring with "Jack's 327" each time it is removed. Clean and inspect O-ring; re-install on strainer cover. Replace strainer cover on strainer housing; turn clockwise to tighten cover. NOTE: Tighten strainer cover by hand only (no wrenches) ¼ turn. Open all valves before starting system. Release all air from filter and piping system. See filter owner's manual. With suction and outlet valves open and water source higher than the pump and flowing, pump will prime itself. If pump does NOT prime within ten minutes, stop motor and determine cause. Be sure all suction and discharge valves are open when pump is running. See Troubleshooting Guide. USE ONLY HAYWARD GENUINE REPLACEMENT PARTS 6
-
 1
1 -
 2
2 -
 3
3 -
 4
4 -
 5
5 -
 6
6 -
 7
7 -
 8
8 -
 9
9 -
 10
10 -
 11
11 -
 12
12
 |
 |