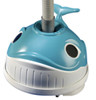
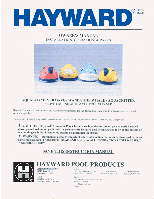
Hayward Wanda The Whale 500 - Page 4
Installation, Instructions
 |
View all Hayward Wanda The Whale manuals
Add to My Manuals
Save this manual to your list of manuals |
Page 4 highlights
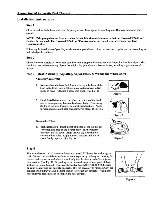
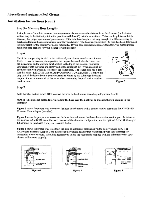
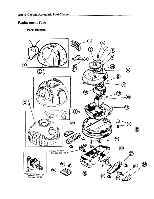
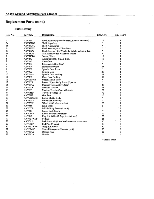
Above-Ground Automatic Pool Cleaners Installation Instructions Step 1 Clean or backwash the filter, and clean the pump strainer basket prior to installing your Hayward automatic pool cleaner. NOTE: If the pump does not have a strainer basket, it is absolutely necessary that the Hayward W560 Leaf Canister be installed. The Hayward W560 Leaf Canister can be purchased separately from your local Hayward dealer. Following the installation of your Hayward automatic pool cleaner, clean the system at regular intervals according to individual pool conditions. Step 2 Check the water chemistry. Make sure that the water is properly balanced and that the pool is free from algae. Also, check the pool and remove any objects that might clog your cleaner's bottom intake, including large amounts of leaves. Step 3 - Head Assembly (AquaBug, AquaCritter, & Wanda the Whale only) AquaBug/AquaCritter 1. Antenna Installation - Pull Antenna through the back of the head to the front. Align flat section of Antenna base to Key inside of head. Pull until it snaps into place. (See Fig. 1) Figure I 2. Head Installation - Insert the tab at the bottom of the head into its corresponding hole on the cleaner body. Then swing the top of the head forward. Align tab with top hole. Apply forward pressure until head snaps firmly in place. (See Fig. 2) lly Figure 2 Wanda the Whale I. Tall Installation - Insert the tab at the top of the tail into its corresponding hole on the cleaner body. Then swing the bottom of the tail down. Align the two (2) tabs with the corresponding holes. Apply forward pressure until the tail snaps firmly in place. (Sec Fig. 3) Figure 3 Step 4 There are eleven (II) 32" connector hoses and one (I) 32" leader hose with a gray cuff. Connect the special cleaner hose sections together by pushing and twisting the tapered male connector end of each hose firmly into the female end of the adjacent hose sections (See Fig. 4). Depending on the size and shape of your pool, all hose sections might not be used. However, the leader hose MUST ALWAYS be used or your cleaner will not operate properly. It is not necessary to "Bottom Out" the connections, but they MUST be tight enough to prevent any air leaks. Wetting the hose ends will make it easier to connect the hose sections. • Figure 4
-
 1
1 -
 2
2 -
 3
3 -
 4
4 -
 5
5 -
 6
6 -
 7
7 -
 8
8 -
 9
9 -
 10
10 -
11
 |
 |
