HP 1010 HP Fax 1010 series - (English) Setup Poster - Page 2
Fax Number, Fax Name
 |
UPC - 886111550548
View all HP 1010 manuals
Add to My Manuals
Save this manual to your list of manuals |
Page 2 highlights
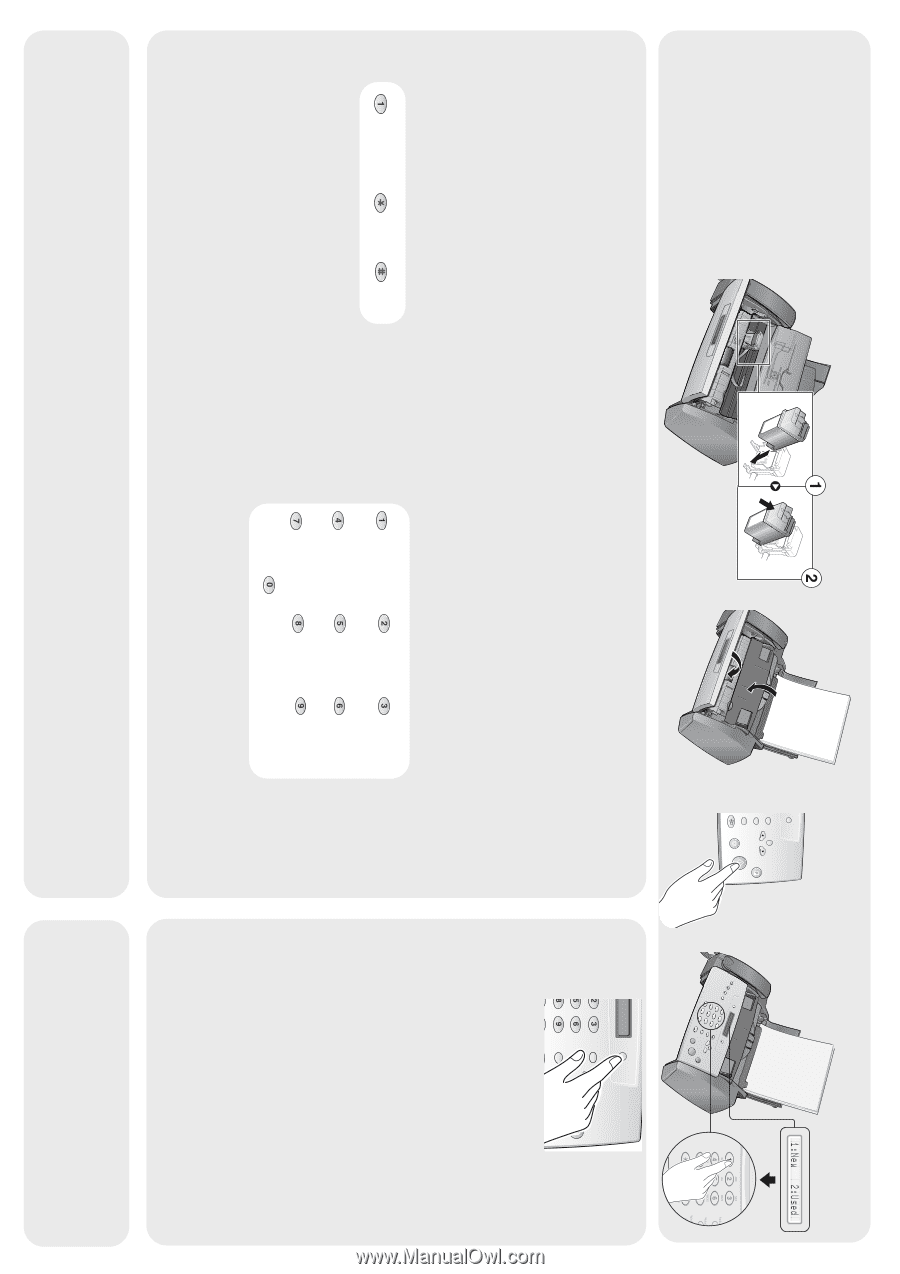
d Orient the copper area on the cartridge toward the back of the machine and click it in the carrier at a slight slant as shown. e Click! f Ans. Mode / Contrast Flash Menu Redial / Pause Mute / Search Loudspeaker Copy Scroll / Volume Start / Enter Cancel g 7 Setting the fax header (your name and fax number) is required by law in many countries. 1 Press Menu repeatedly until System ID displays. 2 Press Start/Enter. Fax Number will display. 3 Press Start/Enter. The cursor will blink for you to enter the number. To enter punctuation in the number use the keys labelled Fax Number below. 4 Enter the number and press Start/Enter. Fax Number Space 1 Space 1 ( ) - Fax Name will display. 5 Press Start/Enter. The cursor will blink for you to enter the name. To enter punctuation or other special characters in the name, use the keys labelled Fax Name below. 6 Enter the name and press Start/Enter. Fax Name Space 1 Space 1 GHI GHI4 ABC ABC2 DEF DEF3 JKL JKL5 MNO MNO6 PQRS PQRS7 TUV TUV8 WXYZ WXYZ9 0 8 ABC DEF JKL MNO TUV WXYZ Scroll / Volume Start / Enter Cancel Press the Ans.Mode/Contrast button to set the answer mode. • FAX Mode: To have the machine always answer as a fax. • TEL Mode: To have the machine always answer as a telephone where you must manually receive faxes. Go to Chapter 2 of the Basic Guide before selecting other Answer Modes. www.hp.com/support 9 Unless you selected TEL Mode in Step 8, review Chapter 2 of the Basic Guide.
-
 1
1 -
 2
2
 |
 |