HP 2133 HP Business Notebook PC - Getting Started Guide - Windows XP - Enhance - Page 15
Performing a recovery - windows 7 drivers
 |
UPC - 884420156444
View all HP 2133 manuals
Add to My Manuals
Save this manual to your list of manuals |
Page 15 highlights
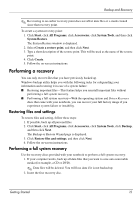
Backup and Recovery ✎ Recovering to an earlier recovery point does not affect data files or e-mails created since that recovery point. To create a system recovery point: 1. Click Start, click All Programs, click Accessories, click System Tools, and then click System Restore. The System Restore window is displayed. 2. Select Create a restore point, and then click Next. 3. Type a short description of the restore point. This will be used as the name of the restore point. 4. Click Create. 5. Follow the on-screen instructions. Performing a recovery You can only recover files that you have previously backed up. Windows backup utility helps you with the following tasks for safeguarding your information and restoring it in case of a system failure: ■ Restoring important files-This feature helps you reinstall important files without performing a full system recovery. ■ Performing a full system recovery-With the operating system and Driver Recovery discs that came with your notebook, you can recover your full factory image if you experience system failure or instability. Restoring files and settings To restore files and setting, follow these steps: 1. If possible, back up all personal files. 2. Click Start, click All Programs, click Accessories, click System Tools, click Backup, and then click Next. The Backup or Restore Wizard page is displayed. 3. Click Restore files and settings, and then click Next. 4. Follow the on-screen instructions. Performing a full system recovery Use the recovery discs provided with your notebook to perform a full system recovery: 1. If your computer works, back up all data files that you want to save onto removable media (for example, a CD or DVD). ✎ Data files will be deleted. You will lose data if it is not backed up. 2. Insert the first recovery disc. Getting Started 15
-
 1
1 -
2
-
3
-
4
-
5
-
6
-
7
-
8
-
9
-
 10
10 -
 11
11 -
 12
12 -
 13
13 -
 14
14 -
 15
15 -
 16
16
 |
 |
