HP 3000 HP StorageWorks 3000/5000 Enterprise Virtual Array connectivity 4.1A f - Page 6
HP StorageWorks Storage System Scripting Utility, Avoiding problem situations
 |
UPC - 829160972251
View all HP 3000 manuals
Add to My Manuals
Save this manual to your list of manuals |
Page 6 highlights
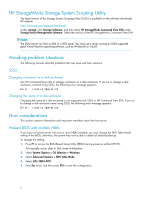
HP StorageWorks Storage System Scripting Utility The latest version of the Storage System Scripting Utility (SSSU) is available on the software downloads HP website: http://www.hp.com/support/downloads Under storage, click Storage Software, and then select HP StorageWorks Command View EVA under Storage Device Management Software. Select the version of the HP StorageWorks Command View EVA. NOTE: The SSSU cannot run from an ESX or a GSX server. You must use a server running an SSSU-supported guest Virtual Machine operating software, such as Windows® or Linux®. Avoiding problem situations The following sections describe problems that may arise and their solutions. SSSU Changing comments on a disk enclosure Use HP Command View EVA to change comments on a disk enclosure. If you try to change a disk enclosure comment using SSSU, the following error message appears: Error: Invalid Operation Changing the name of a disk enclosure Changing the name of a disk enclosure is not supported with SSSU or HP Command View EVA. If you try to change a disk enclosure name using SSSU, the following error message appears: Error: Invalid Operation Host considerations This section contains information and important reminders about the host server. ProLiant BIOS with multiple HBAs If you have a ProLiant server with one or more HBAs installed, you must change the MPS Table Mode setting in the BIOS; otherwise, the system may not be able to detect all attached devices. To change the setting: 1. Press F1 to access the ROM-Based Setup Utility (RBSU) during power-on self-test (POST). This typically occurs after 5i Disk Array initialization. 2. Select System Options > OS Selection > Windows. 3. Select Advanced Options > MPS Table Mode. 4. Select FULL TABLE APIC. 5. Press Esc twice, and then press F10 to save the configuration. 6
-
 1
1 -
 2
2 -
 3
3 -
 4
4 -
 5
5 -
 6
6
 |
 |
