HP 4200n HP q2429a, q2430a, q2436a, q2437a - Maintenance Kit - Page 9
Setzen Sie Fach 2 ein. Wenn keine optionalen
 |
UPC - 808736313971
View all HP 4200n manuals
Add to My Manuals
Save this manual to your list of manuals |
Page 9 highlights
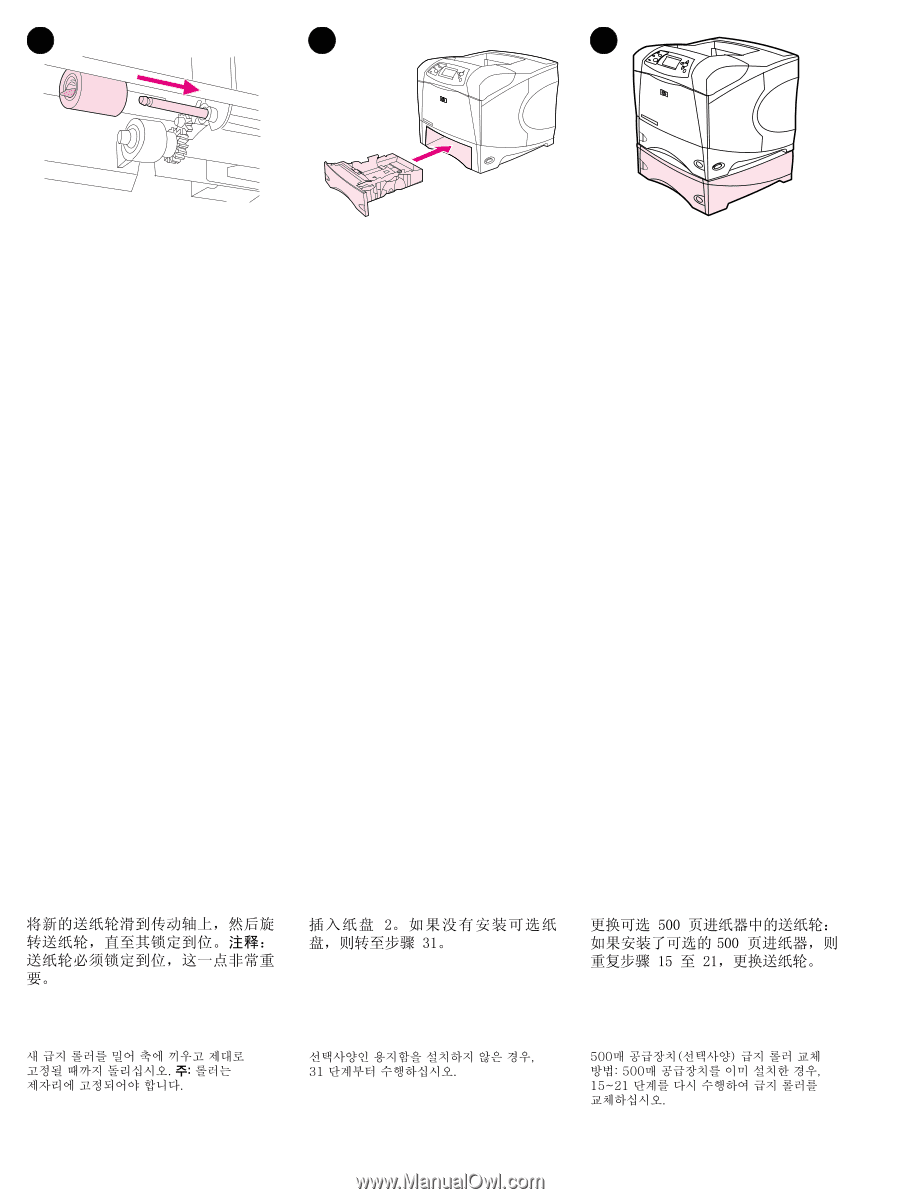
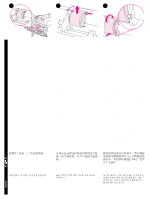
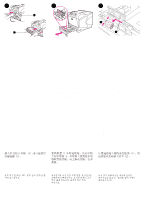
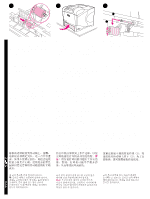
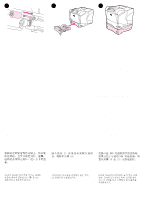
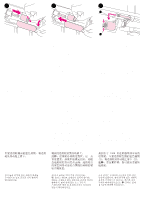
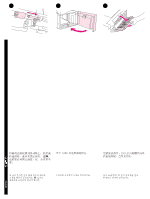
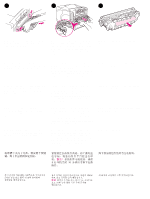
20 21 22 Slide a new feed roller onto the shaft and rotate the roller until it locks into place. Note: It is important that the roller locks into place. Insert tray 2. If no optional trays are installed, go to step 31. To replace the feed rollers in an optional 500-sheet feeder: If an optional 500-sheet feeder is installed, repeat steps 15 through 21 to replace the feed rollers. Faites glisser un nouveau rouleau d'alimentation sur l'axe. Faites-le pivoter jusqu'à ce qu'il s'enclenche. Remarque : Enclenchez bien le rouleau. Insérez le bac 2. Si aucun bac optionnel n'est installé, passez à l'étape 31. Pour remplacer les rouleaux d'alimentation d'un chargeur de papier optionnel de 500 feuilles : Si un chargeur optionnel de 500 feuilles est installé, répétez les étapes 15 à 21 pour remplacer les rouleaux d'alimentation. Schieben Sie die neue Zufuhrwalze auf die Welle, und drehen Sie sie, bis sie einrastet. Hinweis: Achten Sie darauf, dass die Walze einrastet. Setzen Sie Fach 2 ein. Wenn keine optionalen Fächer installiert sind, fahren Sie mit Schritt 31 fort. So tauschen Sie die Zufuhrwalzen im optionalen 500-Blatt-Zufuhrfach aus: Wenn dieses optionale Zufuhrfach angebracht ist, wiederholen Sie zum Austauschen der Zufuhrwalzen die Schritte 15 bis 21. Fare scorrere un nuovo rullo di alimentazione nell'asta e farlo ruotare fino a quando non scatta in posizione. Nota: è importante che il rullo sia ben inserito e bloccato. Inserire il vassoio 2. Qualora non fossero installati vassoi opzionali, passare alle istruzioni al punto 31. Per sostituire i rulli di alimentazione in un alimentatore opzionale da 500 fogli: se è già installato un alimentatore opzionale da 500 fogli, ripetere le istruzioni dai punti 15 a 21 riguardanti la sostituzione dei rulli di alimentazione. Coloque un nuevo rodillo de alimentación en el eje y gírelo hasta que encaje en su sitio. Nota: Es importante que el rodillo quede bien encajado en su sitio. Inserte la bandeja 2. Si no hay bandejas opcionales instaladas, vaya al paso 31. Para sustituir los rodillos alimentadores en un alimentador de 500 hojas opcional: Si hay instalado un alimentador de 500 hojas opcional, repita los pasos del 15 al 21 para sustituir los rodillos de alimentación. 8
-
 1
1 -
2
-
3
-
 4
4 -
 5
5 -
 6
6 -
 7
7 -
 8
8 -
 9
9 -
 10
10 -
 11
11 -
 12
12 -
 13
13 -
 14
14 -
15
-
16
-
17
-
18
-
19
-
20
 |
 |