HP 4300tn HP q2429a, q2430a, q2436a, q2437a - Maintenance Kit - Page 14
Instale la bandeja de salida posterior. Tire
 |
View all HP 4300tn manuals
Add to My Manuals
Save this manual to your list of manuals |
Page 14 highlights
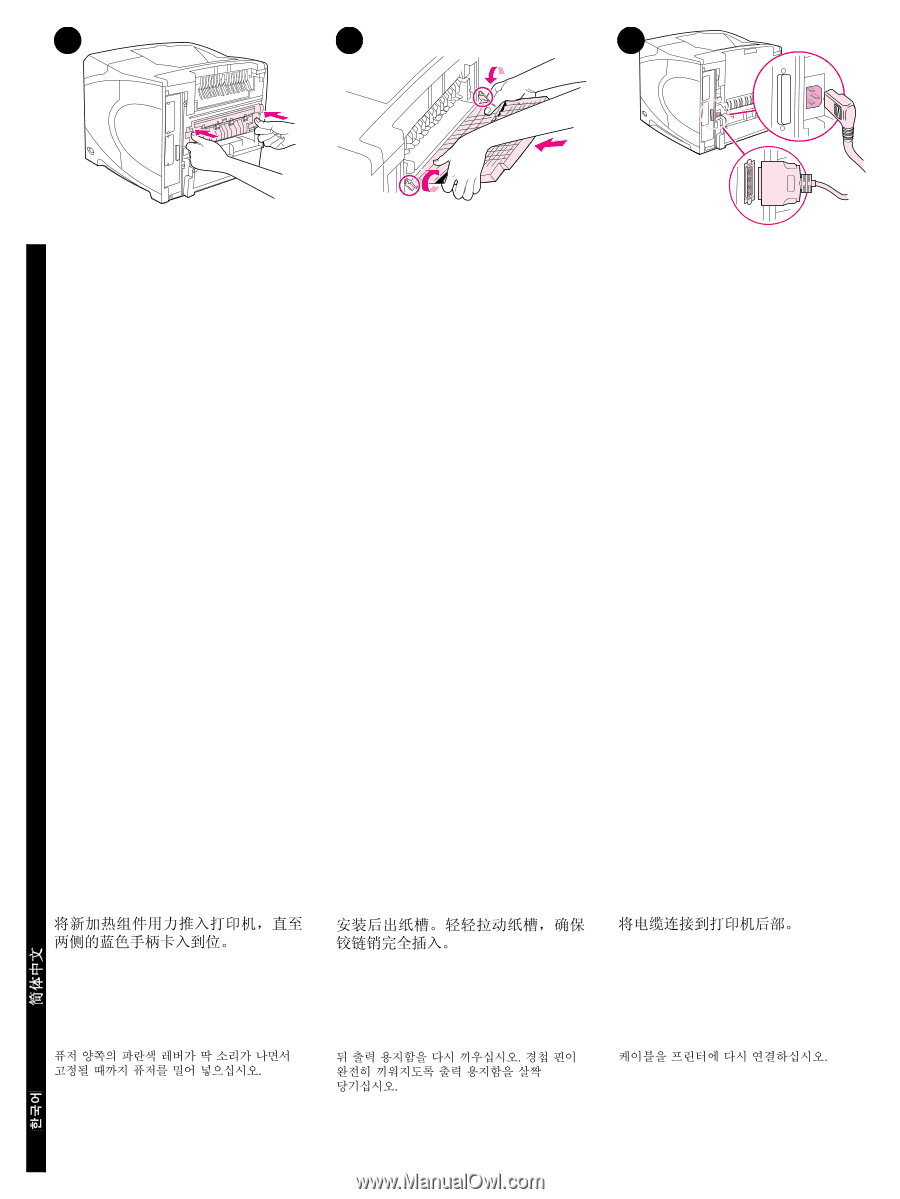
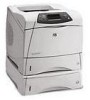
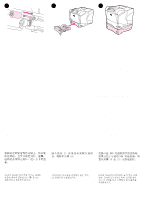
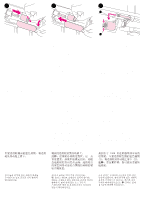
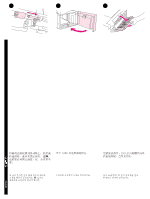
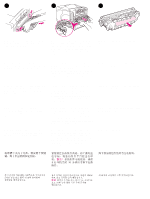
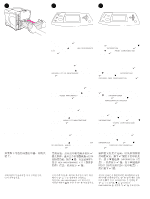
English Français 35 36 37 Push the new fuser firmly into the printer until the blue levers on both sides click into place. Install the rear output bin. Pull gently on the bin to make sure that the hinge pins are fully inserted. Connect the cables to the rear of the printer. Enfoncez fermement la nouvelle unité de fusion dans l'imprimante jusqu'à ce que les leviers bleus latéraux s'enclenchent. Installez le bac de sortie arrière. Tirez doucement sur le bac pour vérifier que les broches de charnière sont complètement insérées. Branchez les câbles à l'arrière de l'imprimante. Schieben Sie die neue Fixiereinheit fest in den Drucker, bis die blauen Hebel auf beiden Seiten einrasten. Setzen Sie das hintere Ausgabefach ein. Stellen Sie sicher, dass die Scharnierstifte vollständig eingeführt sind, indem Sie vorsichtig am Fach ziehen. Schließen Sie die Kabel an der Rückseite des Druckers an. Spingere la nuova unità di fusione saldamente nella stampante fino a quando le leve blu su entrambi i lati non scattano in posizione. Installare lo scomparto di output posteriore. Tirare delicatamente lo scomparto per accertarsi che i piedini siano inseriti completamente. Collegare tutti i cavi al retro della stampante. Introduzca el nuevo fusor en la impresora con firmeza hasta que las palancas azules que tiene a cada lado encajen en su sitio con un clic. Instale la bandeja de salida posterior. Tire suavemente de la bandeja para asegurarse de que las bisagras están correctamente encajadas. Conecte todos los cables de la parte posterior de la impresora. Deutsch Italiano Español 13
-
 1
1 -
2
-
3
-
4
-
5
-
6
-
7
-
8
-
 9
9 -
 10
10 -
 11
11 -
 12
12 -
 13
13 -
 14
14 -
 15
15 -
 16
16 -
 17
17 -
 18
18 -
 19
19 -
20
 |
 |