HP 4315 Setup Guide
HP 4315 - Officejet All-in-One Color Inkjet Manual
 |
View all HP 4315 manuals
Add to My Manuals
Save this manual to your list of manuals |
HP 4315 manual content summary:
- HP 4315 | Setup Guide - Page 1
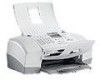
on the inside of the device. 3 Locate components Windows CD print cartridges Mac CD HP Officejet 4300 All-in-One series User Guide User Guide phone cord power cord and adapter * HP Officejet 4300 All-in-One series Setup Guide control panel faceplate (may be attached) *Purchased separately - HP 4315 | Setup Guide - Page 2
even with the device, and that all buttons come through the b holes in the faceplate. The control panel faceplate must be attached for the HP All-in-One to work! 6 Load paper Load plain white paper into the bottom tray. Do not force paper too far into the input tray, or it - HP 4315 | Setup Guide - Page 3
the User Guide if you want to use your own phone cord or if you have any of these features: • DSL • VoIP/FoIP HP Officejet 4300 All-in-One series User Guide • ISDN • Voice mail • Distinctive ring After you press the On button, wait for the print cartridge prompt before continuing. HP All-in - HP 4315 | Setup Guide - Page 4
12 Insert the tri-color print cartridge a b CAUTION: The device must be On before you can insert the print cartridges. a Slide the tri-color print cartridge into the left slot as shown. b Push the top part of the cartridge firmly up and into the slot until it snaps into place. 4 • HP All-in-One - HP 4315 | Setup Guide - Page 5
until it snaps into place. c Make sure both cartridges are secure. Close the print cartridge door. 14 Align the print cartridges a OK b a Press OK to print the alignment c. d Press OK to scan the alignment page. After the page has scanned, alignment is complete. c d OK HP All-in-One • 5 - HP 4315 | Setup Guide - Page 6
the desktop to appear. b Close any open programs. 16 Insert the correct CD Windows Users: Mac Users: a Insert the green HP All-in-One Windows CD. b Follow the onscreen instructions to install the software. c On the Connection Type screen, make sure to select directly to this computer. Continue - HP 4315 | Setup Guide - Page 7
the USB cable to the port on the back of the HP All-in-One, and then to any USB port on your computer. c Follow the onscreen instructions. Complete the Fax Setup Wizard and Sign Up Now screens. After you complete software installation, you are finished. a Mac Users: a Connect the USB cable from - HP 4315 | Setup Guide - Page 8
to Steps 5 and 17. To access the HP Photosmart Software help on a Windows computer: 1 In the HP Solution Center, click the tab for your HP All-in-One. 2 In the Device Support area, click Onscreen Guide or Troubleshooting. To access the HP Photosmart Software Help on a Mac: 1 From the Finder Help
-
 1
1 -
 2
2 -
 3
3 -
 4
4 -
 5
5 -
 6
6 -
 7
7 -
8
 |
 |

1
2
3
*Purchased separately.
The contents of your box
may differ.
*
Start Here
IMPORTANT:
To ensure that the software is
installed correctly, do not connect the USB
cable until step 17.
Make sure to remove all tape and
cardboard on the inside of the
device.
Remove tape and cardboard
Locate components
Follow the steps in order. If you have problems during setup, see
Troubleshooting
in the last section. Your
device might be different from the illustrations in this guide.
HP Officejet 4300 All-in-One series Setup Guide
control panel faceplate
(may be attached)
Windows CD
Mac CD
User Guide
print cartridges
power cord
and adapter
phone cord
a
b
HP Officejet 4300 All-in-One series
User Guide