HP 4315 Setup Guide - Page 2
Unfold paper trays, Attach the control panel faceplate if not attached, Load paper - paper jam
 |
View all HP 4315 manuals
Add to My Manuals
Save this manual to your list of manuals |
Page 2 highlights
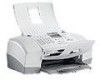
4 Unfold paper trays a b c 5 Attach the control panel faceplate (if not attached) a a Fit the faceplate tabs into the slots on top of the device. b Rotate the faceplate down. Then firmly press down on the front corners until they both snap into place. IMPORTANT: Make sure that all edges are even with the device, and that all buttons come through the b holes in the faceplate. The control panel faceplate must be attached for the HP All-in-One to work! 6 Load paper Load plain white paper into the bottom tray. Do not force paper too far into the input tray, or it might cause a paper jam. 2 • HP All-in-One
-
 1
1 -
 2
2 -
 3
3 -
 4
4 -
 5
5 -
 6
6 -
 7
7 -
 8
8
 |
 |

2 • HP All-in-One
5
4
Unfold paper trays
Attach the control panel faceplate (if not attached)
IMPORTANT:
Make sure that all edges are even with
the device, and that all buttons come through the
holes in the faceplate.
The control panel faceplate must be attached for the
HP All-in-One to work!
a
Fit the faceplate
tabs
into the
slots
on top of the
device.
b
Rotate the faceplate down. Then
firmly press
down
on the
front corners
until they both
snap into place
.
6
Load paper
Load plain white paper into the bottom tray.
Do not force paper too far into the input tray, or it
might cause a paper jam.
a
b
c
a
b