HP 5500dn HP Designjet 5500 series printers - Quick Reference Pocket Guide - Page 79
printhead installation
 |
View all HP 5500dn manuals
Add to My Manuals
Save this manual to your list of manuals |
Page 79 highlights
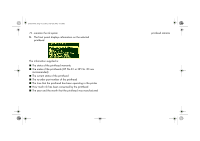
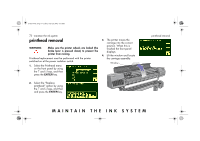
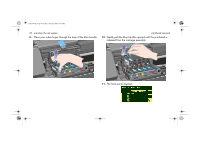
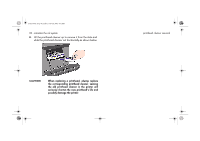
pocket.book Page 77 Friday, June 28, 2002 4:31 PM 77 - maintain the ink system printhead installation 1. If the printhead is new: I Remove the blue protective cap by pulling down on it. I Remove the clear protective tape from the printhead's nozzles by pulling on the paper tab. printhead installation 2. Insert the new printhead into the correct carriage assembly position. Blue protective cap The printhead is designed to prevent you from accidentally inserting it into the wrong position. Check that the colored label on the printhead matches the colored label of the carriage assembly position into which the printhead is to be inserted. MAINTAIN THE INK SYSTEM
-
 1
1 -
2
-
3
-
4
-
5
-
6
-
7
-
8
-
9
-
10
-
11
-
12
-
13
-
14
-
15
-
16
-
17
-
18
-
19
-
20
-
21
-
22
-
23
-
24
-
25
-
26
-
27
-
28
-
29
-
30
-
31
-
32
-
33
-
34
-
35
-
36
-
37
-
38
-
39
-
40
-
41
-
42
-
43
-
44
-
45
-
46
-
47
-
48
-
49
-
50
-
51
-
52
-
53
-
54
-
55
-
56
-
57
-
58
-
59
-
60
-
61
-
62
-
63
-
64
-
65
-
66
-
67
-
68
-
69
-
70
-
71
-
72
-
73
-
 74
74 -
 75
75 -
 76
76 -
 77
77 -
 78
78 -
 79
79 -
 80
80 -
 81
81 -
 82
82 -
 83
83 -
 84
84 -
85
-
86
-
87
-
88
-
89
-
90
-
91
-
92
-
93
-
94
-
95
-
96
-
97
-
98
-
99
-
100
-
101
-
102
-
103
-
104
-
105
-
106
-
107
-
108
-
109
-
110
-
111
-
112
-
113
-
114
-
115
-
116
-
117
-
118
-
119
-
120
-
121
-
122
-
123
-
124
-
125
-
126
-
127
-
128
-
129
-
130
-
131
-
132
-
133
-
134
-
135
-
136
-
137
-
138
-
139
-
140
-
141
-
142
-
143
-
144
-
145
-
146
-
147
-
148
-
149
-
150
-
151
-
152
-
153
-
154
-
155
-
156
-
157
-
158
-
159
-
160
-
161
-
162
-
163
-
164
-
165
-
166
-
167
-
168
-
169
-
170
-
171
-
172
-
173
-
174
-
175
-
176
-
177
-
178
-
179
-
180
-
181
-
182
-
183
-
184
-
185
-
186
-
187
-
188
-
189
-
190
-
191
-
192
-
193
-
194
-
195
-
196
-
197
-
198
-
199
-
200
-
201
-
202
-
203
-
204
-
205
-
206
-
207
-
208
-
209
-
210
 |
 |

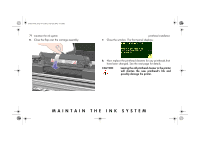
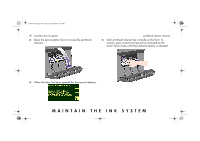
MAINTAIN THE INK SYSTEM
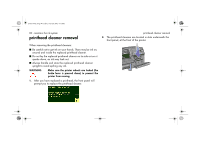
77 - maintain the ink system
printhead installation
printhead installation
1.
If the printhead is new:
■
Remove the blue protective cap by pulling down on it.
■
Remove the clear protective tape from the printhead
’
s nozzles
by pulling on the paper tab.
The printhead is designed to prevent you from accidentally
inserting it into the wrong position. Check that the colored label
on the printhead matches the colored label of the carriage
assembly position into which the printhead is to be inserted.
2.
Insert the new printhead into the correct carriage assembly
position.
Blue
protective
cap
pocket.book
Page 77
Friday, June 28, 2002
4:31 PM