HP 70 HP StorageWorks 70 Modular Smart Array Enclosure setup poster (434894-00 - Page 2
Cabling, Powering up, segment display board, Updating firmware, Additional information - modular smart array
 |
View all HP 70 manuals
Add to My Manuals
Save this manual to your list of manuals |
Page 2 highlights
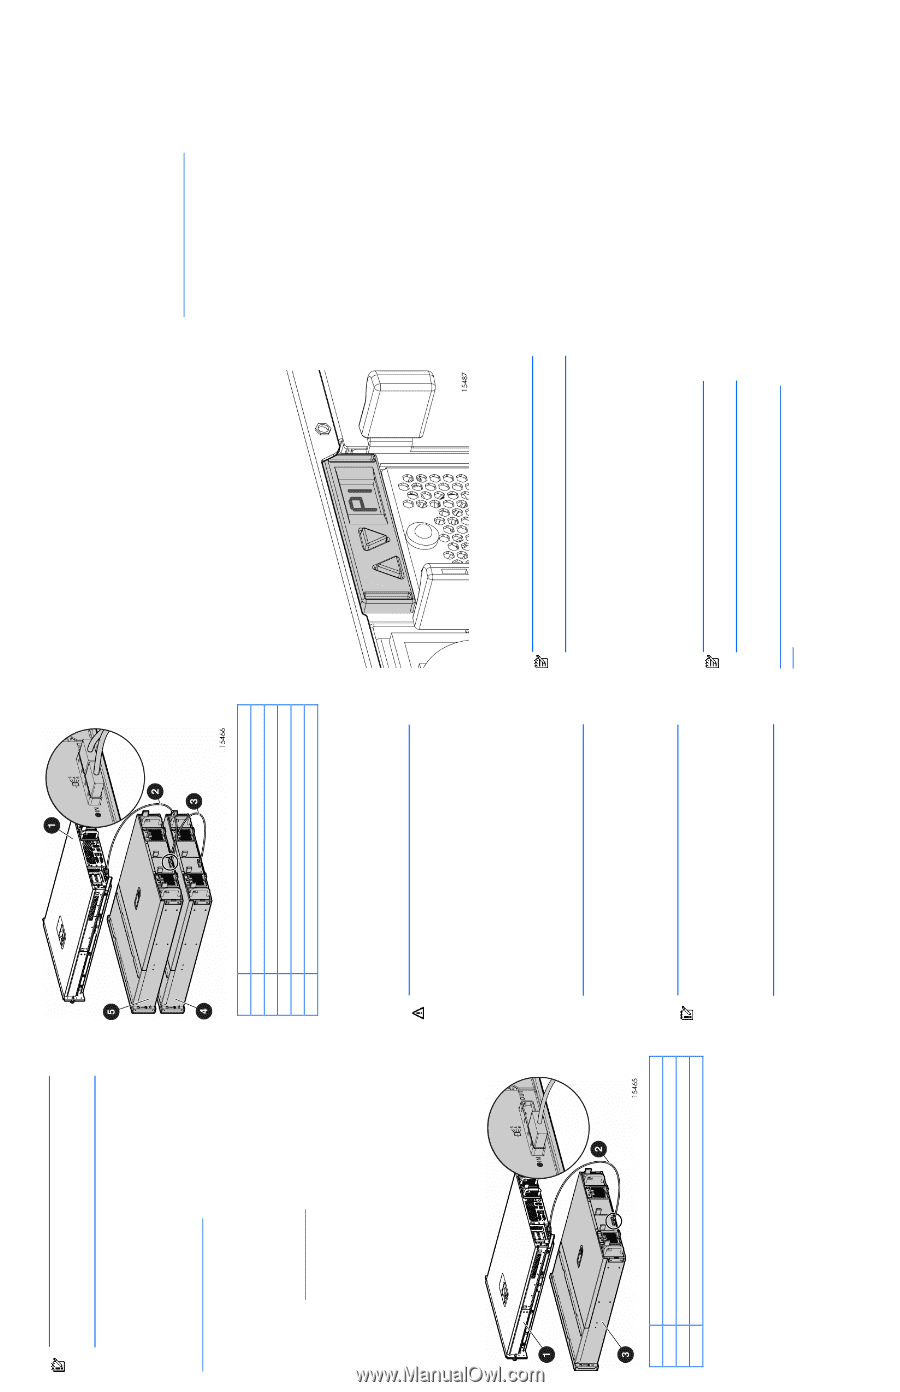
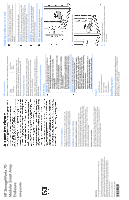
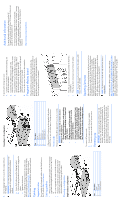
5. Use the shipping bracket to secure the storage enclosure for shipping: IMPORTANT: Use of the shipping bracket is required only when the rack is shipped with the MSA70 Enclosure installed. a. Loosen the thumbscrew on the shipping bracket. b. Slide the shipping bracket forward until it engages the chassis. c. Tighten the thumbscrew. If you are installing the storage enclosure into a telco rack, order the appropriate option kit at the RackSolutions website: http://www.racksolutions.com/hp. Follow the enclosurespecific instructions on the website to install the rack brackets. Cabling Supported cables For a complete list of supported cables, see the QuickSpecs on the HP website: http://www.hp.com. Cabling guidelines • Always use the shortest cables possible. The the maximum supported cable length between SAS ports is 6 M (19.59 ft) • Only use supported SAS cables with 3-Gb connectors. • Always be sure that the servers attached to the MSA enclosure are powered down and power cords are disconnected before connecting SAS cables. Choosing a configuration Single-enclosure configuration Item Description 1 Server 2 SAS cable 3 MSA Enclosure Cascading (1+1) configuration Item Description 1 Server 2 SAS cable 3 SAS cable 4 MSA Enclosure 1 5 MSA Enclosure 2 * Only an MSA70 enclosure can be cascaded with another MSA70. Do not mix with other types of storage enclosures. Power cords The power cord should be approved for use in your country. WARNING! To reduce the risk of electric shock or damage to the equipment: • Do not disable the power cord grounding plug. The grounding plug is an important safety feature. • Plug the power cord into a grounded (earthed) electrical outlet that is easily accessible at all times. • Do not route the power cord where it can be walked on or pinched by items placed against it. Pay particular attention to the plug, electrical outlet, and the point where the cord extends from the storage system. To connect AC power cords: 1. Connect the power cords to the power supplies. 2. Connect the power cords to the AC power source. Powering up IMPORTANT: Always power up the enclosure first, and then the server. This ensures that the servers, during their discovery, see the enclosure as an operational device. If you do not power up the enclosure before powering up the servers, you will need to power down the servers, ensure that the enclosure is powered up, and then power back up the servers. To power up the storage enclosure: 1. Complete server hardware installation and cabling. See the server documentation. 2. Connect the SAS cables and power cords to the enclosure. See "Choosing a configuration" on this poster. 3. Press and hold the Power On/Standby button. Wait and observe the system power LED and fan modules. When the enclosure powers up, the system power LED illuminates solid green and the fans spin to a high speed, and then spin down to a low speed. 4. Power up the servers. See the server documentation. 7-segment display board When the MSA70 is connected to the host controller, the controller automatically assigns the port and box ID numbers to the enclosure. The 7-segment display board allows you to identify the port and box ID number assigned to the MSA70. See the user guide for more information. Additional information For more information about this product, see the HP StorageWorks Modular Smart Array 70 Storage Enclosure user guide on the Documentation CD. To receive proactive support alerts (such as Customer Advisories), as well as updates on drivers, software, firmware, and customer replaceable components, proactively via e-mail through HP Subscriber's Choice. Sign up for Subscriber's Choice at: http://www.hp.com/go/myadvisory. • Press the up arrow key to view the port that the MSA70 is connected to. • Press the up down arrow key to view the box ID number. NOTE: You can also view the port and box ID numbers within ACU, HP SIM, and ADU. Updating firmware After installing hardware and powering up the enclosure for the first time, be sure to verify that the host controller, the enclosure, and hard drives have the latest firmware. You can identify which firmware versions you have for the host controller, the MSA70, and the installed hard drives through HP SIM and ACU. ADU allows you to view the firmware versions for the host controller and hard drives, but not the MSA70. NOTE: The firmware for both SAS and SATA hard drives is upgradeable. For firmware and software updates, see the HP website: http://h18004.www1.hp.com/support/files/storage/us/index .html. You can also update the firmware on the server, controller, enclosure, and hard drives using Smart Components. See "Smart Components for ROM Flash" in the user guide.
-
 1
1 -
 2
2
 |
 |