HP 8750 User's Guide - Page 21
Basic printing from a computer - photosmart driver download
 |
UPC - 829160741741
View all HP 8750 manuals
Add to My Manuals
Save this manual to your list of manuals |
Page 21 highlights
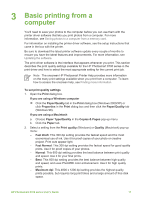
3 Basic printing from a computer You'll need to save your photos to the computer before you can use them with the printer driver software that lets you print photos from a computer. For more information, see Saving photos to a computer from a memory card. For information on installing the printer driver software, see the setup instructions that came in the box with the printer. Be sure to download the latest printer software update every couple of months to ensure you have the latest features and improvements. For more information, see Updating the software. The print driver software is the interface that appears whenever you print. This section describes the print quality settings available for the HP Photosmart 8700 series in the print driver and how to select the most appropriate setting for the current print job. Note The onscreen HP Photosmart Printer Help provides more information on the many print settings available when you print from a computer. To learn how to access the onscreen help, see Finding more information. To set print quality settings 1. Open the Print dialog box. If you are using a Windows computer ➔ Click the Paper/Quality tab in the Print dialog box (Windows 2000/XP) or click Properties in the Print dialog box and then click the Paper/Quality tab (Windows 98). If you are using a Macintosh a. Choose Paper Type/Quality in the Copies & Pages pop-up menu. b. Click the Paper tab. 2. Select a setting from the Print quality (Windows) or Quality (Macintosh) pop-up menu: - Fast Draft: This 300 dpi setting provides the fastest speed and the most economical use of ink. Use it for proof copies of your photo or creative project. Print outs appear light. - Fast Normal: This 300 dpi setting provides the fastest speed for good quality prints. Use it for proof copies of your photos. - Normal: This 600 dpi setting provides the best balance between print quality and speed. Use it for your final prints. - Best: This 600 dpi setting provides the best balance between high quality and speed, and uses PhotoREt color enhancement. Use it for high quality prints. - Maximum dpi: This 4800 x 1200 dpi setting provides the highest quality prints possible, but requires long print times and a large amount of free disk space. HP Photosmart 8700 series User's Guide 17
-
 1
1 -
2
-
3
-
4
-
5
-
6
-
7
-
8
-
9
-
10
-
11
-
12
-
13
-
14
-
15
-
 16
16 -
 17
17 -
 18
18 -
 19
19 -
 20
20 -
 21
21 -
 22
22 -
 23
23 -
 24
24 -
 25
25 -
 26
26 -
27
-
28
-
29
-
30
-
31
-
32
-
33
-
34
-
35
-
36
-
37
-
38
-
39
-
40
-
41
-
42
-
43
-
44
-
45
-
46
-
47
-
48
-
49
-
50
-
51
-
52
-
53
-
54
-
55
-
56
-
57
-
58
-
59
-
60
-
61
-
62
-
63
-
64
-
65
-
66
-
67
-
68
-
69
-
70
-
71
-
72
-
73
-
74
-
75
-
76
-
77
-
78
-
79
-
80
-
81
-
82
-
83
 |
 |