HP A1224n Getting Started Guide - Page 93
Creating a Video Project with the Direct-to-Disc Wizards
 |
View all HP A1224n manuals
Add to My Manuals
Save this manual to your list of manuals |
Page 93 highlights
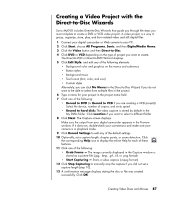
Creating a Video Project with the Direct-to-Disc Wizards Sonic MyDVD includes Direct-to-Disc Wizards that guide you through the steps you must complete to create a DVD or VCD video project. A video project is a way to group, organize, store, play, and burn related video and still digital files. 1 Connect your digital camcorder or Web camera to your PC. 2 Click Start, choose All Programs, Sonic, and then DigitalMedia Home. 3 Click the Video button and then Direct-to-Disc. 4 Click DVD or VCD depending on the type of project you want to create. The Direct-to-VCD or Direct-to-DVD Wizard displays. 5 Click Edit Style, and edit any of the following elements: • Background color and graphics on the menus and submenus • Button styles • Background music • Text format (font, color, and size) • Custom styles Alternately, you can click No Menus in the Direct-to-Disc Wizard if you do not want to be able to select from multiple files in the project. 6 Type a name for your project in the project name field. 7 Click one of the following: • Record to DVD (or Record to VCD if you are creating a VCD project): Select the device, number of copies, and write speed. • Record to hard disk: The video capture is stored by default in the My DVDs folder. Click Location if you want to select a different folder. 8 Click Next. The Capture screen displays. Make sure the output from your digital camcorder appears in the Preview window. If it does not, double-check your connections and make sure your camera is in playback mode. 9 Click Record Settings to edit any of the default settings. 10 Optionally, set a capture length, chapter points, or scene detection. Click the corresponding Help icon to display the online Help for each of these features. 11 Click one of the following: • Grab Frame - The image currently displayed in the Capture window is stored as a picture file (.jpg, .bmp, .gif, .tif, or .png format). • Start Capturing - Starts a video capture (.mpeg format). 12 Click Stop Capturing to manually stop the capture if you did not set a capture length (step 10). 13 A confirmation message displays stating the disc or file was created successfully. Click OK. Creating Video Discs and Movies 87
-
 1
1 -
2
-
3
-
4
-
5
-
6
-
7
-
8
-
9
-
10
-
11
-
12
-
13
-
14
-
15
-
16
-
17
-
18
-
19
-
20
-
21
-
22
-
23
-
24
-
25
-
26
-
27
-
28
-
29
-
30
-
31
-
32
-
33
-
34
-
35
-
36
-
37
-
38
-
39
-
40
-
41
-
42
-
43
-
44
-
45
-
46
-
47
-
48
-
49
-
50
-
51
-
52
-
53
-
54
-
55
-
56
-
57
-
58
-
59
-
60
-
61
-
62
-
63
-
64
-
65
-
66
-
67
-
68
-
69
-
70
-
71
-
72
-
73
-
74
-
75
-
76
-
77
-
78
-
79
-
80
-
81
-
82
-
83
-
84
-
85
-
86
-
87
-
 88
88 -
 89
89 -
 90
90 -
 91
91 -
 92
92 -
 93
93 -
 94
94 -
 95
95 -
 96
96 -
 97
97 -
 98
98 -
99
-
100
-
101
-
102
-
103
-
104
-
105
-
106
-
107
-
108
-
109
-
110
-
111
-
112
-
113
-
114
-
115
-
116
-
117
-
118
-
119
-
120
 |
 |