HP A6419fh Getting Started - Page 186
Recording the movie project to disc, muveeShare, Rename, Move up, Move down, Select all, trash can
 |
UPC - 883585760572
View all HP A6419fh manuals
Add to My Manuals
Save this manual to your list of manuals |
Page 186 highlights
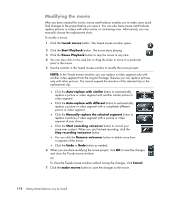
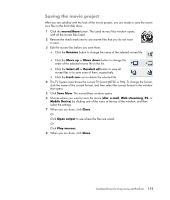
Recording the movie project to disc To create a DVD, VCD, or SVCD disc of the movie project: 1 Click the muveeShare button. The Listed muvee files window opens with all the muvee files listed. 2 Remove the check mark next to any muvee files that you do not want to save. 3 Edit the muvee files before you save them: Click the Rename button to change the name of the selected muvee file. Click the Move up or Move down button to change the order of the selected muvee file in the list. Click the Select all or Deselect all button to save all muvee files or to save none of the muvee files, respectively. Click the trash can icon to delete the selected file. 4 Click the disc icon to create copies of all of the picture and video files that are used to create the muvee file. 5 The TV System area shows the current TV format (NTSC or PAL). To change the format, click the name of the current format, and then select the correct format in the window that opens. 6 Under Disc title, type a title for the disc. 7 Select the disc menu theme in the drop-down list. You can preview the different themes in the window. 8 Select the CD or DVD burner drive in the drop-down list. 9 Click Burn Now. 10 Select the type of video disc that you want to create: DVD, VCD, or SVCD. The window shows the disc capacity, the disc capacity used, and available disc space. 11 If you want to create more than one disc of the same muvee file: a Click a number next to Number of copies, and then click OK. b Select the number of copies to record, and then click OK. 12 Insert a disc into the DVD recording drive. 13 Click Burn Now to start recording the movie to disc. NOTE: For best disc quality, it is recommended that you not perform other computer tasks while the movie is being recorded to disc. Or To save the current settings for future use, click Burn Later. 14 When the recording is complete, click OK. 15 Click Close. 176 Getting Started (features vary by model)
-
 1
1 -
2
-
3
-
4
-
5
-
6
-
7
-
8
-
9
-
10
-
11
-
12
-
13
-
14
-
15
-
16
-
17
-
18
-
19
-
20
-
21
-
22
-
23
-
24
-
25
-
26
-
27
-
28
-
29
-
30
-
31
-
32
-
33
-
34
-
35
-
36
-
37
-
38
-
39
-
40
-
41
-
42
-
43
-
44
-
45
-
46
-
47
-
48
-
49
-
50
-
51
-
52
-
53
-
54
-
55
-
56
-
57
-
58
-
59
-
60
-
61
-
62
-
63
-
64
-
65
-
66
-
67
-
68
-
69
-
70
-
71
-
72
-
73
-
74
-
75
-
76
-
77
-
78
-
79
-
80
-
81
-
82
-
83
-
84
-
85
-
86
-
87
-
88
-
89
-
90
-
91
-
92
-
93
-
94
-
95
-
96
-
97
-
98
-
99
-
100
-
101
-
102
-
103
-
104
-
105
-
106
-
107
-
108
-
109
-
110
-
111
-
112
-
113
-
114
-
115
-
116
-
117
-
118
-
119
-
120
-
121
-
122
-
123
-
124
-
125
-
126
-
127
-
128
-
129
-
130
-
131
-
132
-
133
-
134
-
135
-
136
-
137
-
138
-
139
-
140
-
141
-
142
-
143
-
144
-
145
-
146
-
147
-
148
-
149
-
150
-
151
-
152
-
153
-
154
-
155
-
156
-
157
-
158
-
159
-
160
-
161
-
162
-
163
-
164
-
165
-
166
-
167
-
168
-
169
-
170
-
171
-
172
-
173
-
174
-
175
-
176
-
177
-
178
-
179
-
180
-
 181
181 -
 182
182 -
 183
183 -
 184
184 -
 185
185 -
 186
186 -
 187
187 -
 188
188 -
 189
189 -
 190
190 -
 191
191 -
192
-
193
-
194
-
195
-
196
-
197
-
198
-
199
-
200
-
201
-
202
-
203
-
204
-
205
-
206
-
207
-
208
-
209
-
210
-
211
-
212
-
213
-
214
-
215
-
216
 |
 |
