HP A6500f Getting Started - Page 158
Making a LightScribe label by using CyberLink LabelPrint, CyberLink DVD Suite
 |
UPC - 883585957347
View all HP A6500f manuals
Add to My Manuals
Save this manual to your list of manuals |
Page 158 highlights
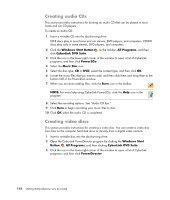
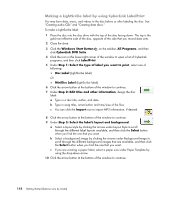
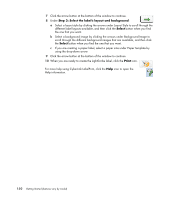
Making a LightScribe label by using CyberLink LabelPrint You may burn data, music, and videos to the disc before or after labeling the disc. See "Creating audio CDs" and "Creating data discs." To make a LightScribe label: 1 Place the disc into the disc drive with the top of the disc facing down. The top is the gold non-reflective side of the disc, opposite of the side that you record data onto. 2 Close the drive. 3 Click the Windows Start Button on the taskbar, All Programs, and then click CyberLink DVD Suite. 4 Click the icon in the lower-right corner of the window to open a list of CyberLink programs, and then click LabelPrint. 5 Under Step 1: Select the type of label you want to print, select one of following: Disc Label (LightScribe label) Or MiniDisc Label (LightScribe label) 6 Click the arrow button at the bottom of the window to continue. 7 Under Step 2: Edit titles and other information, design the disc label: a Type in a disc title, author, and date. b Type in song titles, artist/author and time/size of the files. c You can click the Import icon to import MP3 information, if desired. 8 Click the arrow button at the bottom of the window to continue. 9 Under Step 3: Select the label's layout and background: a Select a layout style by clicking the arrows under Layout Style to scroll through the different label layouts available, and then click the Select button when you find the one that you want. b Select a background image by clicking the arrows under Background Image to scroll through the different background images that are available, and then click the Select button when you find the one that you want. c If you are creating a paper label, select a paper size under Paper Template by using the drop-down arrow. 10 Click the arrow button at the bottom of the window to continue. 148 Getting Started (features vary by model)
-
 1
1 -
2
-
3
-
4
-
5
-
6
-
7
-
8
-
9
-
10
-
11
-
12
-
13
-
14
-
15
-
16
-
17
-
18
-
19
-
20
-
21
-
22
-
23
-
24
-
25
-
26
-
27
-
28
-
29
-
30
-
31
-
32
-
33
-
34
-
35
-
36
-
37
-
38
-
39
-
40
-
41
-
42
-
43
-
44
-
45
-
46
-
47
-
48
-
49
-
50
-
51
-
52
-
53
-
54
-
55
-
56
-
57
-
58
-
59
-
60
-
61
-
62
-
63
-
64
-
65
-
66
-
67
-
68
-
69
-
70
-
71
-
72
-
73
-
74
-
75
-
76
-
77
-
78
-
79
-
80
-
81
-
82
-
83
-
84
-
85
-
86
-
87
-
88
-
89
-
90
-
91
-
92
-
93
-
94
-
95
-
96
-
97
-
98
-
99
-
100
-
101
-
102
-
103
-
104
-
105
-
106
-
107
-
108
-
109
-
110
-
111
-
112
-
113
-
114
-
115
-
116
-
117
-
118
-
119
-
120
-
121
-
122
-
123
-
124
-
125
-
126
-
127
-
128
-
129
-
130
-
131
-
132
-
133
-
134
-
135
-
136
-
137
-
138
-
139
-
140
-
141
-
142
-
143
-
144
-
145
-
146
-
147
-
148
-
149
-
150
-
151
-
152
-
 153
153 -
 154
154 -
 155
155 -
 156
156 -
 157
157 -
 158
158 -
 159
159 -
 160
160 -
 161
161 -
 162
162 -
 163
163 -
164
-
165
-
166
-
167
-
168
-
169
-
170
-
171
-
172
-
173
-
174
-
175
-
176
-
177
-
178
-
179
-
180
-
181
-
182
-
183
-
184
-
185
-
186
-
187
-
188
-
189
-
190
-
191
-
192
-
193
-
194
-
195
-
196
-
197
-
198
-
199
-
200
-
201
-
202
-
203
-
204
-
205
-
206
-
207
-
208
-
209
-
210
-
211
-
212
-
213
-
214
-
215
-
216
 |
 |